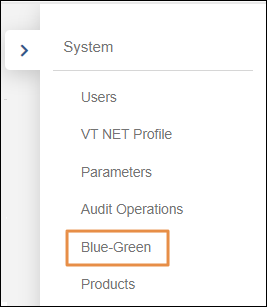
Blue-Green (System Menu)
This section is available on environments that have the Blue-Green feature enabled. From this page, you can create a Release Candidate to run a system experiment to test new updates in every product or application in the environment. This means that a system experiment tests and compares versions of the platform, and not single applications.
To create a release candidate for a system experiment, click System Menu > Blue-Green.
Important
To be able to create a system experiment, first you must request your implementation consultant to deploy the platform version you want to test to a green node.
Basic Info
Give your experiment a name and a description to identify it. Both fields are mandatory. Click Next to continue.
Individuals
In this step, you can specify which groups or individual users must go to the blue or green nodes during the test.
Important
If you don't add any groups or users to the lists in this step, you must assign a random distribution in the next step.
Add Individuals or Groups
Define the blue and green users of the experiment. Repeat the procedure for both types (blue and green). The types are identified by their corresponding color.

To add individual users, type the user ID (as it appears on the project's database), give a description (optional), select the product to which the user is associated, and click Add.
To add groups, click Add group and choose groups from those associated to the project. Read Groups Management to learn how to create groups.
As you add users, you can see a preview of the list at the top. The column Switches To shows to which node the individual or group will go during the experiment (blue or green).
You can also add new users or groups once the experiment is running.
Switching Criteria
In this step, you must define the transactions associated to the experiment and the characteristics users must have to enter the experiment.
Refer to the annotated image below to learn more.
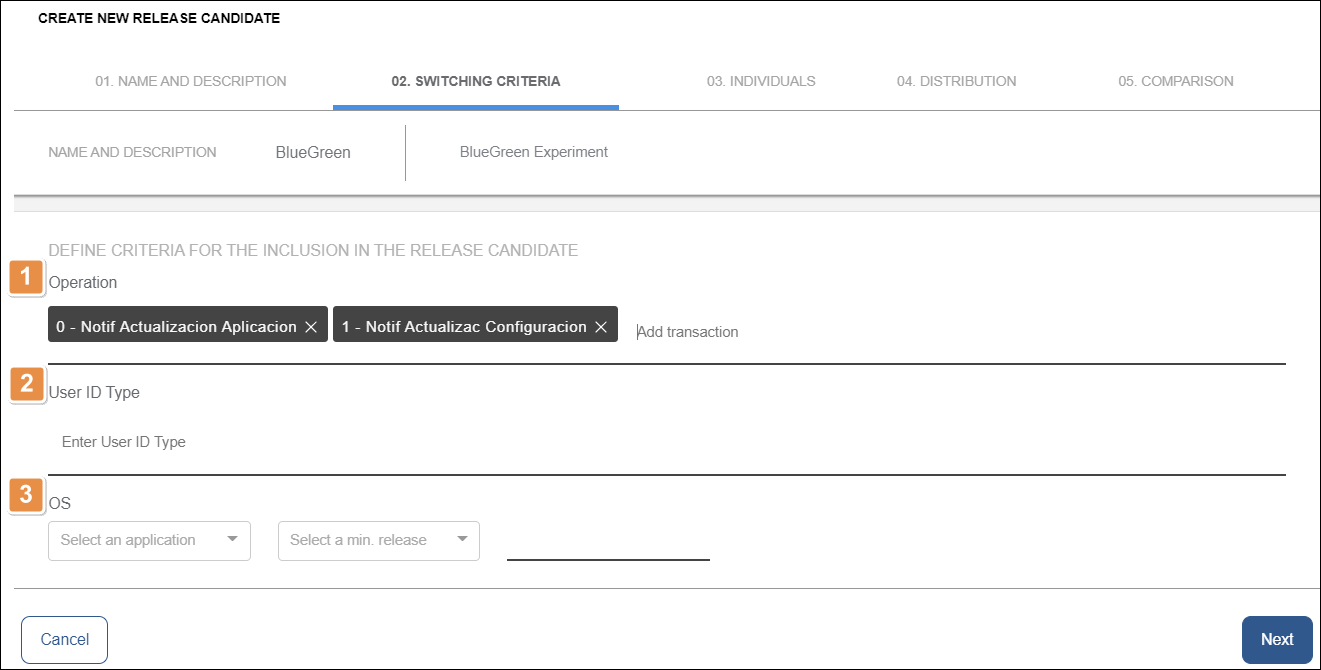
Operation: List of the transactions that will indicate the system to run the calculations needed to place the user in their respective group (blue or green). By default, the list shows the transactions previously defined for your app in Transactions Management.
If you need to add more transactions to the list, click add transaction.
Important
The recommended transactions are app initialization and user login. Associating other transactions may negatively impact user experience.
User ID Type. Enter the name assigned to a project or client when configuring the environment.
OS. Select the type of mobile Operating System and the minimum release of the binary.
Warning
All users that don't have the characteristics you selected in the User ID Type and OS fields will be excluded from the experiment.
Click Next to continue.
Distribution
In this step, you define the percentage of users that will be randomly assigned to the green node during the experiment.
If you specified users and groups in the previous step, adding a random distribution is optional. You can run the test with only the users you specified, or you can add random users to broaden your test.
If you didn't define any users or groups in the previous step, you must define a distribution rate greater than 0% in this step. Refer the image below for reference.
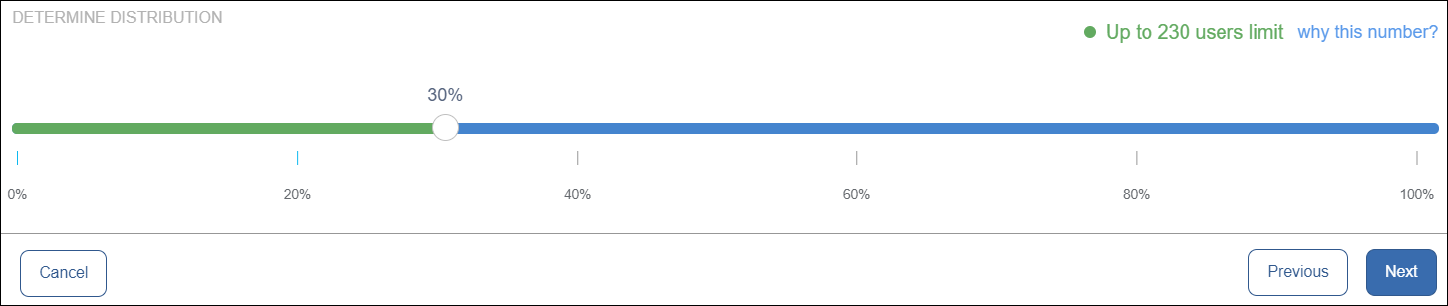
Drag the pointer to change the percentages assigned to each group. For example, if you drag the pointer to 30%, it means that 30% of the random users in the test will go to the green node, and the rest will go to the blue node.

The users limit represents the maximum number of users that can be part of your experiment. It does not represent the total number of active users you may have in the platform. It is the result of the following formula:
Number of active users in the platform in the last three months
Divided by the number of blue nodes of the platform
Click Next to continue.
Comparison
In the last step, you see the comparison of the system version in production with the system version in the green node of your experiment.
The table shows kernel versions and processes that are part of the platform.
Check that you are comparing different versions. Click Confirm & Create to start the experiment.