Create or Edit a Unit Test
To create or edit a unit test, go to Quality Assurance > Unit Tests. To create a unit test, click + New unit test. To edit a unit test, find it in the list and click Edit (pencil icon).
In both cases, the Unit Test Editor opens in a new tab containing the sections explained in the annotated image below.
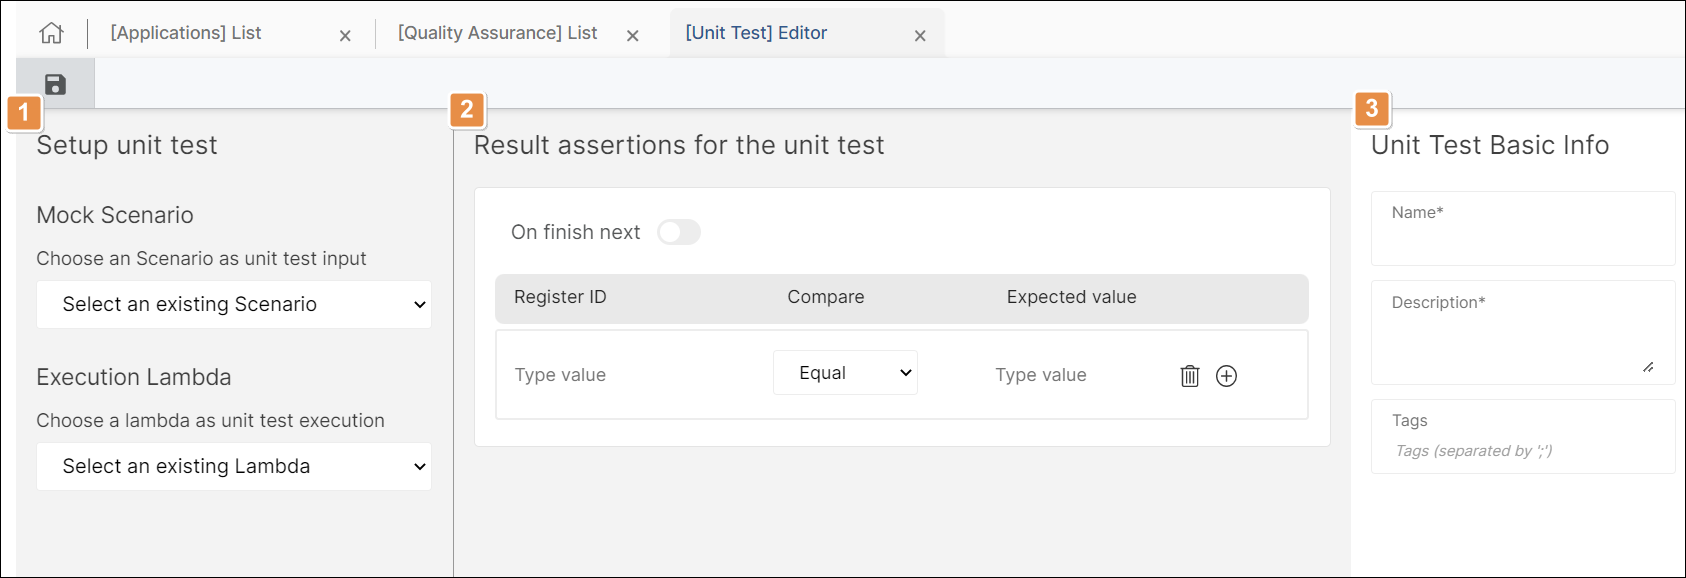
Setup unit test. Fill in the following fields:
Mock Scenario
Click the drop-down menu and select the scenario you want to use for this test. Only scenarios that were created for the app you are working with appear in the list.
Execution Lambda
Click the drop-down menu and select the Lambda process you want to test. Only processes that were created for the app you are working with appear in the list.
Result assertions for the unit test. Use this section to define the expected result of your Lambda process' execution. Read the Result Assertions for the Unit Test section below to learn how to fill out this section.
Basic information. Fill out this section with the unit test's name, description and tags.
Click the Save icon to save your unit test. Once the system confirms that your unit test was saved, you can close the editor.
Result Assertions for the Unit Test
In this section, you define the assertions that should evaluate to true when the test runs in order for the Lambda process to pass the test. Complete the available fields as explained below:
Register ID | Enter the register where the expected value is stored. |
Compare | Select Equal or Different from the drop-down menu to indicate whether the result should be equal or different to the value defined in the Expected value field. |
Expected value | If you selected Equal in the Compare field, enter the value you expect to obtain as a result of the process' execution. If you selected Different in the Compare field, enter the value you expect not to obtain as a result of the process' execution. |
Click Delete (trashcan icon) to delete the assertion. Click + to add a new assertion to the list.
Optionally, enable On finish next to define where the process should lead to once it runs all of its steps. Select Equal or Different from the drop-down menu and fill in Expected to go to with the screen, process or transaction that the process should lead to. For example, enter S106 to indicate the process should lead to screen 106 after its execution.