Profiles Main Actions
On the Profiles page, you can see and edit the configuration of existing or imported profiles, import or export profiles from your device or create new ones from scratch.
See and Edit a Profile
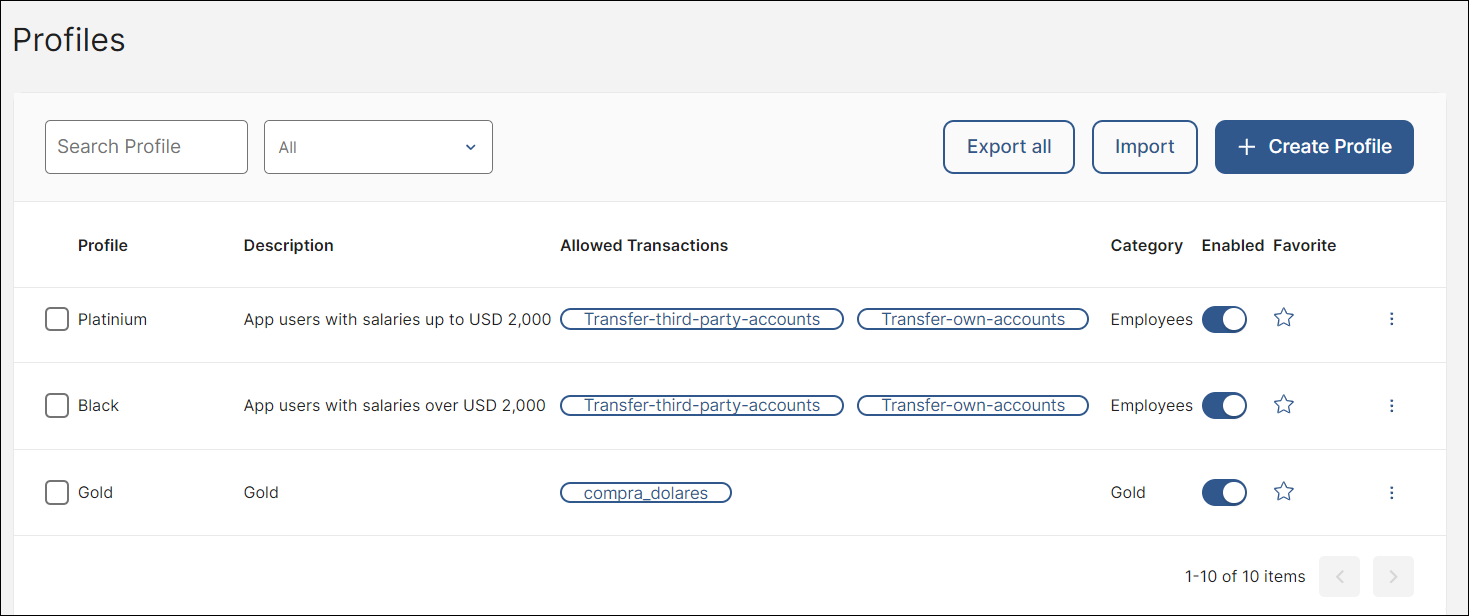
The Profiles page lists all the existing profiles in your environment. You can see their details and make changes to their configuration. The instructions below explain how to find a profile and edit its details.
Find a profile in the list using one of the following options. Use the available search bars and find the profile by its name or narrow down the list by clicking the arrow and selecting an option: click All to see all the profiles available, click Show only favorites to see only the profiles pinned as favorite, or Hide favorites so that profiles marked as favorite are hidden.
See the list of profiles according to the filters you chose and review the profile details explained in the table below.
Profile
Unique name given to a profile than can include letters, numbers, spaces, - and _.
Description
Text that describes the main characteristics of the profile and helps your team understand why it was created.
Allowed Transactions
Transactions allowed to app users associated to that profile.
Category
Attribute used to group profiles that have the same or similar characteristics.
Enabled
Feature that allows you to enable or disable the profile. When a profile is enabled (blue toggle), end users associated to that profile can perform the allowed transactions. When the profile is disabled (toggle grayed-out), BRM blocks all transactions attempted by the associated users so they can't execute them.
Click the toggle switch to enable the profile. If you want to disable the profile, click on the toggle switch again. When enabling or disabling a profile, the message “The profile has been updated successfully” appears on the top right side of the screen.
Favorite
Feature that allows you to set a profile as favorite. Profiles marked as favorite are pinned (blue star icon) and appear at the top of the list whenever you access the list of profiles again.
To unset a profile as favorite, click the blue star icon. The icon appears empty and the profile are organized by date of creation.
Favorite feature
Pinning profiles with the Favorite feature helps you keep track and makes it easier to find profiles modified and that you may need to export in the future.
To make changes to the profile configuration, click the vertical three-dot icon and then click Edit. Refer to Create or Edit a Profile to learn more.
Import or Export a Profile
If the profile you need to use has already been created by you or other user but is not available in the environment, you can import it. For example, if you previously exported profiles to the client's environment and tested the app, you can now import them back to your production environment. By using the import feature, you ensure the integrity of the configuration across all environments.
Read the instructions below to learn how to export a profile or set of profiles from your device.
Click Import.
Once the Import Profiles modal opens, click Select file and select the file in JSON format from the files browser.
Click Import.
A pop-up message informs you that the import was successful and the imported profile will appear listed in this page.
Important
You can only import profiles saved in JSON format.
You can also export profiles, either individually or in bulk. Read the instructions below to learn how to export a profile from your environment to your local device.
To export one or more profiles individually, click the checkbox located to the left of each profile. The Export button shows the number of profiles selected.
Click Export.
A modal opens, listing the names of profiles selected and asking you to confirm the export. Click Export to proceed and save the profiles in JSON format in your local device.
To export all profiles available in bulk, click Export All. A modal opens, asking you to confirm the export. Click Export to proceed and save the profiles in JSON format in your local device.
Create a Transaction
If, after reviewing the details of the profiles already created or imported, you determine that you need a new profile, you must create it. To create a transaction, click + Create Profile. Refer to Create or Edit a Profile to learn more.