Create or Edit a Scenario
To create a scenario, go to Quality Assurance > Scenarios and click + New Scenario. The Scenario Editor opens in a new tab containing the sections explained in the annotated image below.
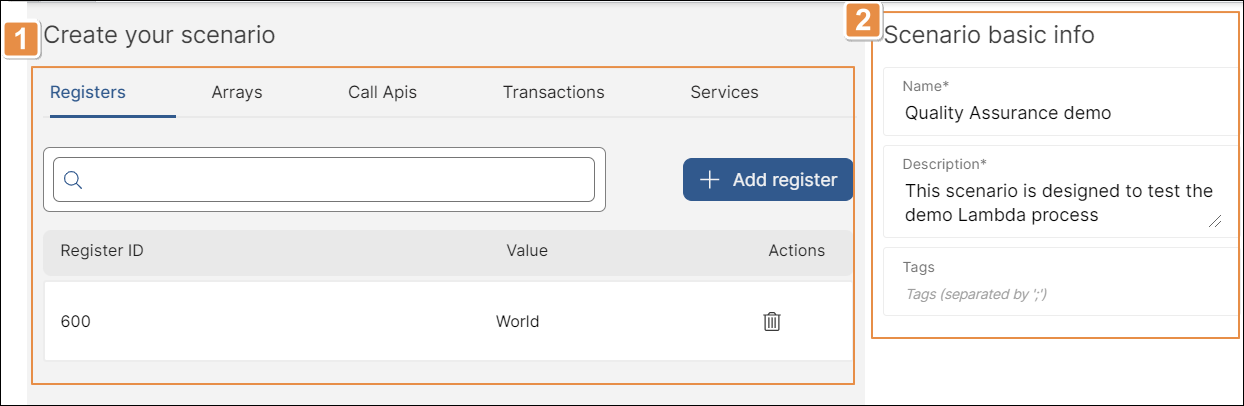
Data tabs. Navigate the Registers, Arrays, Call Apis and Transactions tabs to enter the input data needed to test your Lambda process. The Services tab is not yet functional.
Read the sections below to learn how to enter each type of data.
Basic information. Fill out this section with the scenario's name, description and tags.
Click Save to save your scenario. Once the system confirms that your scenario was saved, you can close the editor.
To edit a scenario, find it in the list and click the three-dot icon > Edit (pencil icon).
The registers tab is open by default. Refer to the image below to learn how to add register data to your scenario.
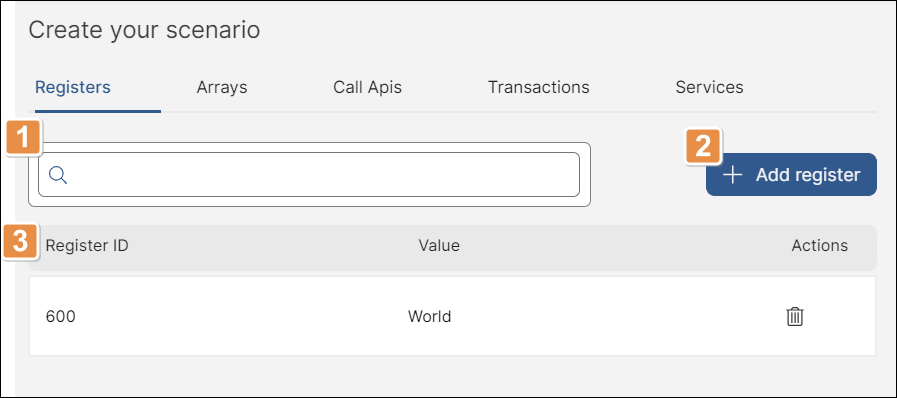
Search bar. Once there are registers added to the list, use the search bar to find registers by Register ID.
+ Add register. Click to add a new register to the list. You can add as many registers as needed.
List of registers, with a row for each register and the following columns:
Register ID
Enter the Register ID.
Value
Enter the value you want the register to hold for this scenario.
Actions
Click Delete (trashcan icon) to delete the register.
Click Arrays to open the Arrays tab. Refer to the annotated image below to learn how to add array data to your scenario.
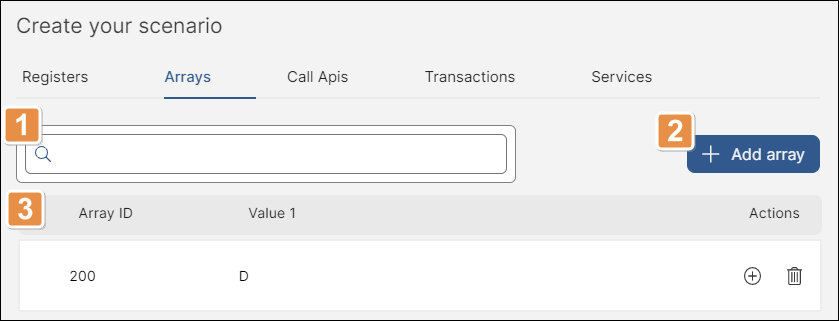
Search bar. Once there are arrays added to the list, use the search bar to find arrays by Array ID or values included in the array.
+ Add array. Click to add a new array to the list. You can add as many arrays as you need.
List of arrays. By default, each array has a single row where you can add multiple values. Read Multidimensional arrays below to learn how to work with arrays with multiple rows.
Array ID
Enter the array ID. This field is only present in the first row of each array.
Value 1
Enter the value you want the array to hold first. To add more values to the array, hover over Value 1 and click +. You can add as many value columns as you need.
To delete a value column, hover over that column's name and click Delete (trashcan icon).
Actions
Click + to add a new row to the array. Click Delete (trashcan icon) to delete the array.
Multidimensional Arrays
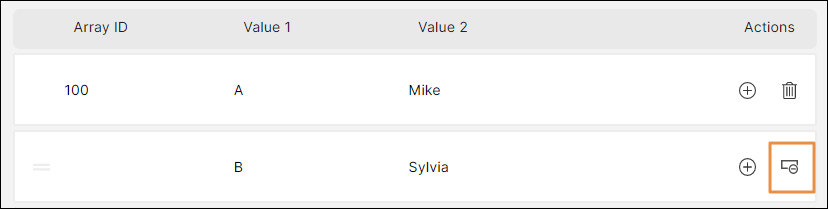
To add a new row to an array, click + in the Actions column. You can add as many rows as you need. To add a row in a specific position, click + in the Actions column of the row before the one you want to add. See an example in the image below.
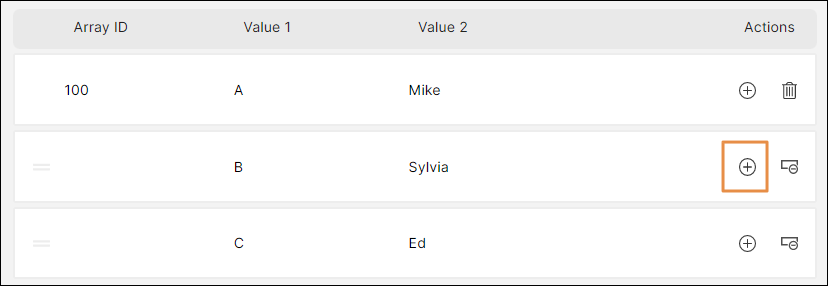
In this example, clicking + in the "B" row creates a new row between "B" and "C".
To rearrange rows, drag and drop them as shown in the animation below.
To delete a row, click Delete in the actions column of that row, as shown in the image below.
Warning
Deleting the first row in an array deletes the entire array.
Click Call Apis to open the Call Apis tab. Refer to the annotated image below to learn how to add Call API data to your scenario.
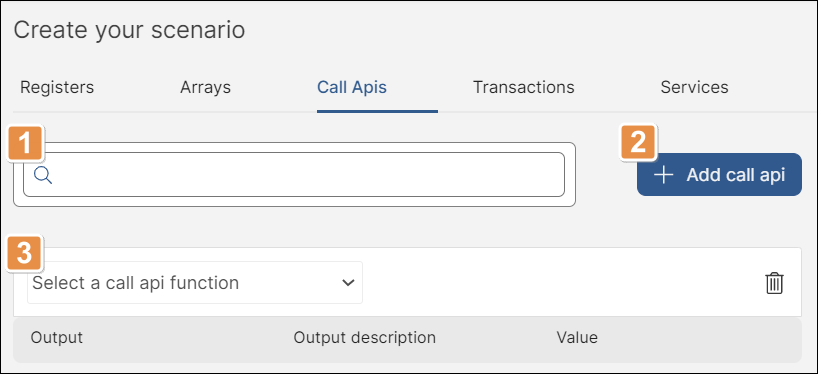
Search bar. Once you have added Call APIs to the list, use the search bar to find Call APIs by output register ID and value.
+ Add call api. Click to add a new Call API to the list. You can add as many as needed.
List of Call APIs. Select a Call API function from the drop-down menu. For each call API you select, the system generates a table with a row for each configured output and the following columns:
Output
ID of the register where the output value is stored. This is completed automatically by the system.
Output description
Description of the output. This is completed automatically by the system.
Value
Enter the value that the Call API should store in the output register.
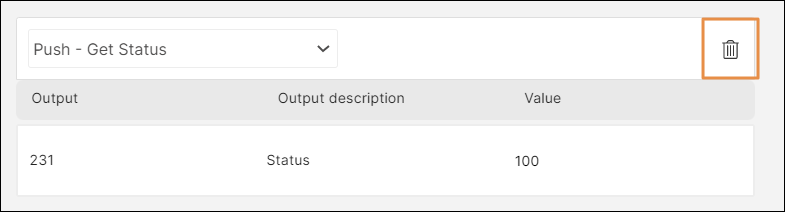
To delete a Call API, click Delete call api, as shown below.
Click Transactions to open the Transactions tab. Refer to the annotated image below to learn how to add transaction data to your scenario.
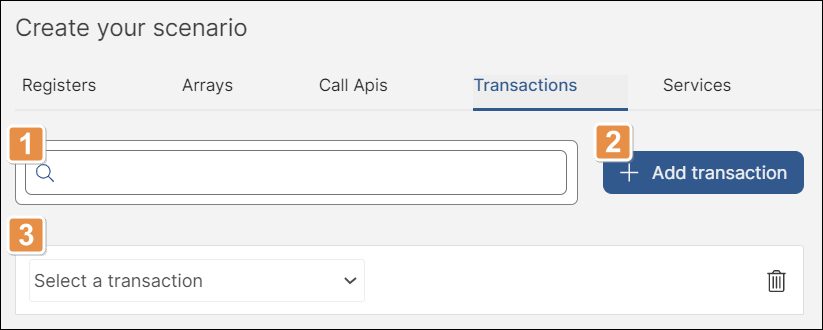
Search bar. Once you have added transactions to the list, use the search bar to find transactions by output register ID and value.
+ Add transaction. Click to add a new transaction to the list. You can add as many as needed.
List of transactions. Select a transaction from the drop-down menu.
Once you have selected a transaction, three options appear as radio buttons: Success result, Predefined error simulation, and Custom simulation of error. Read the sections below to learn how to configure data according to each option.
To delete a transaction, click Delete transaction, as shown below.
Success result
The Success result option is selected by default. Use this section to configure the output values you need to obtain from the transaction to test your Lambda process.
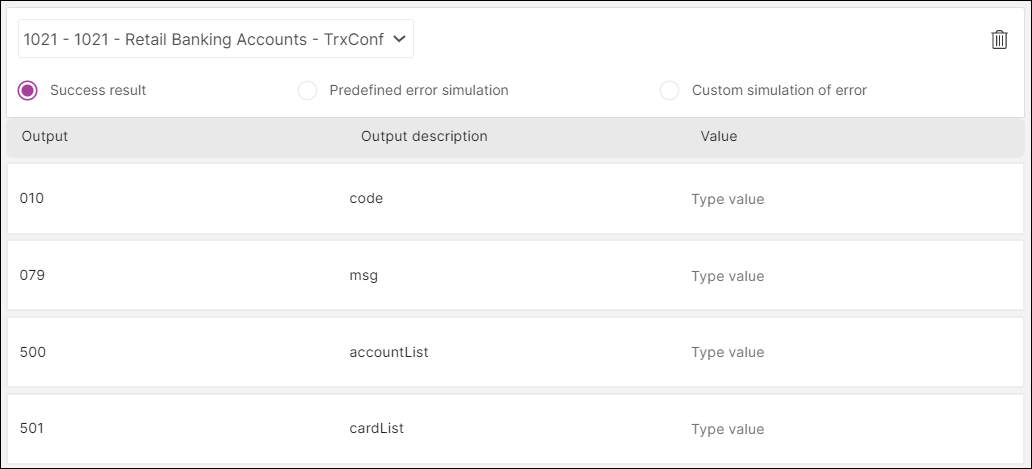
The section shows a table with a row for each output and the following columns:
Output | ID of the register where the output value is stored. This is completed automatically by the system. |
Output description | Description of the output. This is completed automatically by the system. |
Value | Enter the value that the transaction should store in the output register. |
Predefined error simulation
Select Predefined error simulation to open this section. To configure a predefined error for the simulation, click the drop-down menu and select a predefined error. The system automatically fills in the type of error and the error code.

Custom simulation of error

Select Custom simulation of error to open this section. To configure a custom error for the simulation, click the drop-down menu and select a type of error. finally, enter the error code.