Modules
The concept of modularity refers to building apps by creating smaller parts, called modules, to enable and facilitate collaborative building.
Modules are configuration units - either configured components or screens flows - that can be instanced through their interfaces in an app or another module, which is called the parent app or module. They have the same functionalities of an app but they cannot be published.
App builders define whether they can reuse or must build modules from the beginning of the project. Modules allow you to reuse configured components and save time during the building process or reuse screens flows to ensure the quality and correct functioning of the different parts of your app.
Modules can contain configured components or screens flows:
Configured components have a limited functionality and enable the creation of parts of a screen, like an input, a header or footer.
Screens flows have a more complete, extensive functionality and enable the creation of sets of screens.
Navigate the Modules page

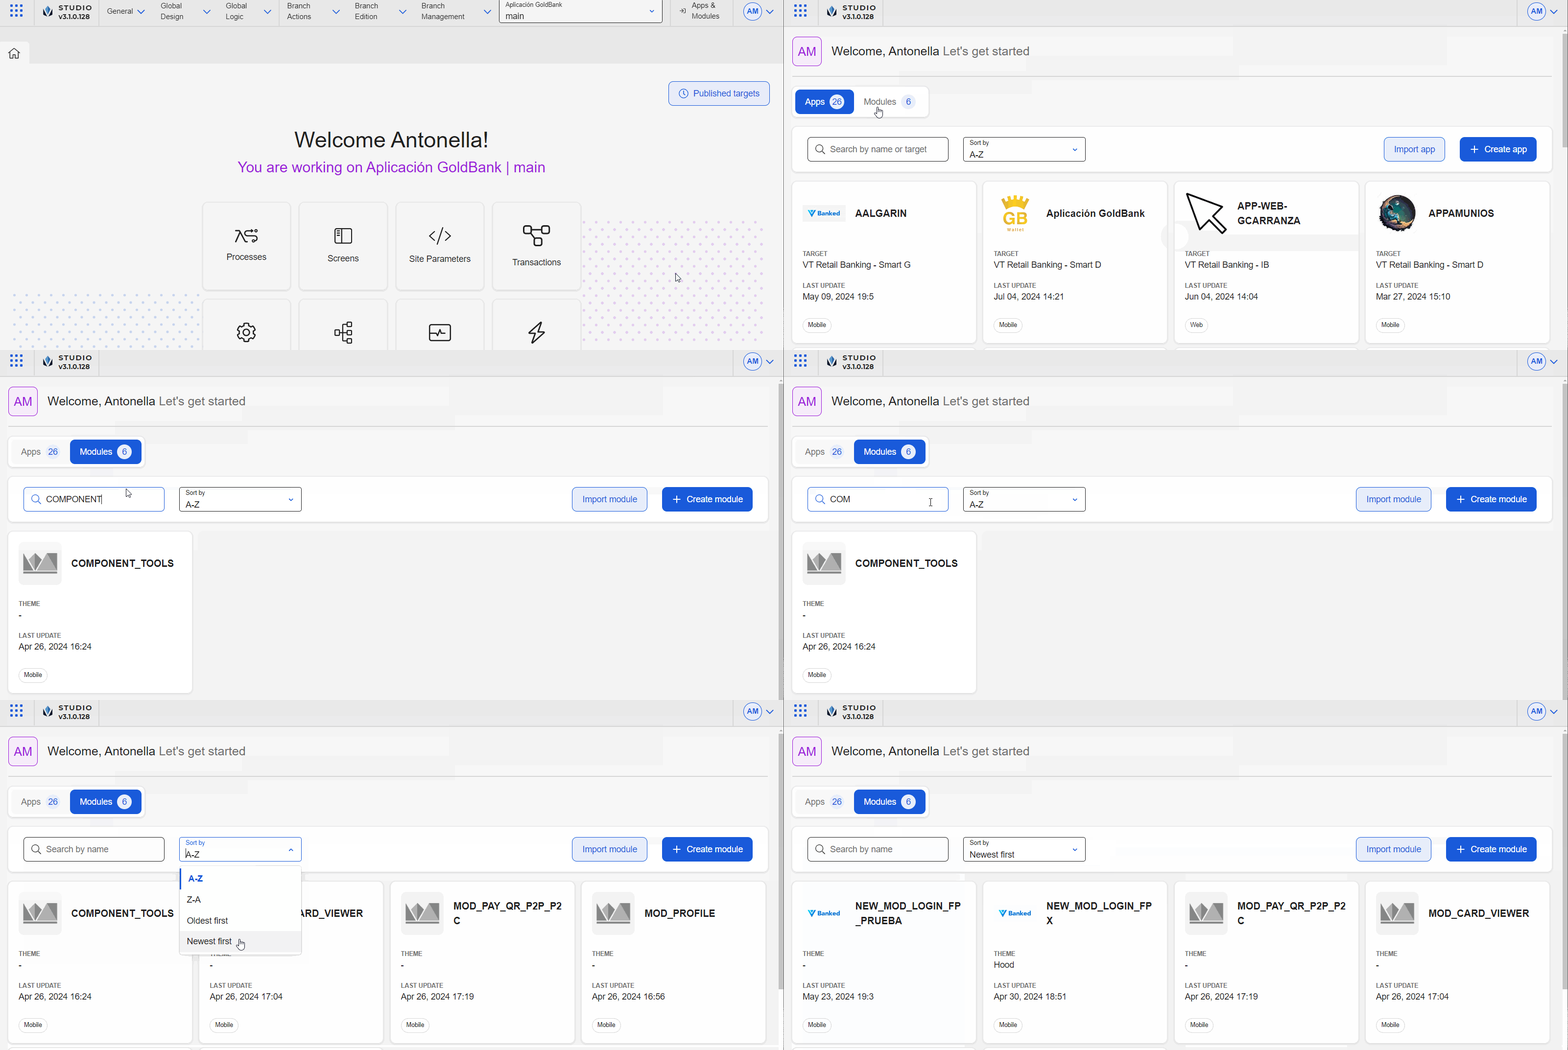
To access the Modules page, you have two options. If you are logging into Studio for the first time or your session was closed, Studio opens in the dashboard. Go to the Modules tab. If you are already in a specific branch, click Apps & Modules in the Overview. Then, click the Modules tab.
In both cases, the Modules page opens and shows a list of the modules (in card format) created by you or your team in the environment. From this page, you can create or use existing modules and import modules created in a different environment.
If you created and exported a module and you want to import it to your current environment, click Import module. The Import Application/Module page opens. Click Upload to open the files browser and open the module file in xml format. For example, you can import a module if you created it in a testing environment and now you want to use it in your development environment.
Note
The Modules page doesn't contain an Export button. To export a module, go to Branch Management > Export branch. From the zip file downloaded to your device, export the .xml file that you will then import to another environment.
To define whether to use a module previously created or create a new one, first review the content of the modules available to identify whether you can reuse the configured components or the screens flows within them.
Best Practice
When the project starts, app builders define if they need to create modules and reusable components and screens flows. However, they can build them in any instance of the building process. This means that all members of the team must be aware of the modules created, their purpose and the content the (either a configured components or screens flow) they include.
By default, modules are organized in descending alphabetical order (A-Z). To modify the modules organization , click the arrow and select an option. The options available are: A-Z, Z-A, Oldest first, Newest first.
In the module card, you can see the theme applied to the module, the last update time and date and the type, as configured upon creation.
Then, access the module interfaces by clicking the module card to see the components or screens flows they contain.
If the module contains branches, the branches list opens for you to select one. If the module only has the main branch, the list won't appear and will open it directly. In both cases, the module opens in the Overview page. To see its interfaces, click Interfaces or go to Branch Edition > Interfaces. Read Interfaces to learn how to access and navigate a module's interfaces.
If there are no modules created, or after reviewing the existing modules content you identify that they don't meet your requirements, click + Create module. Read Create a Module to learn more.