Create a Configurable Transaction
See below an example on how to build a login using configurable transactions. Keep in mind that, since transactions vary depending on the functionality you want to build and on the client's requirements, you might encounter different approaches on how to build a similar transaction.
Consider this scenario: You need to create a login transaction that decrypts a user's login information (that is encrypted in the device for security reasons), validates the information provided by the user against a data base, returns a status, but also saves every status that is not successful in the transaction log. For this transaction, you need to consume data provided by a third party and validate it with a REST service. You also need two Script actions. One for decrypting the user's information, and another one for saving the login status in the transaction log.
Prerequisites
For this example, it is contemplated the use of a REST service provided by a client or third-party. Make sure to have this information available before creating the transaction.
Depending on the case, the REST service might be created or you might need to create it from scratch. In this example, you will use a REST service already created in the environment. To learn how to create a REST service, read Create a REST Service for a Login Validation.
How to Create a Login Using Configurable Transactions
Go to Global Logic > Transactions.
Click + New transaction .
In the modal that opens, click Configurable.
In the Settings tab that opens by default, complete information about the transaction you are building.
In the Name field, add a name to the transaction that represents its functionality, with its transaction code in the beginning to track it. For this example, set 1058_Validate_Login.
In the Description field, add a short text that helps you identify the purpose of the transaction. For this example, set Validates a user login.
Important
Keep in mind that, in Middleware, the transaction will appear with its transaction code and its description, so make sure to be as brief and accurate as possible.
In the Code field, add a unique 4-digit transaction code that will identify the transaction in the transaction log and. For this example, enter the code 1058.
Important
Codes are unique per product, which means you can have two transactions with the same code but set for different products.
In the Product field, select the product you are working on. For this example, select P1.
Important
Products are configured in Middleware and vary depending on the client's business structure and needs. Contact your admin to confirm the product you should be working on.
In the Timeout field, enter the time in seconds that the platform will wait until it receives a response from the transaction. The default timeout is 30 seconds. For this example, leave the default value.
In the Processing Message field, add the message that the user will see on screen while the transaction is being processed. This message shows if you do not set a custom processing message in the Loading Process screen of your app. The default message is Processing....
In the Tags field, Add tags to help identify and group your transactions by their functionality. Since there is no autofill in this field, use simple tags you can remember easily the next time. For this example, add the tag Login.
Set the output parameters on the Start node to begin the transaction flow. You need to retrieve the username and password for each client from the registers where this information is stored. Click the node, and then click Outputs > Add Output. Complete the information as follows:
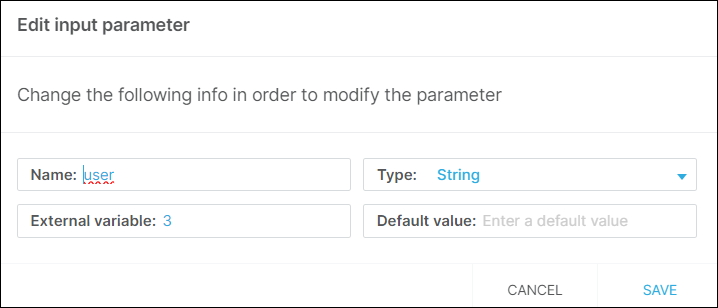
In the name field, enter the name of the value you want to obtain. For this example, enter user.
In the Type field, set the type of value you want to obtain. For this example, set String.
In External variable, add the register where the value is stored. For this example, set 3.
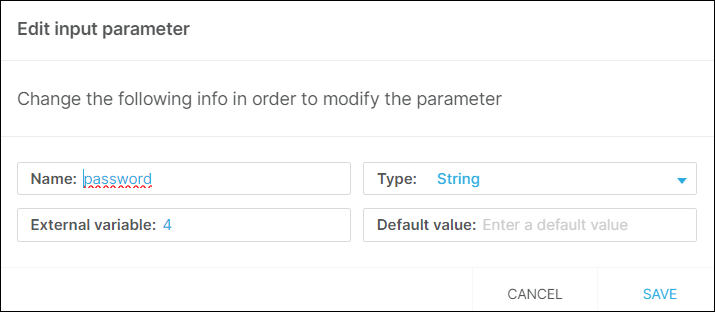
Repeat the same process for the password value, stored in register 4, as shown in the image above.
Note
Registers 3 (username) and 4 (password) are global for every project, and encrypt user's information for security reasons.
Then, you need to decrypt the user and password received. Drag the Script action node from the Actions tab in the left menu into the canvas, and follow the steps below:
In the Script Editor, paste the following script that will decrypt the information:
let trxInfo = VtNet.Host.getTransactionInfo();
let terminalId = trxInfo[0];
let seqNumber = trxInfo[1];
let decryptedclientId =  VtNet.Host.decryptSession(user)[0];
let decryptedclientKey = VtNet.Host.decryptTransaction(password, terminalId, seqNumber)[0];
if((decryptedclientId == respuesta.username) && (decryptedclientKey == respuesta.password))
Go to the right panel and complete the Configuration, Input and Output tabs.
In Configuration, modify the label so that it reflects the Script's functionality. For this example, set Decrypt.
In Inputs, you need to retrieve the username and password information from the Start node, so you need to consume the node's outputs set in step 3. Click Input Bulk Connection and select the Start node as source node. Click the inputs' checkboxes and then Import & connect.
In Outputs, you need to obtain the decrypted username and password, and transfer them to the next node in the flow. Click Add Output and add a decryptedclientId and a decryptedclientKey string-type output to receive the username and password, respectively.
Note
These parameters' names match the parameters you are receiving in the script. You can modify the name both in the Script and in this step.
Finally, connect the Start and Script nodes by dragging the Script node close to the Start. They will connect automatically. Additionally, you can connect them by dragging from one node to the other.
Finally, connect the Start and Script nodes by dragging the Script node close to the Start. They will connect automatically. Additionally, you can connect them by dragging from one node to the other.
In the left panel, click the Services tab and look for the REST service you are going to implement in this transaction. For this example, drag the REST service called Validate Login into the canvas, and connect it to the Script node. In this step, the REST service receives the decrypted user information from the previous Script node and validates it. Then, follow the steps below:
Note
The steps below are based on a REST service already created in the environment. If you need to create the service from scratch, go to Create a REST Service for a Login Validation.
Go to the right panel of the REST service and complete the Configuration, Input and Output tabs.
In Configuration, modify the label so that it reflects the service's functionality. For this example, set Srv Validate Login. Below the label, in the node, you see the service's name.
In the Inputs tab, import the outputs from the Script node to receive the encrypted username and password. Click the user and password drop-down lists (which are query keys set when creating the REST service) and select the decryptedclientId and decryptedclientKey parameters from the Script node created in step 4.
Outputs for the REST service are retrieved automatically from the service's information, so they vary depending on the service created. Outputs are consumed by the End node, which will be explained in step 7.
You can use another Script node to log errors in Middleware to track transactions responses in the transaction log. Drag a Script action node from the Actions tab in the left menu into the canvas, and follow the steps below:
Paste the following script, modifying the transaction ID and the message displayed on the transaction log:
if (status != 200) {
    VtNet.Host.log("DEBUG","TRX [ID]",'Status: '+status);
    VtNet.Host.setToken("91", "H99");
    VtNet.Host.setToken("79", "There was an error with the service");
    VtNet.Host.setResponseCode(true, "H99");
    return;
}
Go to the right panel and complete the Configuration, Inputs and Outputs tabs.
In Configuration, modify the label so that it reflects the Script's functionality. For this example, set Validate Status.
In Inputs, you need to retrieve the REST service's status. Click Inputs Bulk Connection, and select the REST node as source node. Click the status input's checkbox and then Import & connect.
This node does not require the configuration of outputs, since it saves the status on the transaction log and does not transfer data to the End node.
Connect the Script node to the REST and End nodes to continue the transaction's flow.
The End node needs to receive information, as explained in step 5. You want to receive the user's email, full name, its ID and a response from the REST service. Go to the right panel and complete the following:
In Inputs, click Inputs Bulk Connection and select the REST node as source node.
Click the mail, fullname, codrsp and iduser checkboxes, and then Import & connect.
Important
This data needs to be included in the REST service provided by the client or third-party, and is going to be automatically displayed as the REST service's outputs. Before making these connections, make sure this information is included in the service call.
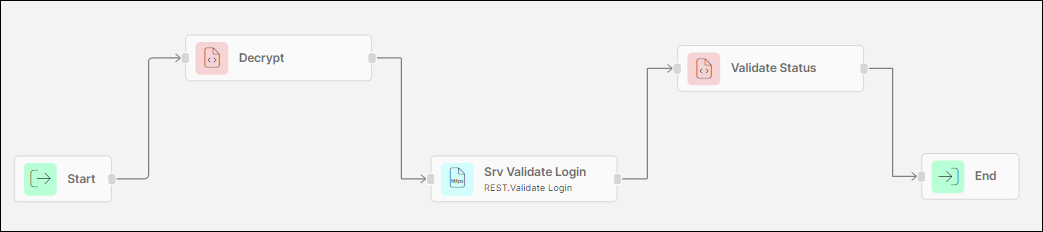
This is how your transaction looks like.
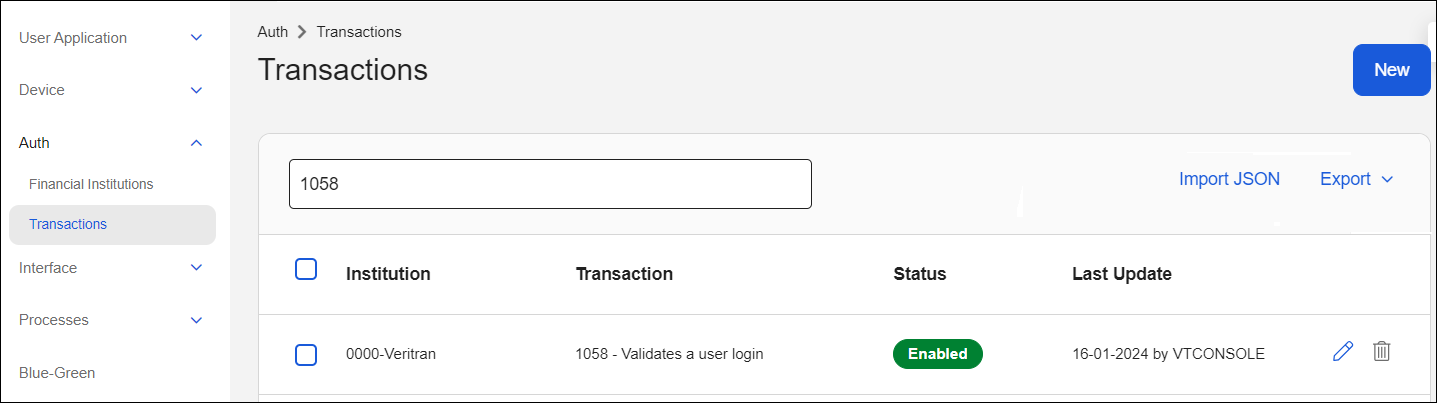
Click Save & continue to save your transaction, or click the down arrow and Save & close to save the transaction and go back to the Transactions page. Your transaction appears on the transactions list with the Pending publication status.
After creating or editing a transaction:
You can verify if there are any internal errors in its construction by checking the Errors tab in the left panel.
If there are no errors, you have to publish the transaction so that changes impact on Middleware and on your app. Read Publish and Run a Configurable Transaction.
You can run the published transaction to test its functionality. Read Publish and Run a Configurable Transaction.
You need to invoke the transaction from a process to integrate it in your app. Read Invoke a Transaction to learn more.
Note
If you edit a transaction that is already integrated in your app, you can skip this step.
Follow the instructions below to learn how to create a REST service and use it in step 5 explained in Create a Login with Configurable Transactions. In this example, you create a REST service with the information provided by GoldBank to validate users' information.
Go to the left panel. In the Services tab, click Add Service.
In the General Information tab that opens, complete the following information.
In the Name field, add a name to identify the REST service functionality. For this example, enter Validate Login.
Note
The service's name will appear on the node when dragged into the canvas.
In the Description field, add information that represents the functionality and explains its purpose. For this example, enter REST service that validates users login information.
In the Tag field, add tags to group services.
Click Next.
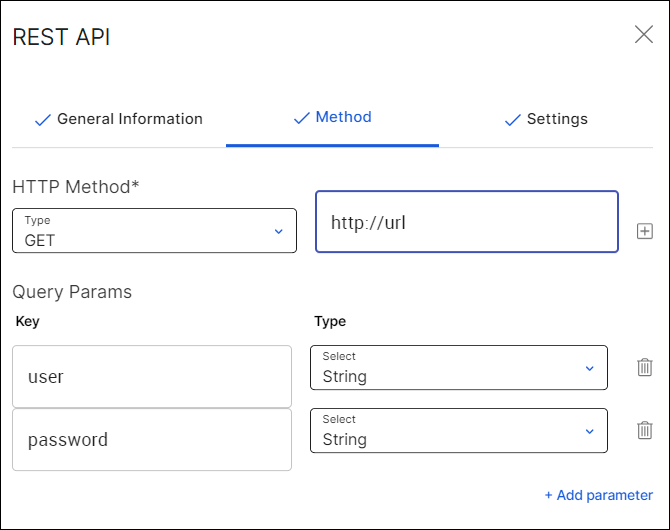
The Method tab opens. Complete the following information.
Go to the HTTP Method section. In the Type field, select an option from the drop-down menu. For this example, select GET.
Add the URL provided by the client. For this example, enter ejemplo
Go to the Query Params section to add the query parameters you are sending to the service. In the Key field, enter the keys user and password, which are both string parameters that will be added as your service's inputs when invoking it in a transaction.
Click Next.
The Method tab opens. Complete the following information.
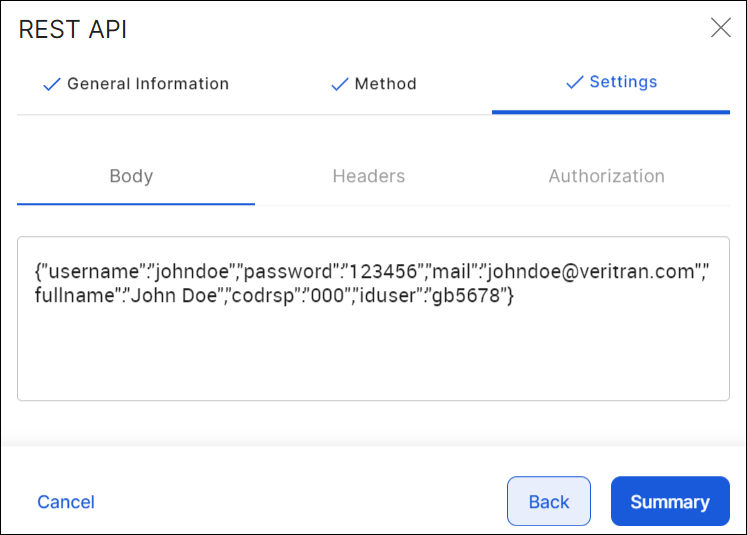
In the Body section that opens, complete the body to format the received data and divide it into different outputs. For this example, these are the outputs created:
{"username":"johndoe","password":"123456","mail":"johndoe@veritran.com","fullname":"John Doe","codrsp":"000","iduser":"gb5678"}For this example, the Headers section must be empty.
For this example, the Authorization field must be empty.
Click Summary to see your service's details.
Click Confirm if you do not need to modify any field.
Once created, the service is available on the Services tab in the transactions editor left panel, and in Global Logic > External Services.