Create and Edit Organizations or Users
To create or edit an organization or user, first click Organizations or Users in the panel to the left. Both organizations and users are created and edited in the same way. For this guide, we will work with users, but you can use the same instructions to create or edit organizations.
Warning
Organizations and users cannot be deleted. If you have doubts, contact your admin before proceeding with the registration.
Create a User
In the Users section, click New User to open the Create New User page.
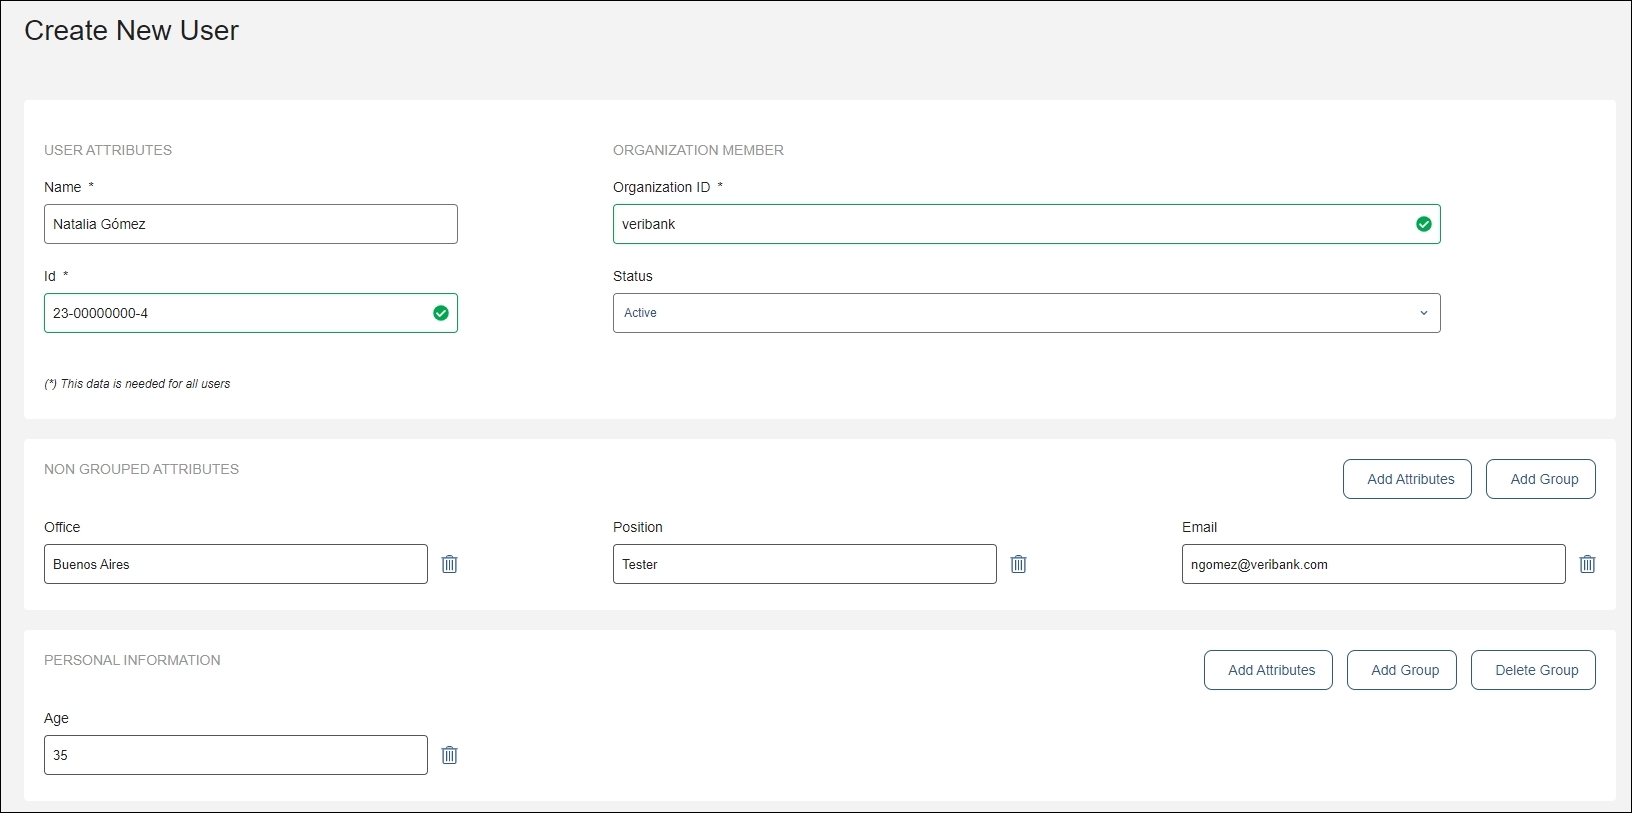
The attributes in the User Attributes section are all required.
Name | Name of the user. |
ID | Unique ID that can later be used to search for a user. As you enter an ID for the user, the console tells you whether or not the ID is available. |
Status | User status. The status labels available are: active, blocked, pending, canceled, risk and inactive. Assigning these labels to a user (or organization) serves for classification purposes only and does not apply any changes. |
Organization ID | IDM requires you to link the user to an organization previously registered in the console. This attribute is only for users and doesn't appear when you're creating an organization. |
Warning
The Name and ID of users and organizations cannot be edited once they have been created.
Attribute groups appear immediately after the Non-Grouped Attributes section, which include other attributes such as email and phone number.
To save and finish the new user's registration, click Save Changes.
Attributes and Attribute Groups
Follow these steps to add an attribute and a group, if necessary.
Click Add Attributes in the top right corner of the Non-Grouped Attributes section. The Add Attribute modal window appears.

Fill in the Attribute Set Name field and click Add. You can repeat this step to create as many attributes as you need.
Once you have created all the necessary attributes, click Save to confirm the action.
To delete an attribute, click the trashcan icon located next to it.
If you want to include an attribute within a specific attribute group, you must create the attribute group first. Follow these steps to add a new attribute group:
Click Add Group in the top right corner of the Non-Grouped Attributes section. The Add Attribute Group modal window appears.
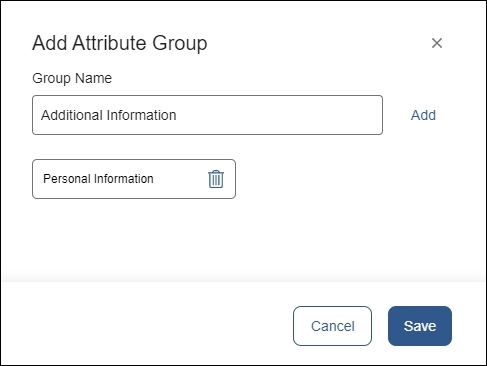
Fill in the Group Name field and click Add. You can repeat this step to create as many attribute groups as you need.
Once you have created all the necessary attribute groups, click Save to confirm the action.
To add attributes within this new group, click Add Attributes.
To create a subgroup, click Add Group in the top right corner of that group's section.
To delete an attribute group, click Delete Group in the top right corner of that group’s section. In the confirmation dialog that appears, click Delete now.
Important
Don't insert spaces before or after the attribute values.
Edit a User
In the Users section, follow these steps to edit a user:
Enter the user's ID in the search bar. The console shows the result that matches your search, with the information provided when creating that user (Name, ID, Organization, and Status) and the Edit action (see image below).
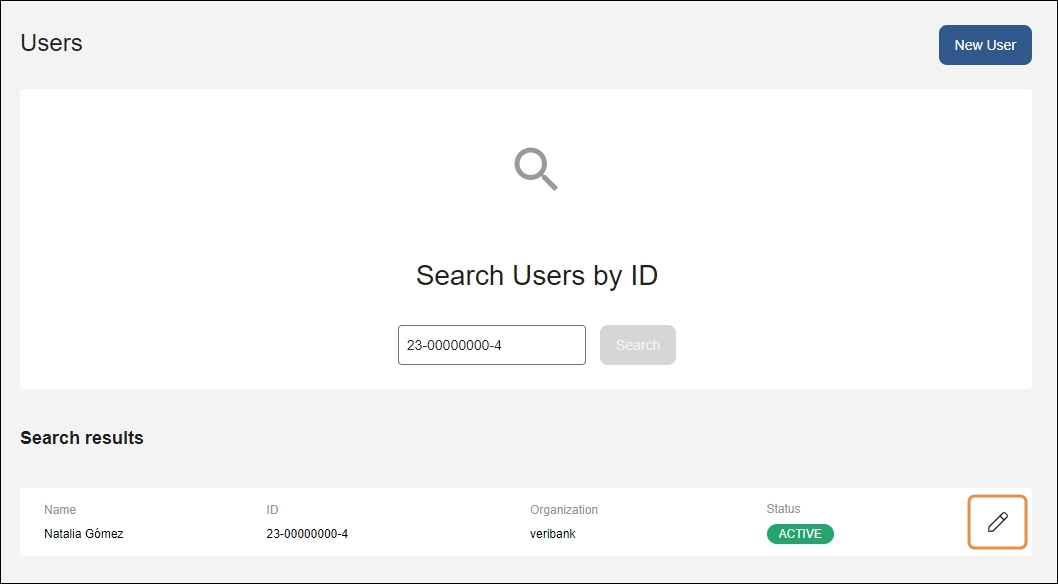
Click Edit to open the Edit User page. Edit attribute values in the same way that you did when creating the user. You may also edit or delete the attributes themselves or create new ones. The Name and ID attributes cannot be modified.
Important
Don't insert spaces before or after the attribute values.
Once you have edited the user's information or attributes as needed, click Save Changes.