Services
From the Services tab, you can invoke third-party SOAP or REST services or add Easy VT Services to your transaction flow. This tab shows services that have already been created and are available for consuming, and divides them in two categories: Easy VT Services and General services.
Easy VT Services
Easy VT Services are built-in action libraries that integrate with Veritran's services, such as AS or Notif. Easy VT Services help speed up the process of building a transaction that calls any of Veritran's internal services, since they are already configured with the service's URL and the operation they are going to execute.
Each Easy VT Service also comes with the default input and output parameters. You can see these parameters after dropping the Easy VT Service on the canvas, or you can contact your admin to learn about the Easy VT Services available.
Important
Currently, the Easy VT Services you can find in Studio connect with AS, Notif and EMS' GEO.
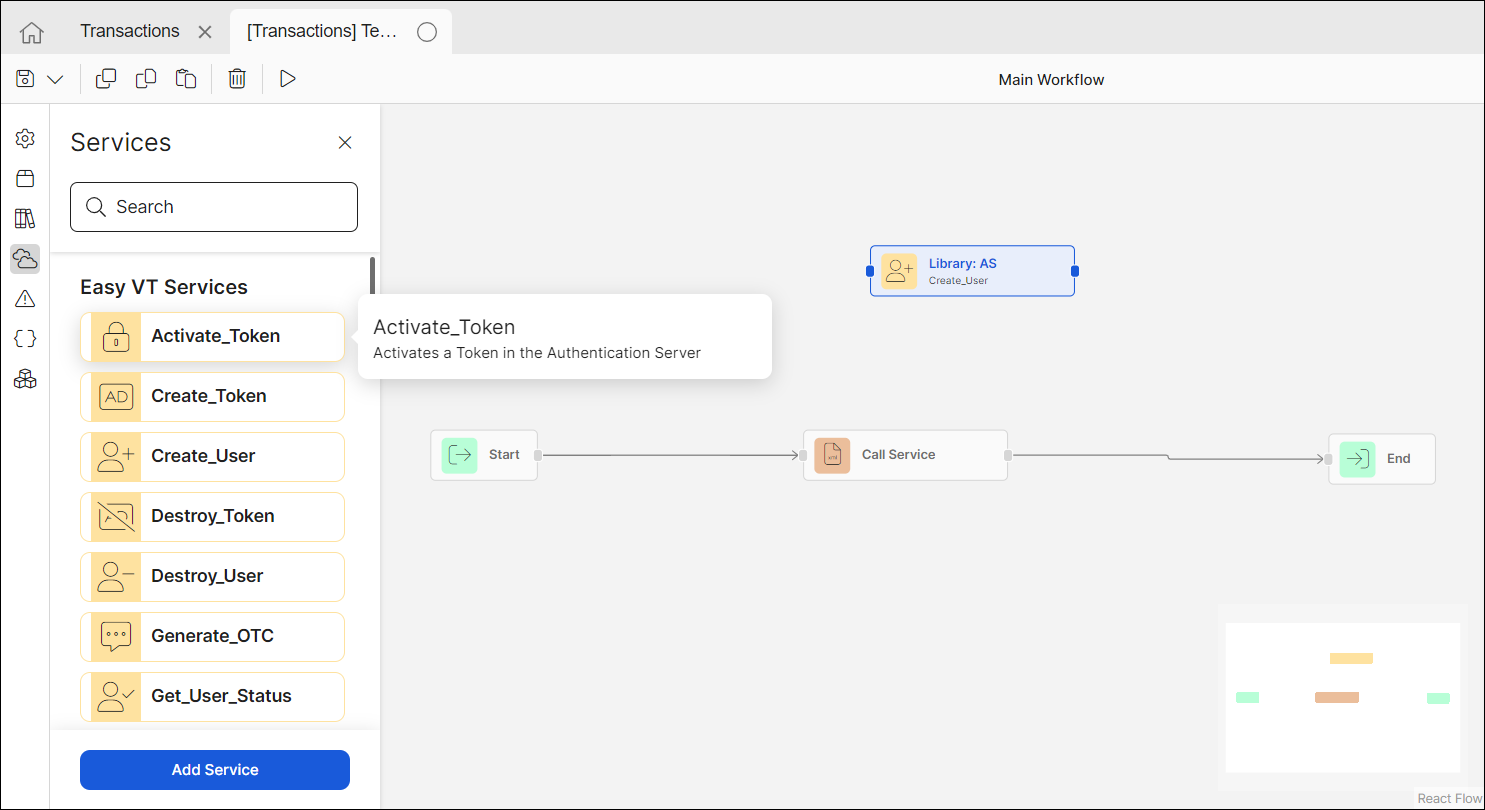
To see a list of the Easy VT Services available, open the transactions editor. On the left panel, click Services and scroll to the Easy VT Services category. Hover over the Easy VT service to see a short description of its functionality.
Read below to learn how to implement an Easy VT Service in your transaction.
The example below shows how to implement an Easy VT service that invokes AS and receives a user's status. This Easy VT Service's parameters are:
Input parameters: user, domain and url.
Output parameters: success, code, description, detail, userStatus, userStatusDescription, userPreviousStatus, userPreviousStatusDescription, tokenStatus, tokenStatusDescription.
Note
The steps below refer to the creation of this particular transaction, since each Easy VT service's parameters will differ.
Create a new transaction or open the transaction you want to edit with an Easy VT Service.
Drag the Get_User_Status Easy VT Service into the canvas and connect it to the Start and End nodes.
Click the Start node to configure the output parameters. Click Outputs > Create from input.
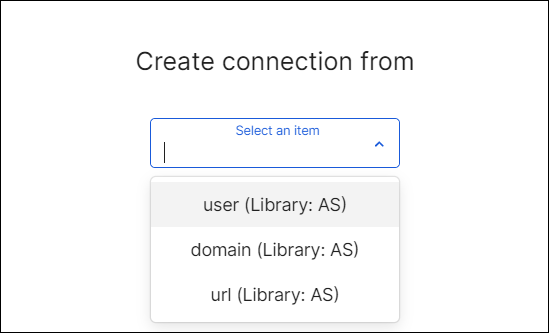
On the Create connection from modal, click the drop-down list and select the user parameter from the (Library:AS) node, which is the Easy VT Service.
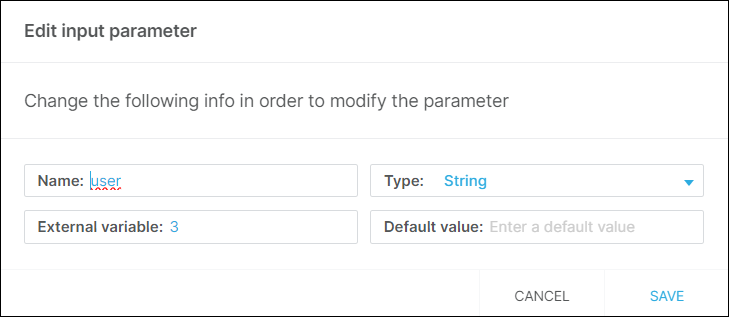
The Add input parameter modal window opens. Set the Type as String, and, on the External variable field, add the register that receives the username. Set register number 3, which is, by default for every project, the register in charge of receiving and storing the username parameter. Click Add.
Repeat the same process with the domain and url fields but set a different register for each one of them. The url will be configured in step X.
Note
Note that the domain is usually preconfigured in the app. Contact your admin to verify the register that is retrieving this information.
Go to the End node to configure the input parameters, that is, the user's information that the transaction is receiving. Go to the End node, click the Inputs tab and click Create from output.
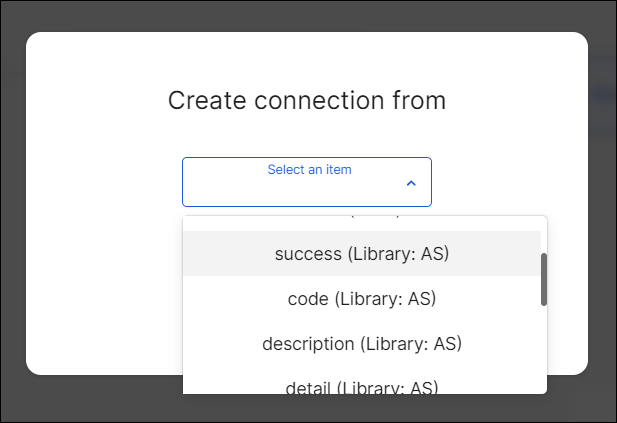
On the Create connection from modal, click the drop-down list and select the success parameter from the (Library:AS) node, which is the Easy VT Service.
The Add input parameter modal window opens. On the External variable field, add a register to store the response. For this value, set register number 2000. Click Add.
Repeat the same process with every parameter from the Action Library's node, making sure to add a different register for each parameter: (code, description, detail, userStatus, userStatusDescription, userPreviousStatus, userPreviousStatusDescription, tokenStatus, tokenStatusDescription).
Now, you have a transaction that receives a user's information and, by connecting to AS, retrieves the user's status.
General Services
The General section contains all the SOAP or REST services created in the environment.
To include a REST service in your transaction flow, look for the service you need to invoke and drag it into the canvas. REST services are displayed with a light-blue icon.
For SOAP services, hover over the service you want to implement to display a list of its methods. Drag the method you need into the canvas and connect it to the rest of the flow. SOAP services are displayed with a muted orange icon.
Configure the REST or SOAP service's inputs and outputs as with any action, and connect them with their surrounding nodes.
Note
Keep in mind that input and output parameters vary depending on the service implemented. You can verify this information by dropping the service into the canvas and inspecting its Inputs and Outputs tabs in the right panel, or by editing the service in Global Logic > External Services.
This tab also includes a shortcut to create an external service. To create a new external service that is not already created in the environment, click Add Service . To learn how to create an external service, read Create External Services. To read a login scenario using a REST service, go to Create a REST Service for a Login Validation.