Domains
Domains allow you to segment users according to their security profile and apply a set of rules for each segment, based on a default set (part of the default domain). For example, different domains can be used if the project involves a wallet with two products: personal banking and business banking. In that case, for the same app, two domains will be created, so different authentication rules are applied for profiles with the same ID: one with authentication rules for profiles in personal banking and one with authentication rules for profiles with business banking.
You can create a domain to define that the rules in the authentication process are applied to a specific segment of users. As a result, once the domain is associated to an app and is then activated, the authentication rules it contains are applied to that app.
By default, the AS has a domain installed (Domain 0), which contains preconfigured sets of rules. Changes to rules in Domain 0 affect all domains associated to it. This means that, if you make changes to a rule associated to Domain 0, those changes will also impact on the rule values of the domain that inherited the Domain 0's rules.
Tip
The default domain is identified in the domains list with a 0 at the beginning of its name. This domain cannot be modified.
On the Domains page (Configuration > Domains), you can see the list of created domains and edit them or create a new domain. You can edit the details of a domain or create a new one to then make changes to the rules in that domain.
Navigate the Domains page
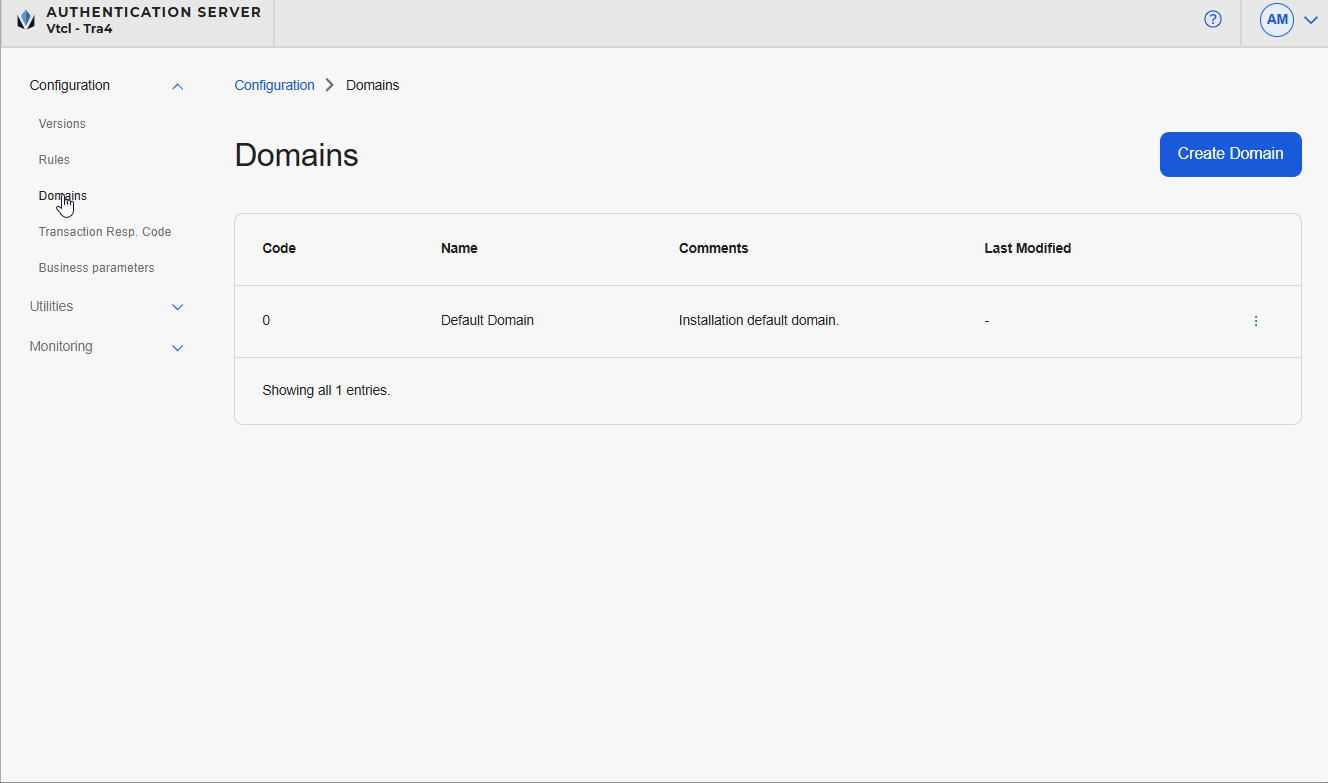
The Domains page shows all the domains created for the environment you are working on. In the list, each domain contains an alphanumeric code that identifies the domain and is associated to the app in Studio, a name that identifies it, comments and the date and time when the domain was created or last modified.
Create a Domain
Create a domain if you need to modify the values of its rules. As a result, if a user is associated to a specific domain, the AS console will search for the rule value configured for that domain. If no value is defined, the console will look for the value set in the default domain. Refer to the instructions below to learn how to create a domain.
Go to the Domains page (Configuration > Domains).
The Create Domain page opens, where you configure the settings of the new domain.
In the Code field, enter an alphanumeric code for the new domain (min. 1 character, max. 16 characters with no spaces or special characters). For this example, enter BB.
In the Name field, enter a name to identify the domain internally It may have spaces and special characters (min. 10 characters, max. 29 characters). For this example, enter Business Banking.
In the Comments field, enter any comments about the domain that you consider necessary. For example, explain why you are creating the domain or which rules it will group. The text may have spaces, line breaks and special characters (min. 10 characters, max. 200 characters). For this example, enter New domain for Business Banking segment..
Click Save.
A modal opens, informing you that the new domain includes the rules of the last active or inactive version under the default domain. Click Confirm to be redirected to the Domains page, where a pop-up message appears confirming that the new domain was successfully created.
Note
All the fields on this page are mandatory.
Edit a Domain
Edit a domain if you need to make changes to the name or comments, for example, if they are not descriptive enough to understand why the domain was created. Refer to the instructions below to learn how to edit a domain.
Go to the Domains page (Configuration > Domains).
Navigate through the list of domains in the Domains page to find the one you want to edit, click the vertical three-dot icon.
Click Edit.
The Edit Domain page opens, where you can only edit the Name and Comments fields.
Click Save.
A modal opens, informing you that you are editing an existing domain and that the system won't reboot after you save the changes. Click Confirm.
You are redirected to the domains page and a message pops up confirming that the domain was successfully updated.
Notice
The Code field cannot be edited.