Create a Lambda Process
See below an example on how to build a lambda process to validate the user and password entered in a login screen. Keep in mind that, since processes vary depending on the functionality you want to build and on the client's requirements, you might encounter different approaches on how to build a similar lambda process.
Consider this scenario: You need to build a lambda process to validate the user and password entered by the user when logging in. To do so, first, you need to invoke the transaction that decrypts and validates the information provided by the user. Then, you need to select the landing screen to be redirected once the information is validated and correct. Finally, you can set an error to define the message shown to the user in case the information provided is invalid and invoke a lambda process containing the logic with the behavior of the app after showing the error message.
Prerequisites
For this example, it is contemplated the use of:
a transaction that decrypts and validates the information provided by the user. To learn how to create the login validation transaction, refer to Create a Configurable Transaction;
a login screen from which the lambda process will be invoked;
a landing screen to be redirected once the information is validated;
and a lambda process containing the logic with the behavior of the app in case the information provided is invalid.
Note
Even though the last three items are not indispensable for the creation of the lambda process, it is suggested to have them ready beforehand to complete the configuration of the process.
How to create a lambda process to validate user and password in a login
Go to Branch Edition > Processes.
In the Lambda processes tab, click + New lambda process. The lambdas editor opens.
In the Process Basic Info tab that opens by default, complete information about the lambda process you are building.
In the Name field, add a name to the lambda process that represents its functionality. For this example, set USR_LOGIN.
In the Description field, add a short text that explains the aim of the logic created. If there is a transaction included in the process, add its code to the process description to easily track it. For this example, set Validates user and password in a login with trx 1058.
In the Tags field, add keywords for you and your team to easily group processes according to their functionality. For this example, set login.
Then, set the transaction that validates the information provided in the login as a variable. To do so, follow these steps:
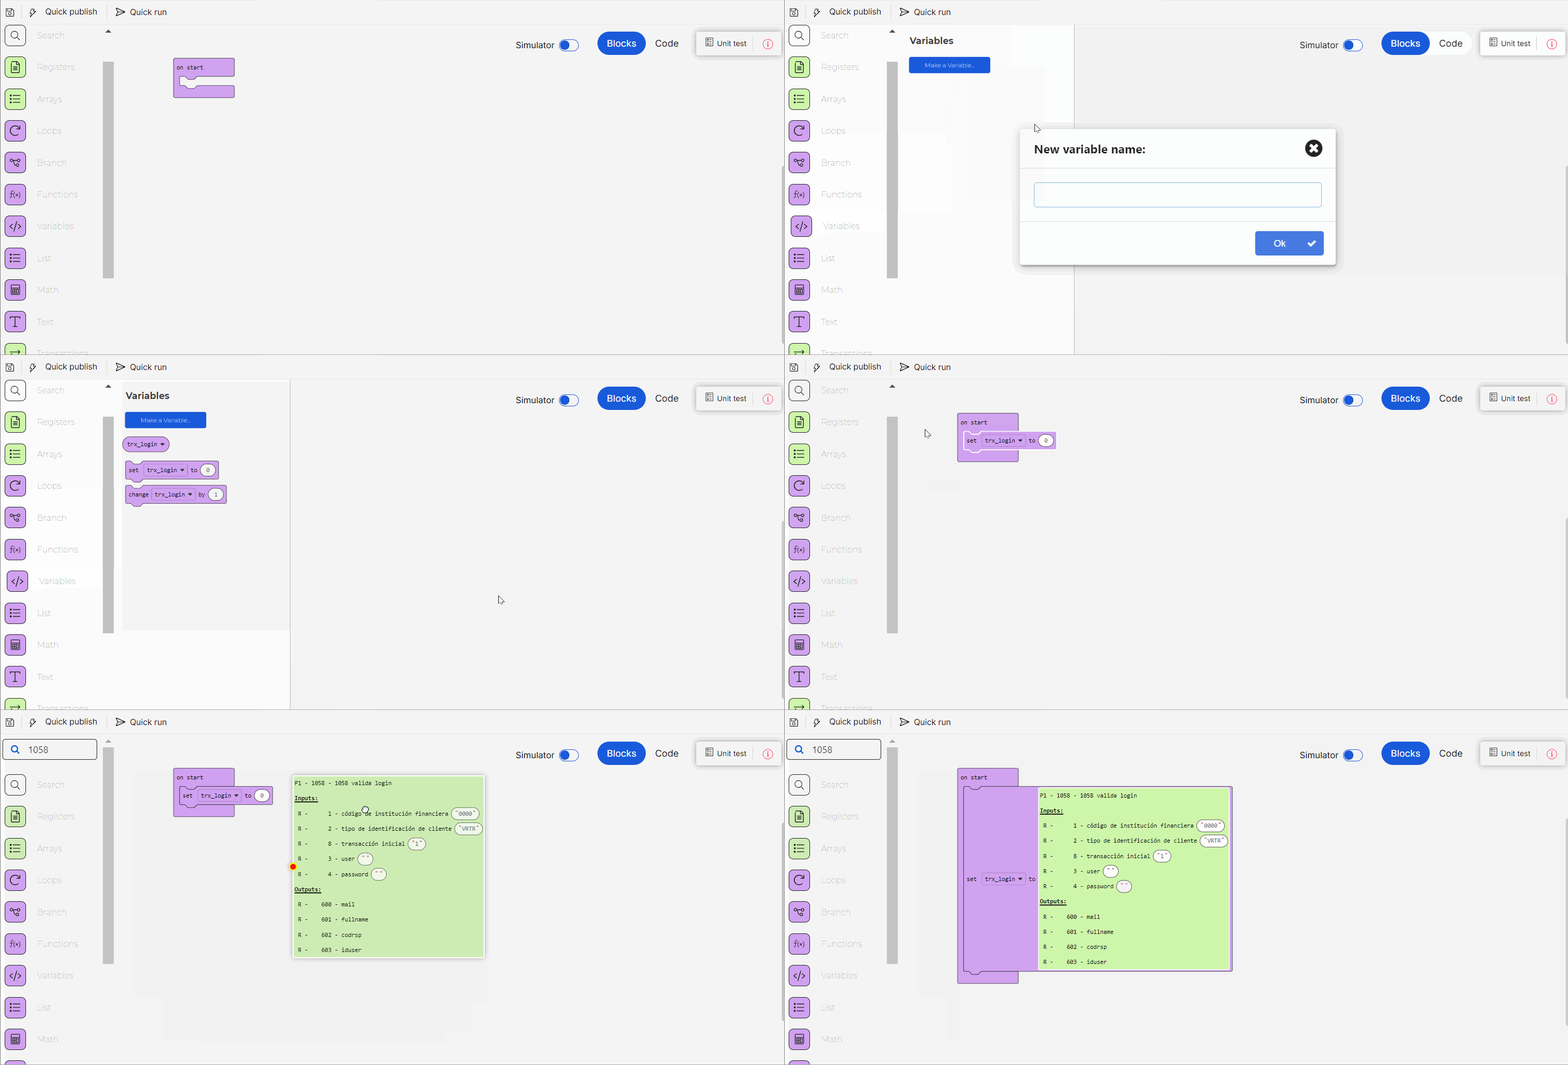
Find the Variables block category in the blocks menu on the left or use the search bar.
Click to open the category and click Make a Variable... to create a new one.
Set the variable name and click Ok to finish the creation process. For this example, set trx_login.
Then, find the set variable to block, drop it into the canvas and connect it to the on start block.
Select the trx_login variable from the variables dropdown.
Then, find the transaction created to validate the login using the search bar. For this example, search for the transaction code 1058. Drag the transaction block into the canvas and connect it to the set variable to block.
Best Practice
Setting the transaction as a variable is considered a good practice as it improves the readability of the lambda process and allows you to easily reuse the transaction within the lambda process as many times as you may need.
To execute the transaction that validates the information provided in the login, find the Transactions block category in the blocks menu on the left or use the search bar. Click to open the category and see the functions available. Drag the execute transaction block into the canvas and connect it to the on start block below the set variable to block.
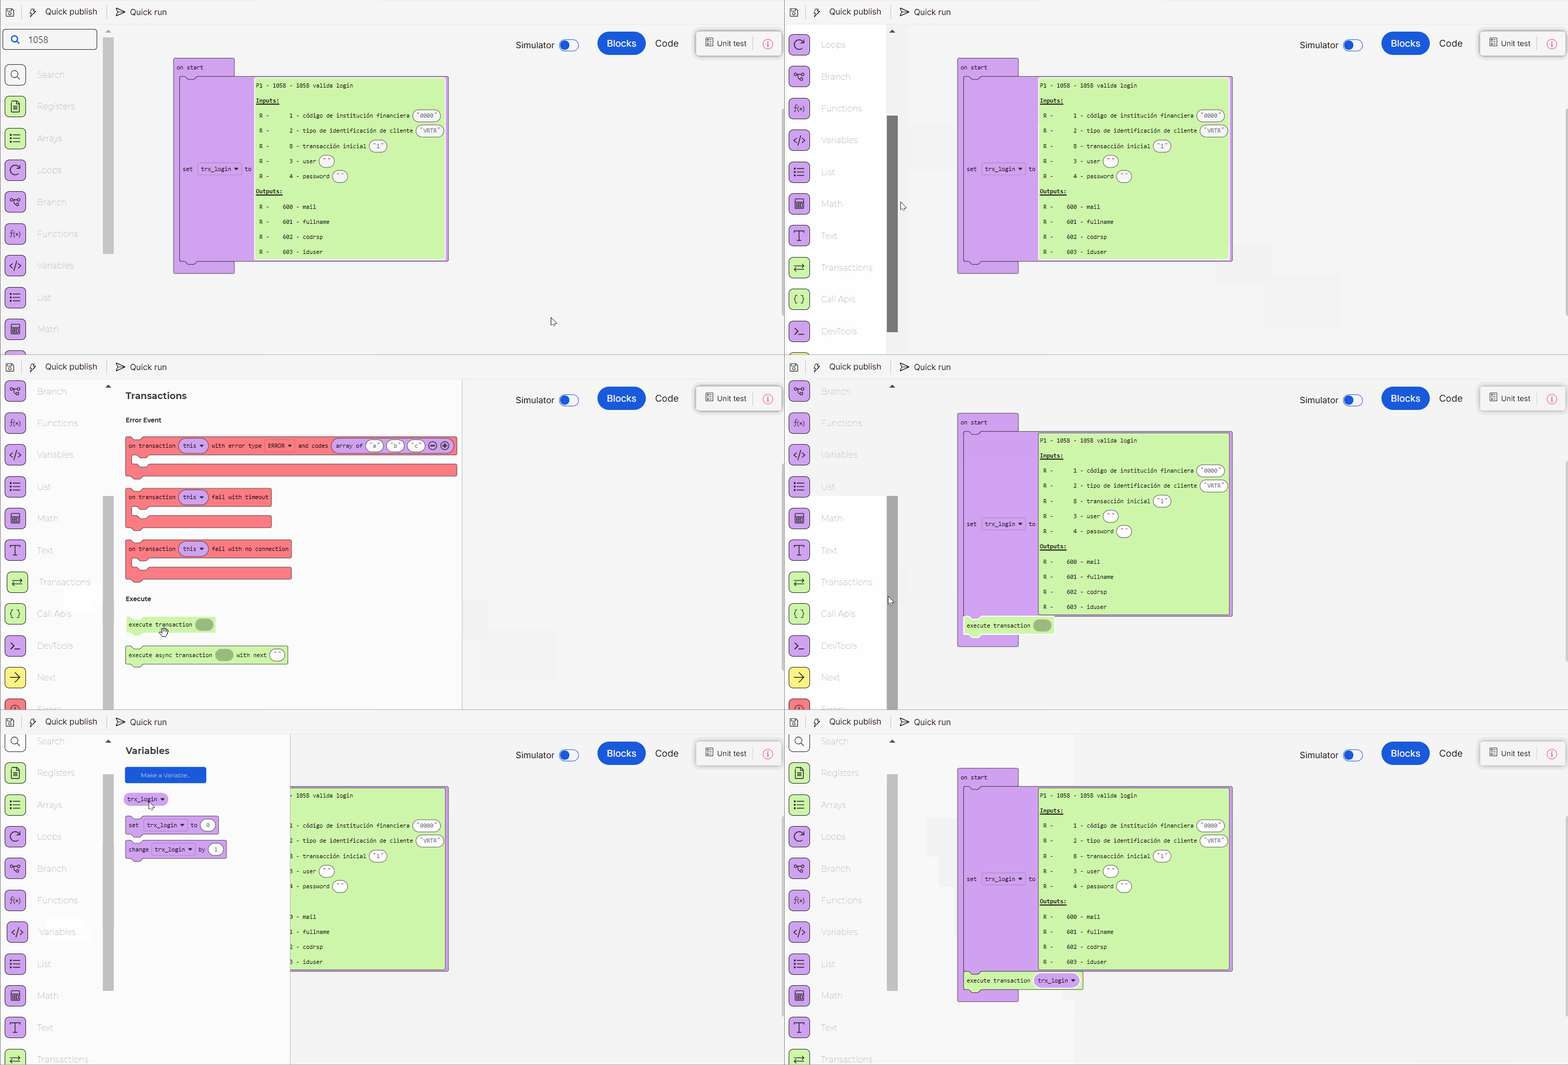
Then, find the trx_login variable in the Variables block category and drag it into the execute transaction block.
To select the screen that will open once the information is validated, find the Next block category in the blocks menu on the left or use the search bar. Click to open the category and see the functions available. Drag the request next render sequence block into the canvas and connect it to the on start block below the execute transaction block.
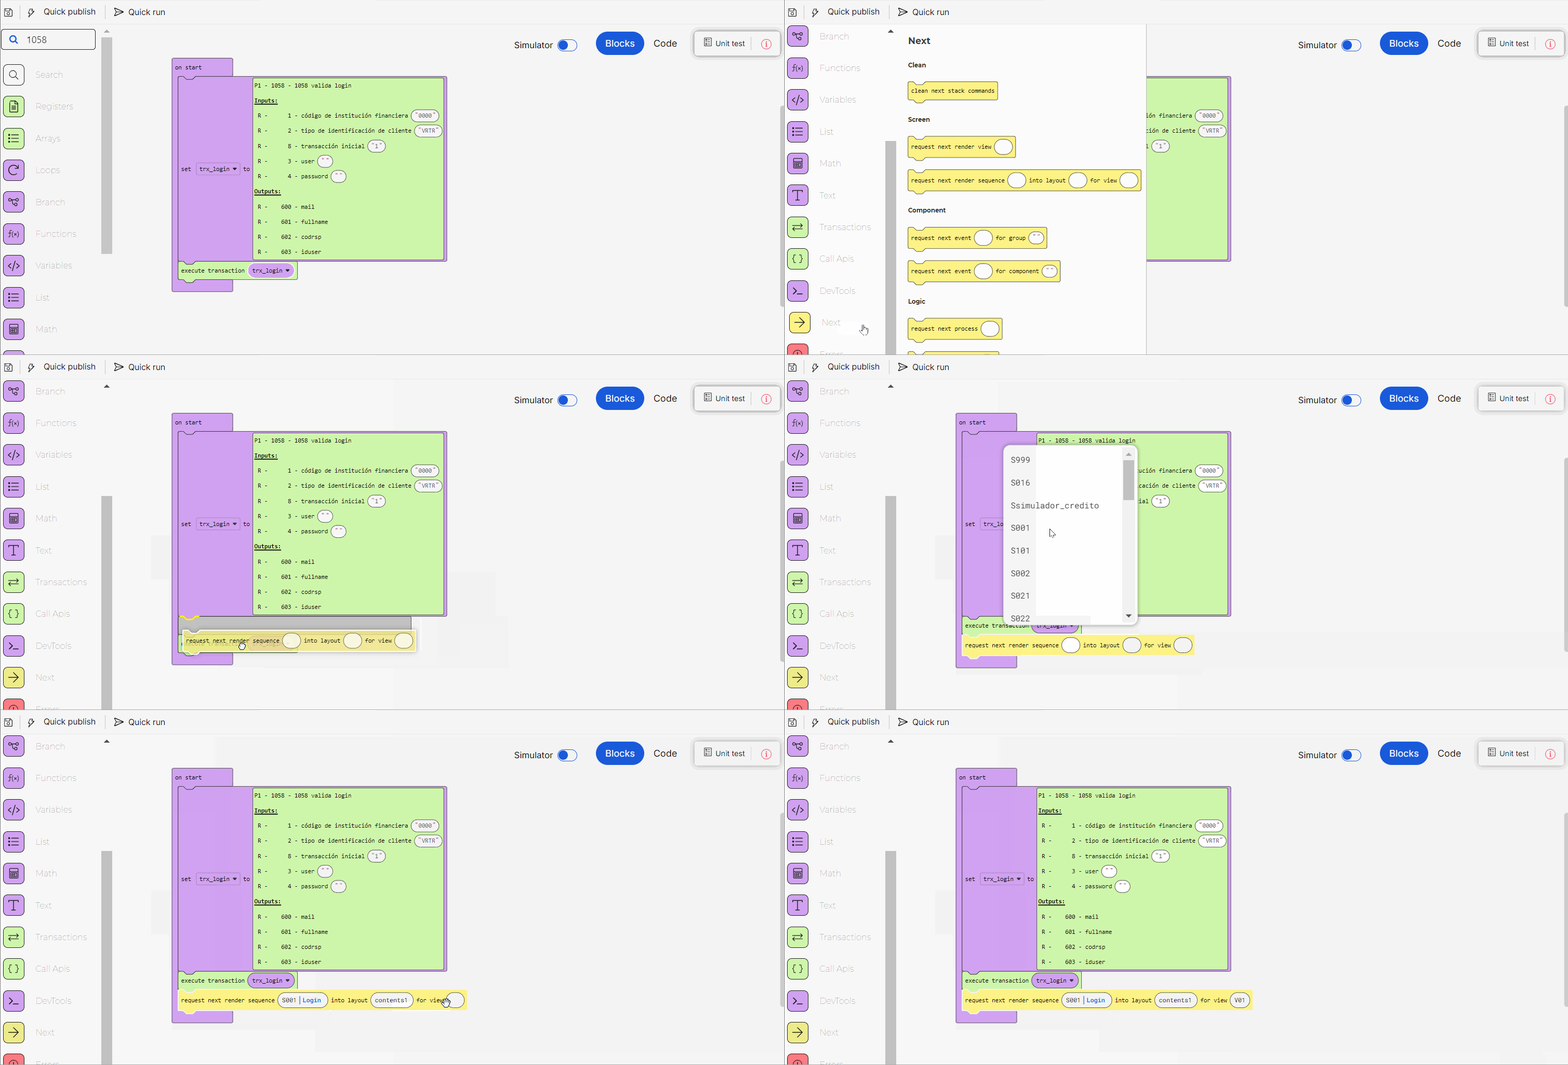
Select the sequence, layout and view of the landing screen you want to open once the information is validated. For this example, select S001, contents1 and V01 respectively.
To set the error that defines the app response in case of an error in the information provided, find the Errors block category in the blocks menu on the left or use the search bar. Click to open the category and see the functions available. Drag the on error with type block into the canvas, next to the on start block.
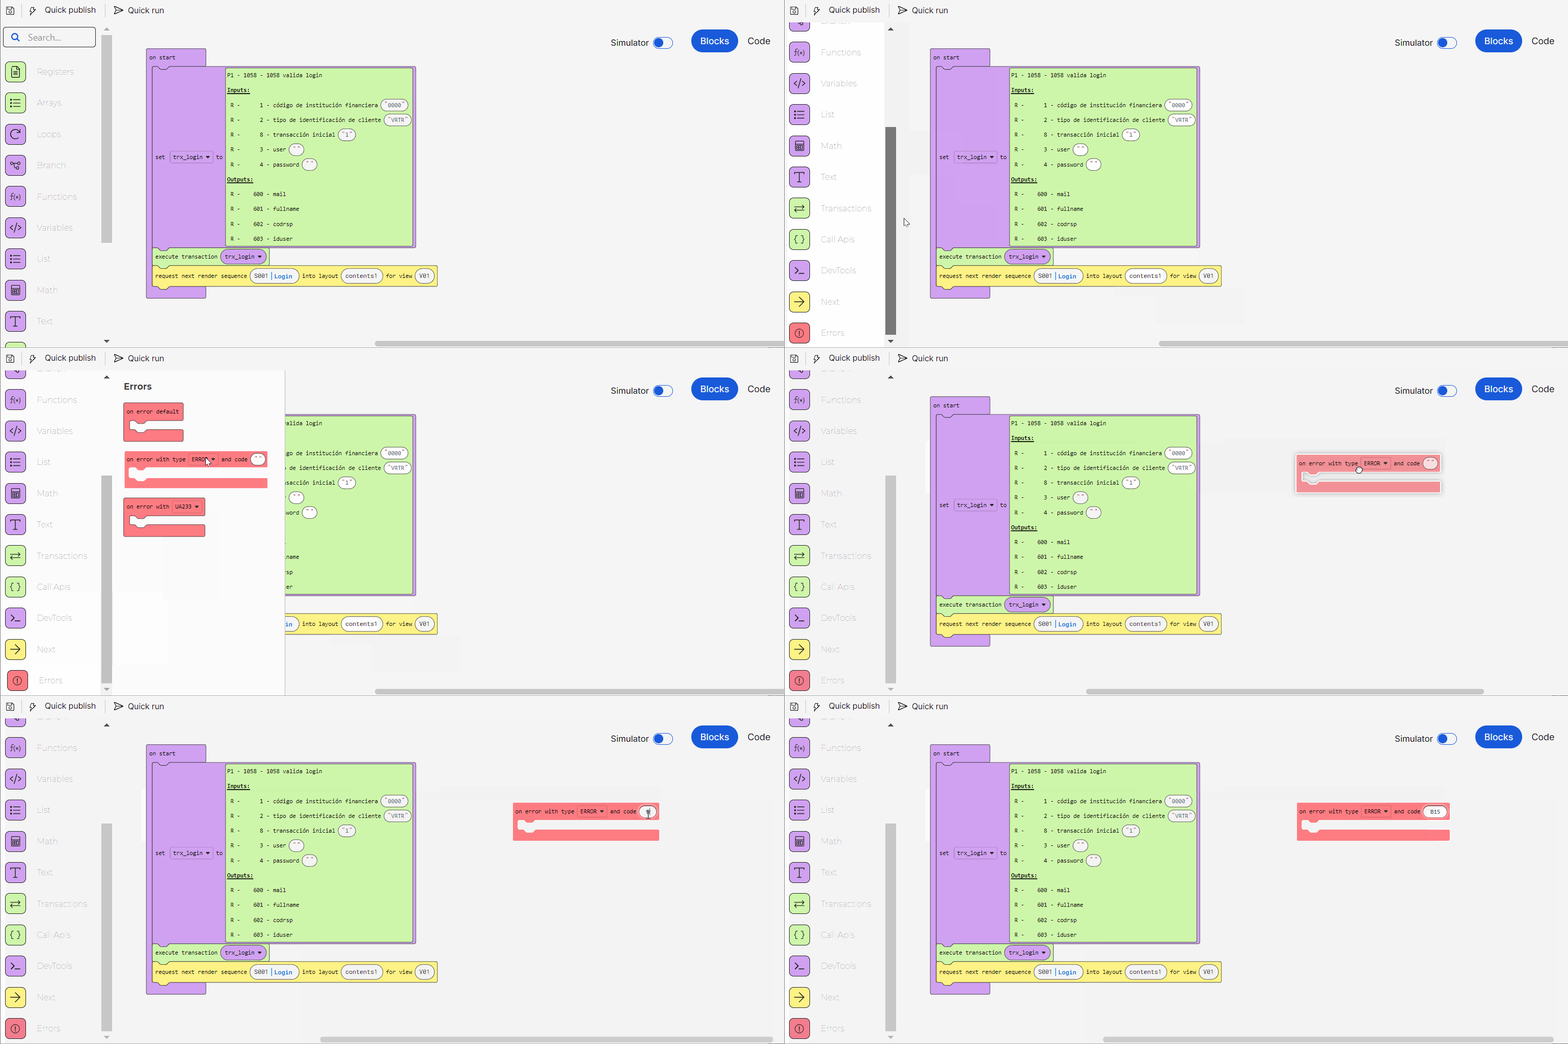
Select error as error type and complete the error code defined for this type of errors in your app. For this example, set B15.
To add the error message to be displayed to the user, you need to save the message in a register. Find the Registers block category in the blocks menu on the left or use the search bar. Click to open the category and see the functions available. Drag the save register with value block into the canvas and connect it to the on error with type block.
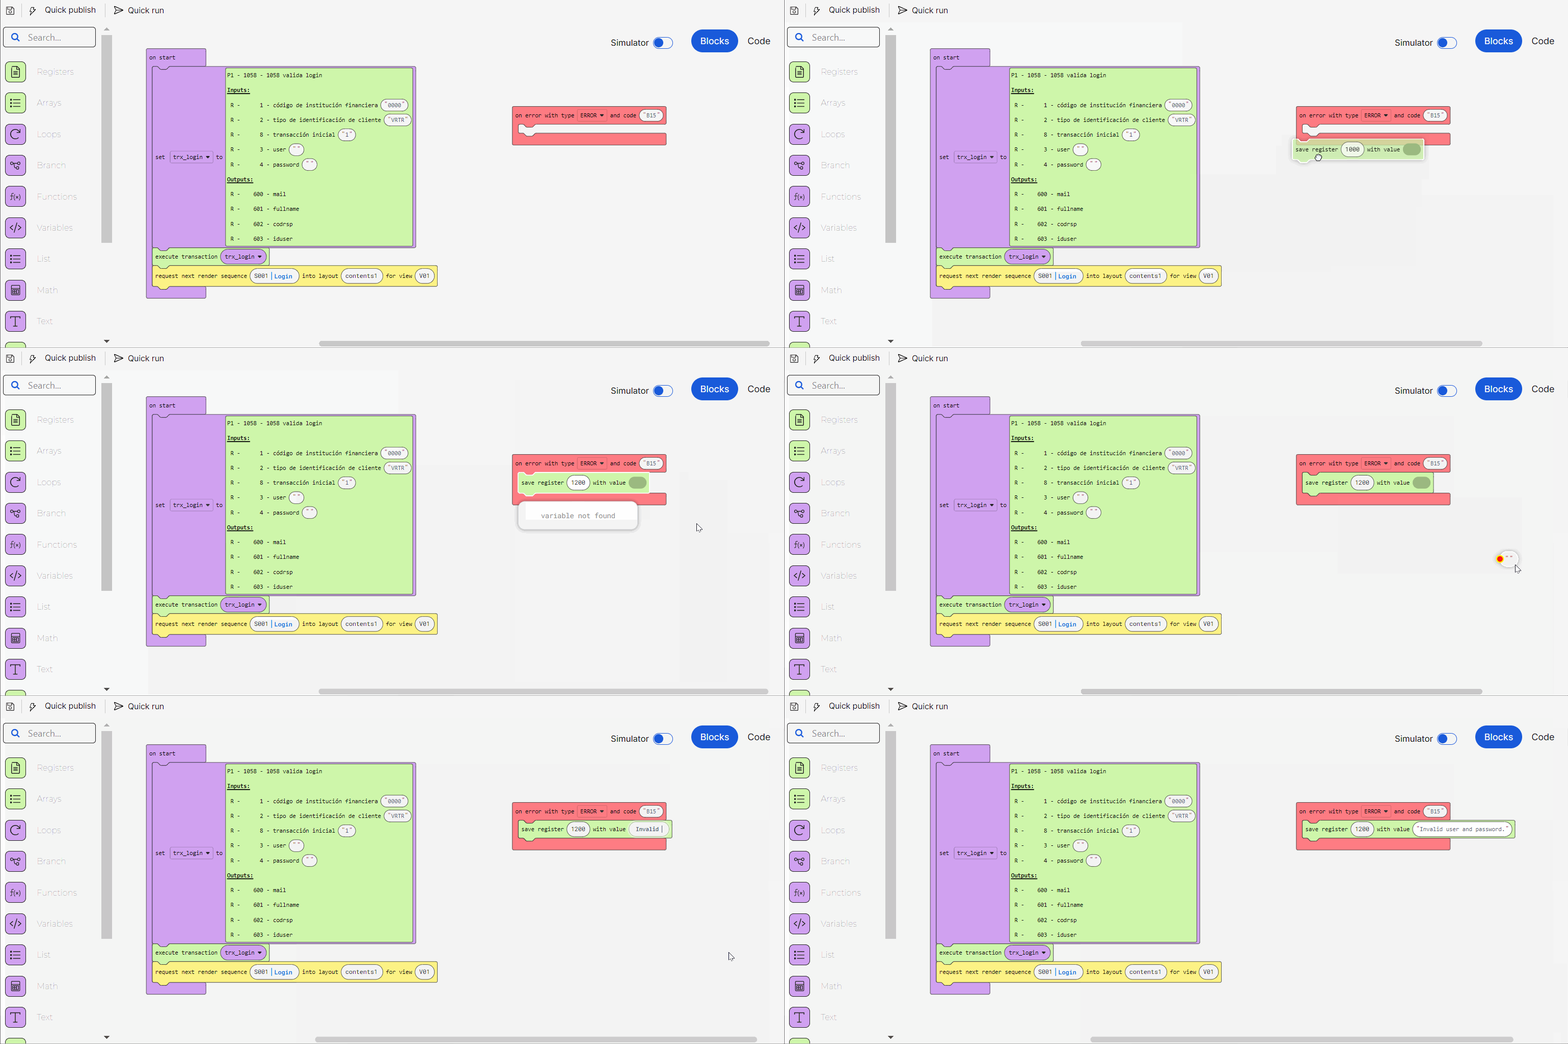
Define the register where the text will be saved. For this example, set 1200. This register will then be added to the screen component where the message will be displayed.
Then, to add the text, find the Text block category in the blocks menu on the left or use the search bar. Click to open the category and see the functions available. Drag the " " block into the canvas and connect it to the value slot of the save register with value block.
Complete the text block with the error message. For this example, set Invalid user or password.
To select the action to be performed once the error message is shown, find the Next block category in the blocks menu on the left or use the search bar. Click to open the category and see the functions available. Drag the request next lambda block into the canvas and connect it to the on error with type block, below the save register with value block.
Select the process lambda previously created to be executed after the error message is shown. For this example, select APP_ERROR_TRX.
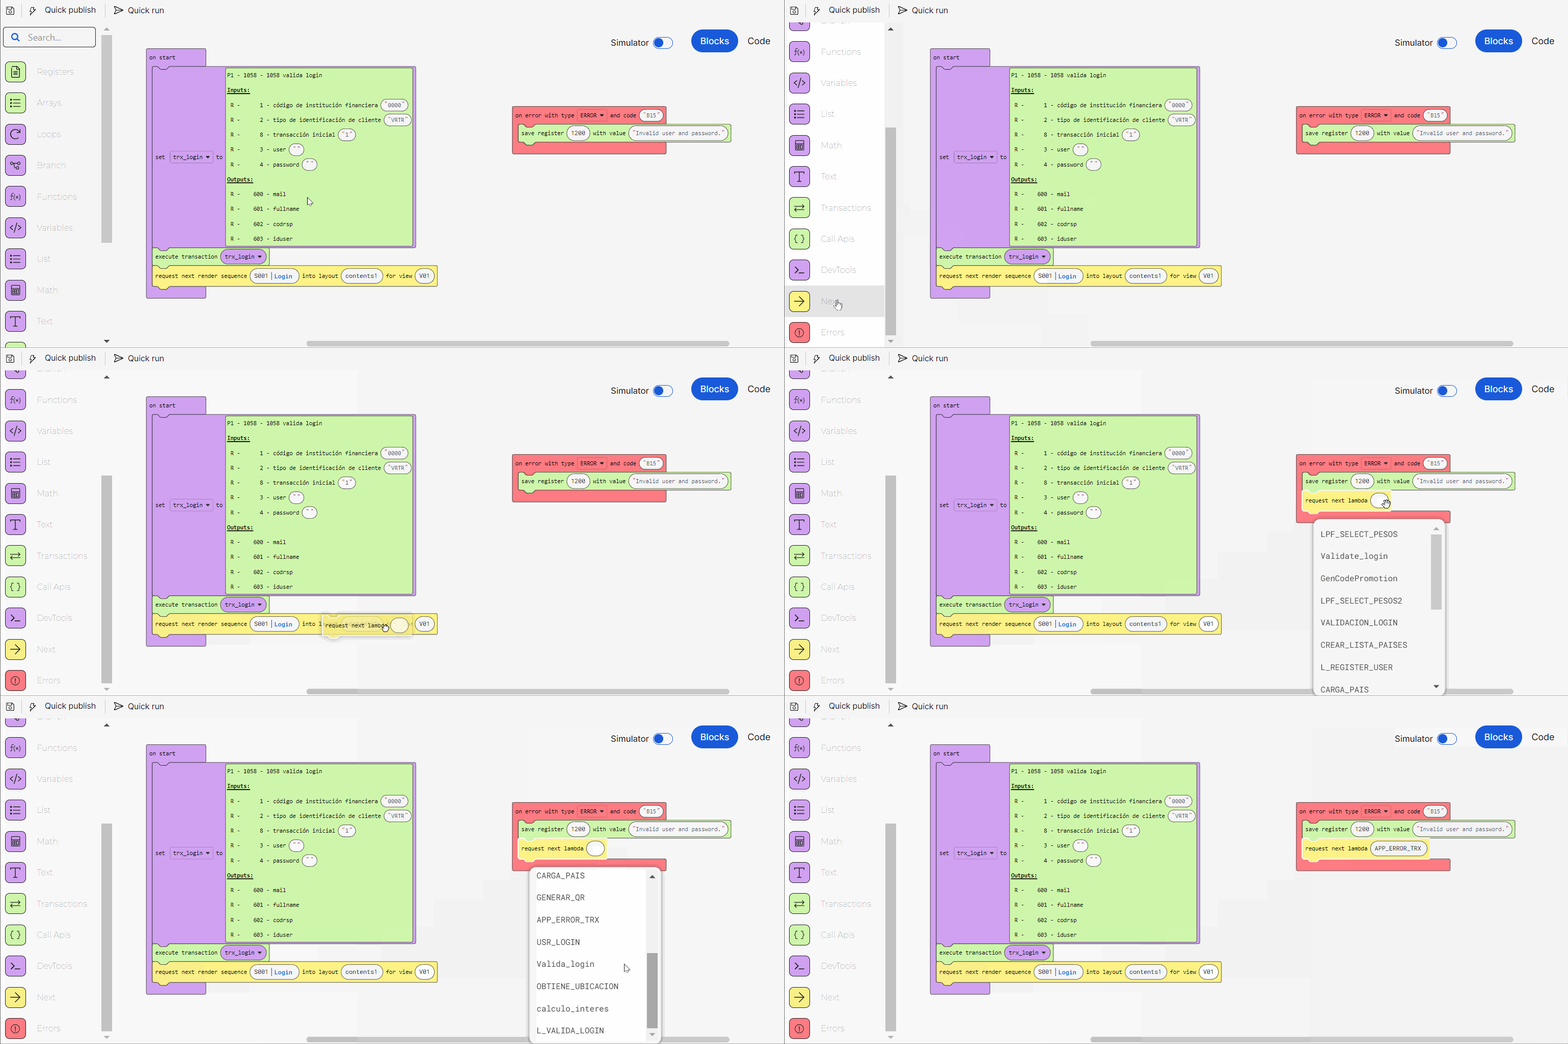
Before saving, you can run the process through the simulator to test the logic of the lambda process and ensure that it works as expected. This step is optional.
Click Save in the actions bar. The Commit message modal opens, complete the description of the last changes made and, if applicable, the details of the JIRA ticket involved, then click Save again to finish the creation process. The lambda process created is ready to be invoked from the OnClick event of the Login button in your app login screen.