Create or Edit an Environment
Important
Only the project leaders can create or edit an environment. If you don’t have the permissions, you won't have these options available. Contact the Mobile Builder team for assistance.
Create an Environment
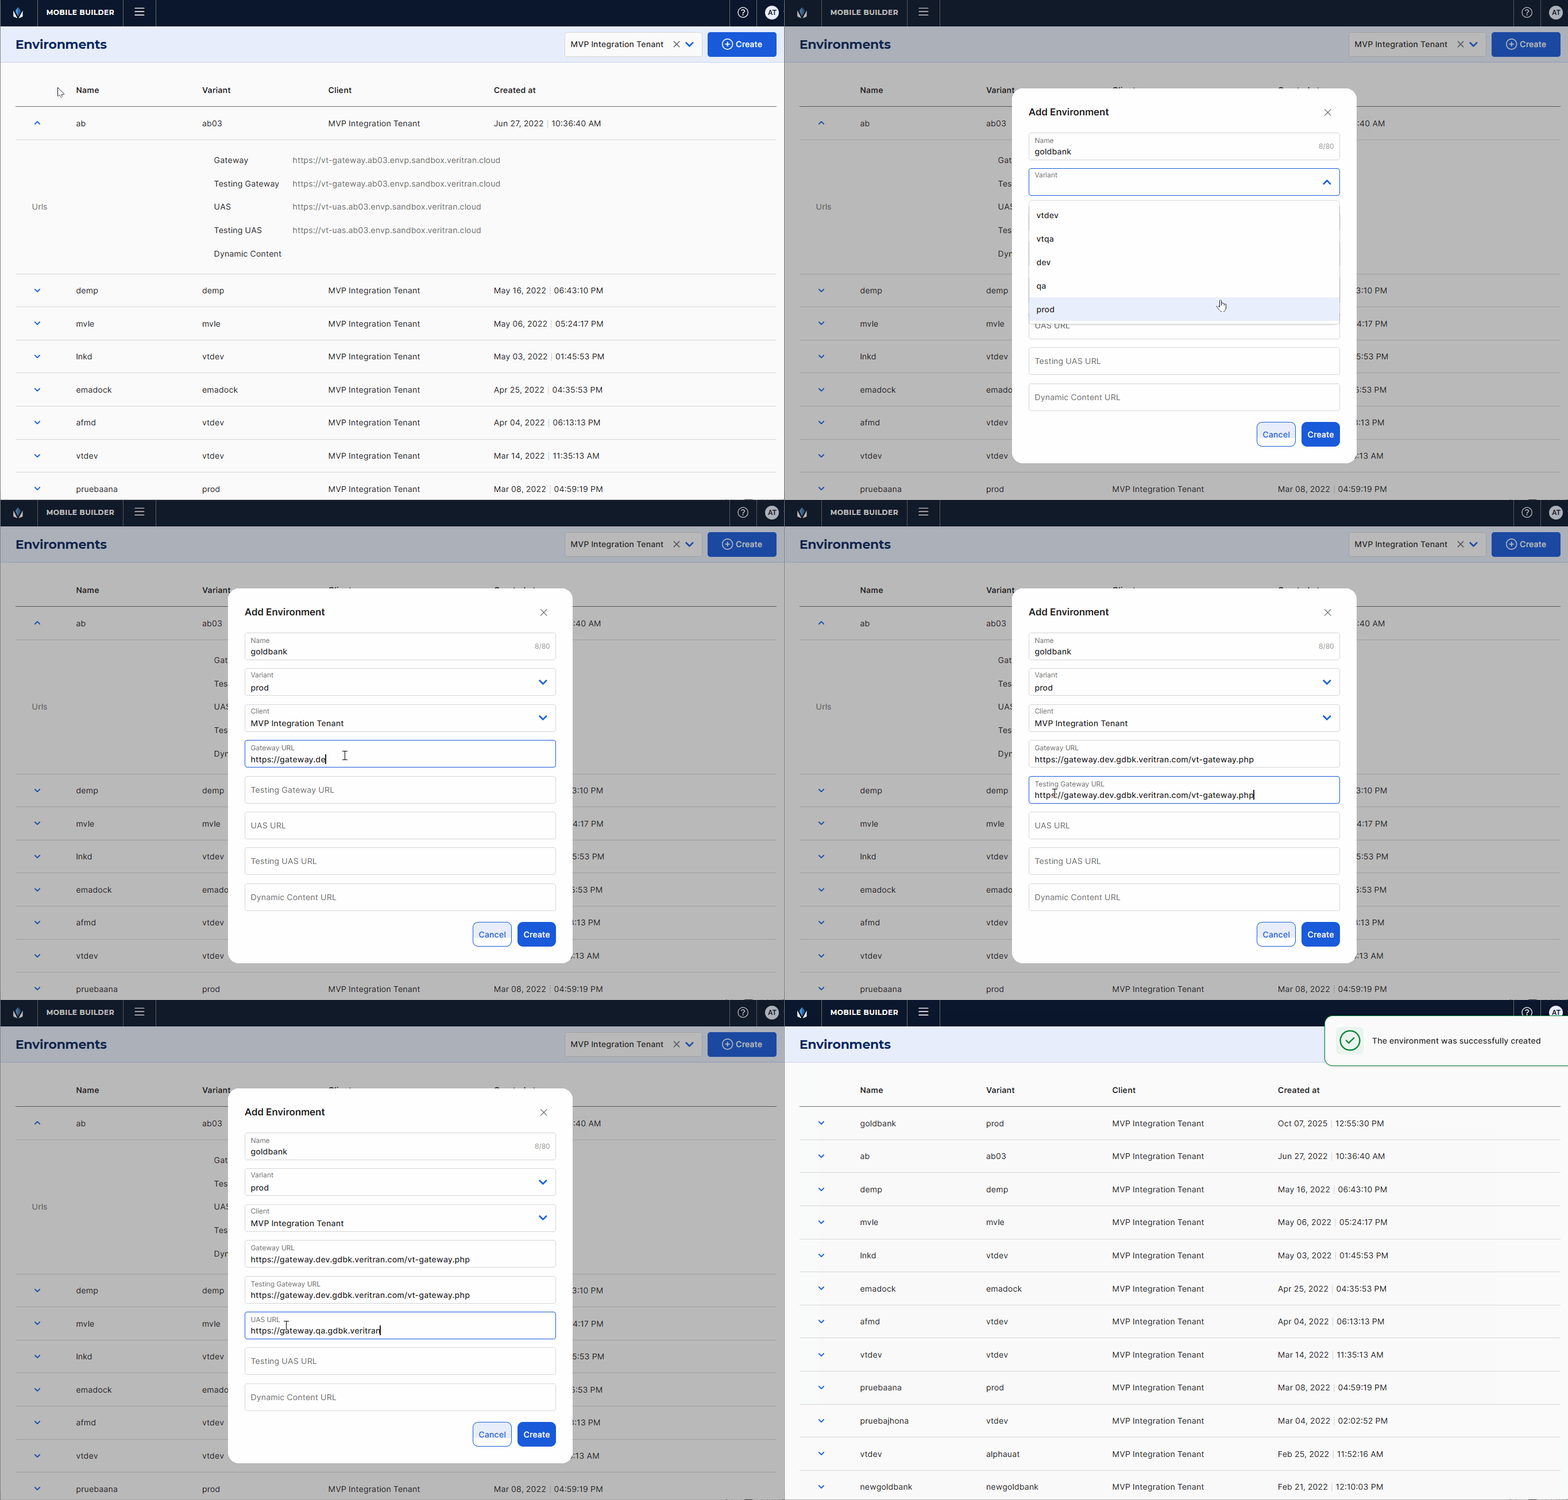
To create an environment, go to the Environments page. Then, follow the instructions listed below.

Click + Create. The Add Environment modal opens.
In the Name field, enter a name to identify the environment (max. 80 characters). Use only characters in lowercase (excluding diacritics), numbers, . , _ and -. For this example, enter goldbankwalletprod.
In the Variant field, click the arrow and select a variant from the drop-down menu to further specify the type of environment. The options available are: vtdev, vtqa, dev, qa and prod. For this example, select prod.
Click the drop-down menu and select a client. For this example, select MVP Integration Tenant.
In the Gateway URL field, enter the URL of the endpoint between the Veritran platform and the mobile device.
In the Testing Gateway URL field, enter the URL of the endpoint between the Veritran platform and the mobile device used for testing purposes.
In the UAS URL field, enter the URL of the server from which the app configuration is downloaded.
In the Testing UAS URL field, enter the URL of the server from which the app configuration for testing is downloaded.
In the Dynamic Content field, if applicable, enter the URL of the server from which images can be dynamically downloaded.
Once you have completed all the necessary fields, click Create to finish the creation process. You are redirected to the Environments page, and a message appears confirming that the environment was successfully created.
Edit an Environment
To edit an existing environment, find the environment in the list and click Edit ( ). The Edit Environment modal opens, where you can edit the parameters configured during the creation process or add new ones. Once you have edited all the necessary fields, click Save to implement the changes. You are redirected to the Environments page, and a message appears confirming that the environment was successfully updated.