Configurable Transactions
Important
This section provides information about configurable transactions. To learn about native transactions and how to create them, refer to Create a Native Transaction.
Configurable transactions are logic flows created in Studio composed by a series of steps or nodes. Within each node, you can execute one or more actions, such as:
validating and manipulating data, like converting a .json to .xml, addition and subtraction operations, unifying names, etc;
invoking external and internal services;
defining error codes; and
accessing and modifying databases.
Configurable transactions are built within the Transactions Editor, a low-code tool that consists of a canvas and building elements in its left panel, such as action nodes, services, reusable actions, and more. They are versioned and stored in GIT, which allows better traceability of any changes introduced.
To build a transaction, you add action nodes to a canvas and connect them through input and output parameters to transfer data between them. Every transaction consists of a Start node, which receives the initial information, and an End node that marks the end of the flow. Both the Start and the End nodes are added by default to the canvas.
Transaction's execution, or logic flow, is represented in the canvas by a straight line that connects nodes. The logic flow reflects the order in which steps are executed in a transaction, one after the other. This is the flow visible by default. Data transfer from one node to another, or the data flow, is represented by a dashed line that connects a node's outputs to another node's inputs. Click a node in the canvas to display the data flow and see the data that enters and exits the selected node.
Note
The data flow may not be identical to the logic flow, since there are cases in which you might need to retrieve data from an action node (such as a Set Variable action) that does not need to be included in the transaction's logic flow.
Logic Flow | Data Flow |
|---|---|
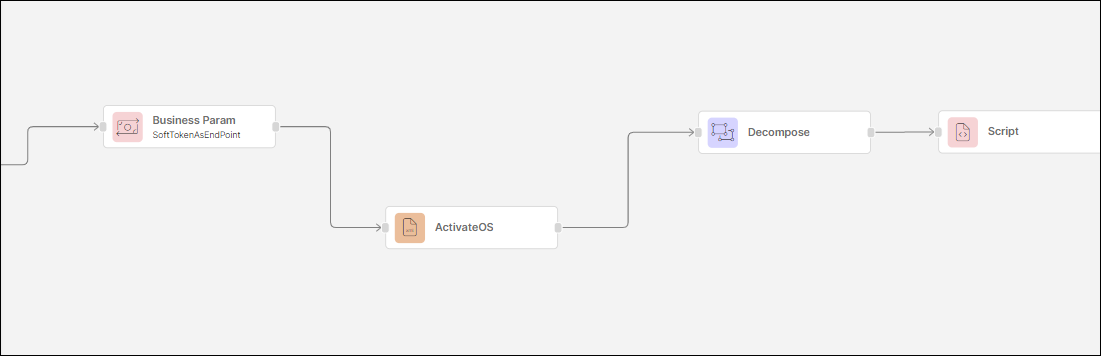 | 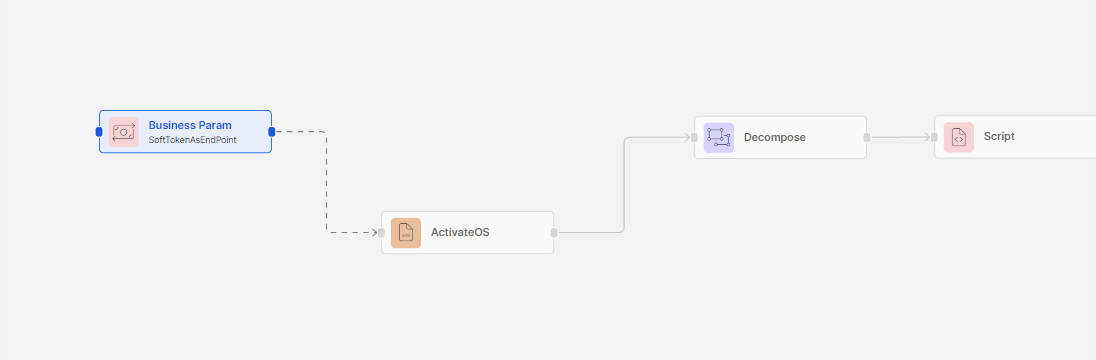 |
Every transaction is different. The actions and elements used in a transaction and their order vary depending on the functionality you want to build and on the client's requirements. For example, a login transaction is built differently from a transaction that retrieves a list of credit cards. To learn how to use a transaction based on a typical login scenario, read Create a Configurable Transaction.
Navigate the Transactions Editor
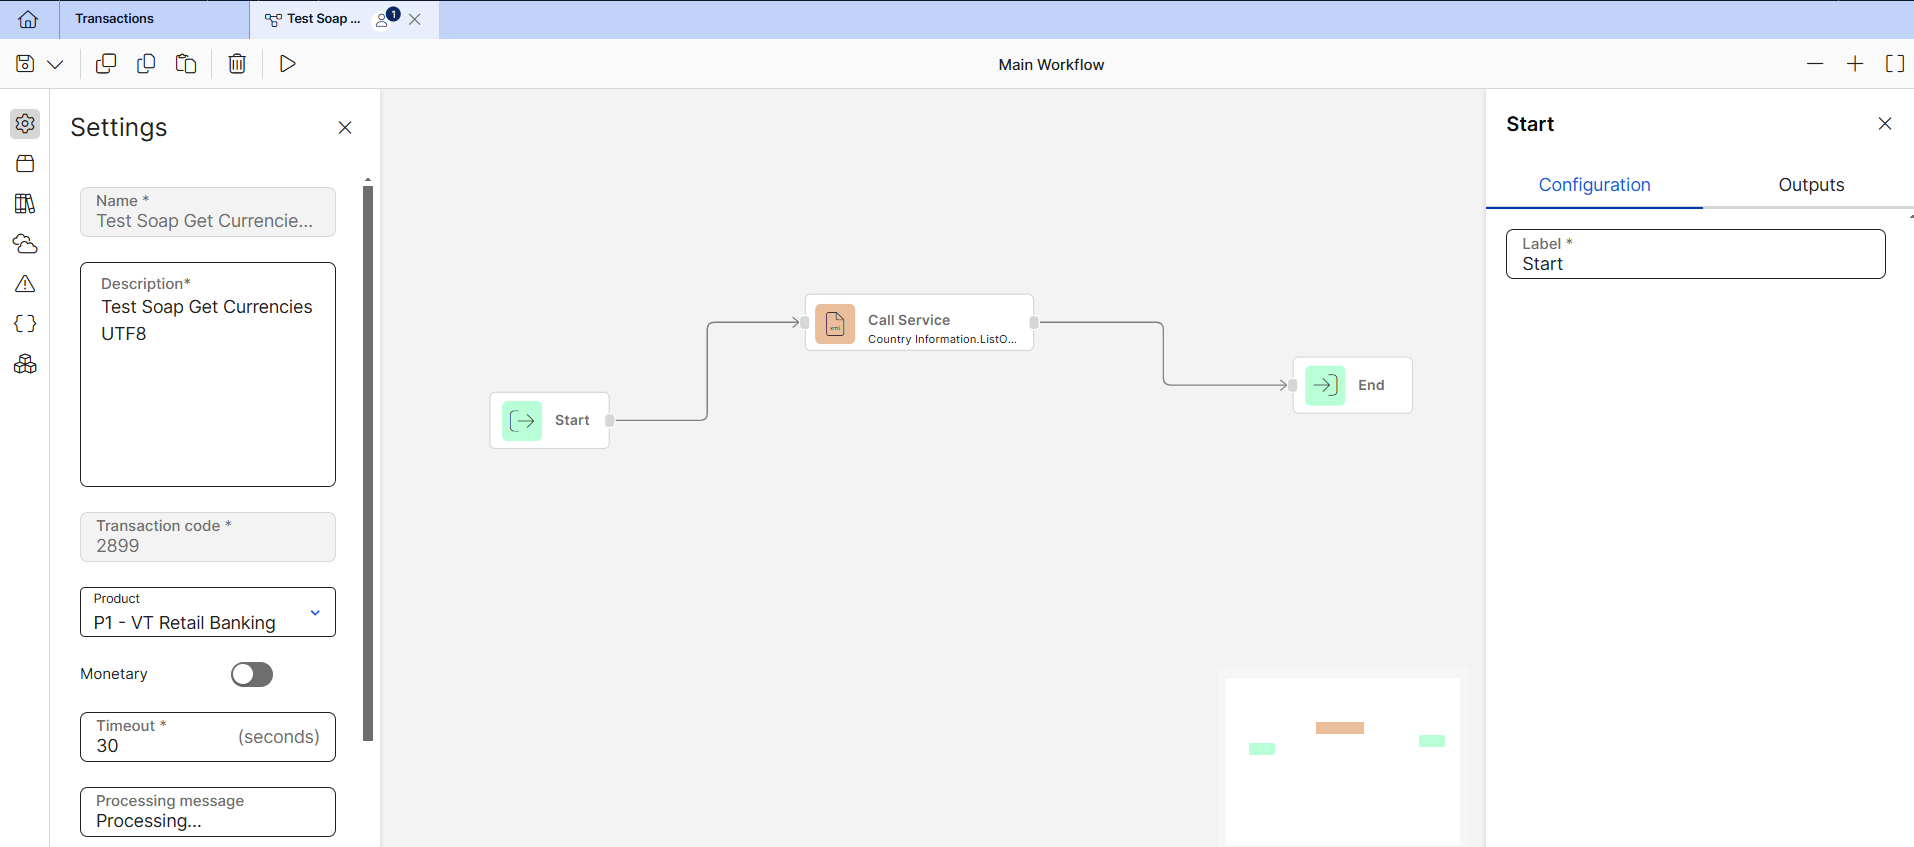
When accessing the transactions editor, you see its two main sections, the left panel and the toolbar, and the canvas, with the Start and End nodes already created.
The toolbar contains actions to save your transaction and run it, and zooming options to navigate the canvas. Click Save & continue at the left corner of the toolbar to save changes without closing the editor. Click the down arrow to display more options in a drop-down menu:
Save & close | Click to save all changes and close the transaction. Always save your transaction before publishing it. Each save is a commit, and will require you to write a commit message with the description of the last changes and, if applicable, the details of the JIRA ticket involved. WarningIf another user is working in the same transaction you are working on and saves changes before you do, once you try to save, a modal pops up and warns you that your changes cannot be saved. |
Publish | Click to publish the transaction. This will publish this transaction only in the branch you are working on and will switch it to Pending publication on the other branches. Read Dependencies and Publication in the Transactions article to learn more. If there is an error within the transaction, Studio shows a warning message and prevents you from publishing it. Refer to Errors to learn more about error management. NoteThis same validation appears when generating and publishing an app that contains transactions with errors. |
Close without saving | Click to close the editor without saving updates. |
Save as Action library | Click to save the current transaction as an action library so that it can be reused. |
Next to the saving options, there is another set of actions to perform on the nodes in the canvas. Click Validate to verify if there are any building errors in the transaction, and display the results in the Errors & Warning tab. Click Duplicate to create a replica of a selected node in the canvas (except for the Start and End nodes) or click Copy and Paste to copy a selected node and paste it into a different transaction (except for the Start and End nodes). You can also select any node added to the canvas and then click the trashcan icon to delete it from the transaction. Next to this set of options, the Run transaction icon allows you to publish and test the transaction's functionality.
At the right corner of the toolbar, click - or + to decrease or increase the zoom level on the canvas respectively. The Fit to workflow option adjusts the zoom level so that the whole flow, from start to end, fits on the screen.
The left panel opens by default in the Settings section, where you can configure basic information for your transaction. Additionally, there are different elements that allow you to build your transaction and add the required business logic. These elements are: Actions, Action Libraries, Services, Variables and Procedures.
Below the Settings tab, you can find a Search section where you can search for variables within your transaction. For example, you can search clientid and Studio filters all the action nodes where the variable clientid is being used as an input or output. Search results are grouped by node, and each entry indicates whether the variable is present as an input, an output, or both. Clicking any result navigates directly to the relevant node in the canvas and highlights it, while opening the right panel to the corresponding configuration section (Inputs or Outputs).
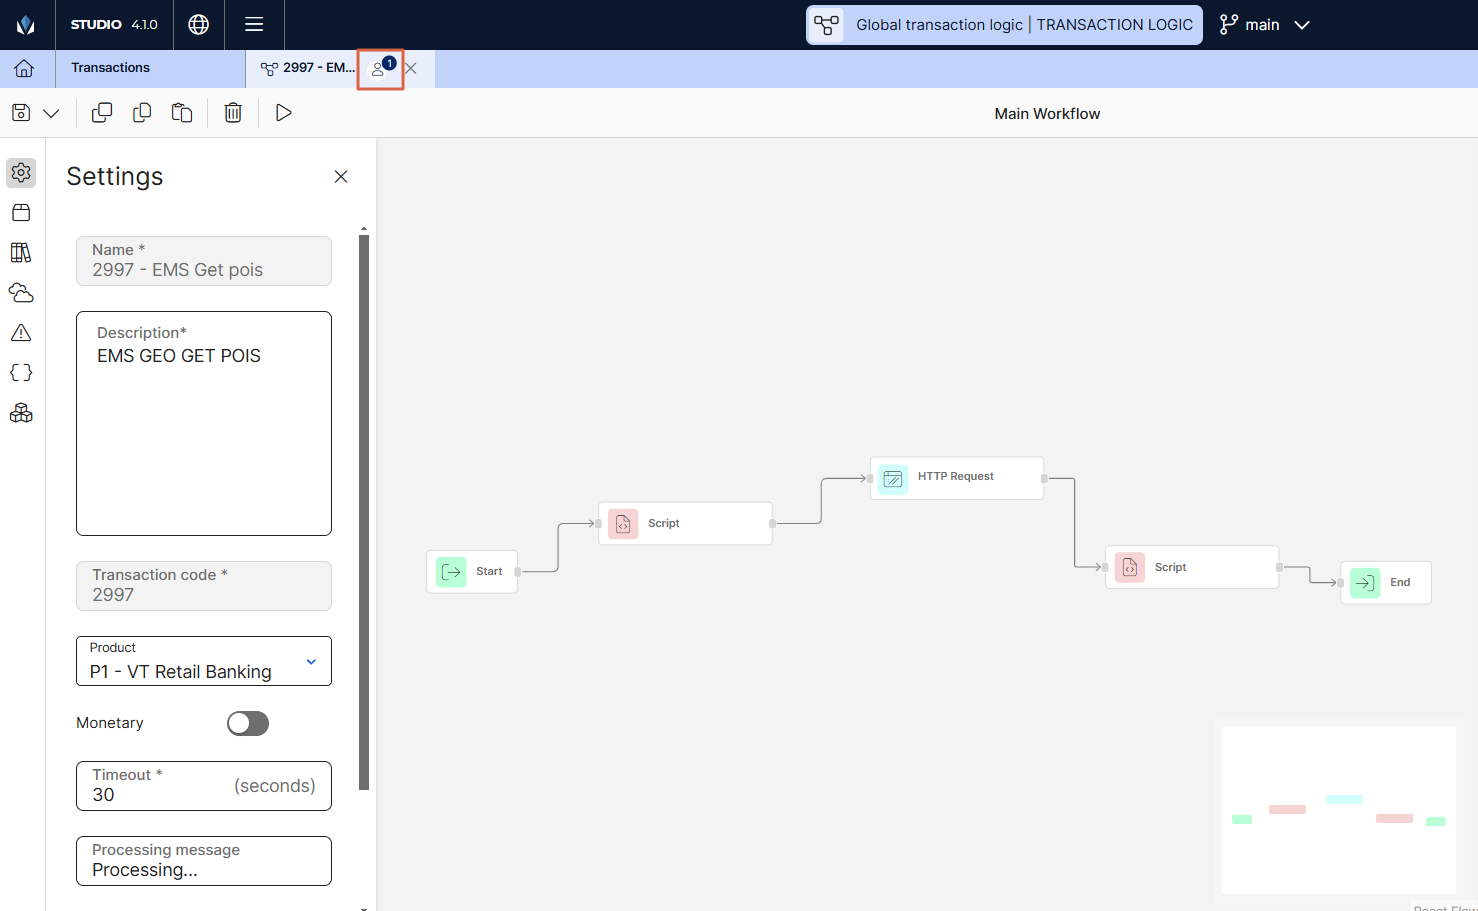
Concurrent Editing
When there is one or more users working on the same transaction you are working on, you will see a user icon with the number of users present in that entity. Hover over the icon to see who that user is. This number and list of users is updated in real time.
Verifying if someone else is working on your entities is useful to prevent concurrency issues, such as loss of updates, since saving changes when another user is still working on the entity will make them lose any changes made.