Export and Import Apps and Modules
Export Apps
In Studio, there are four different ways to export your app:
Full application: This allows you to export the complete app's branch to import it to a different environment. It downloads a .tar file and, within this file, there's an index file included that specifies the branch's metadata (such as the export date, app, branch, user that exported the app, commit info and Studio version) and a list of dependencies included within the export.
XML for search: This full export allows you to obtain an .xml that is human-readable. In this file, you can search for dependencies and elements within your app.
Configuration splash: Contains the app's splash screen so that it can then be uploaded to the binary's repository.
Configuration package: Contains the front end and business logic of the app. This allows you to promote the configuration to the following environment. Includes the app's branch and its dependencies in a Middleware-compatible format.
Important
You need to publish the app at least once to have this option enabled.
To export your app in any of the methods above, navigate to your app branch, click the menu  , and then go to Export branch in the Management section.
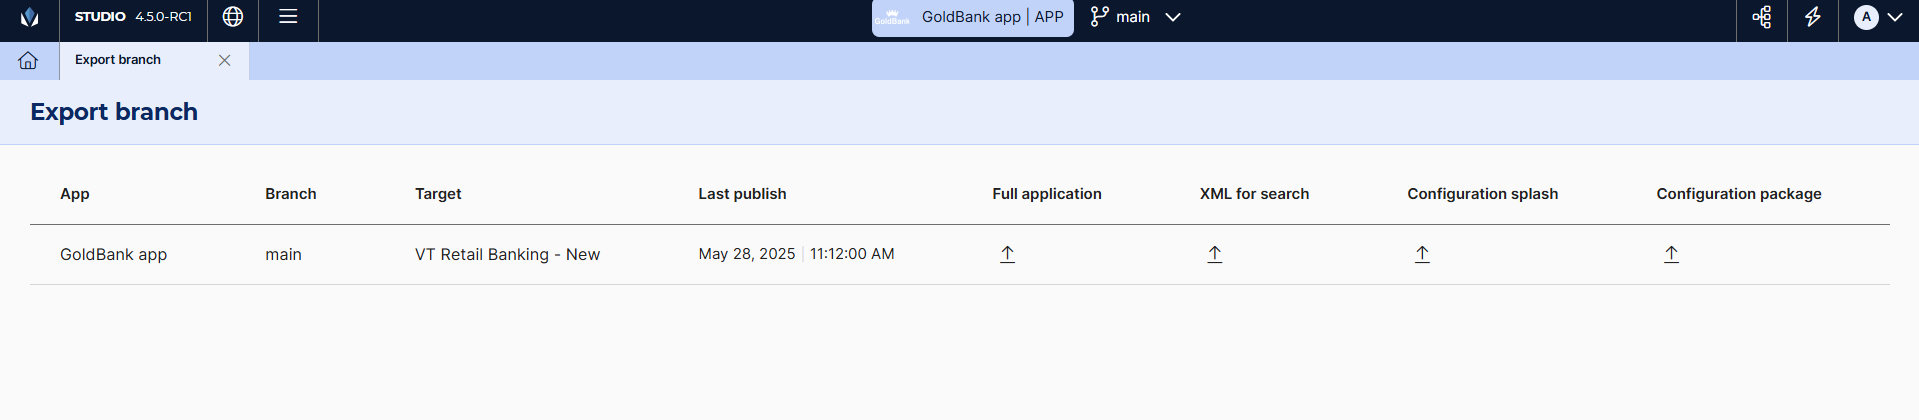
In this page, you can see the name of the app, the branch that is going to be exported, the target (currently not included in the export), and the last publication date.
Export Modules
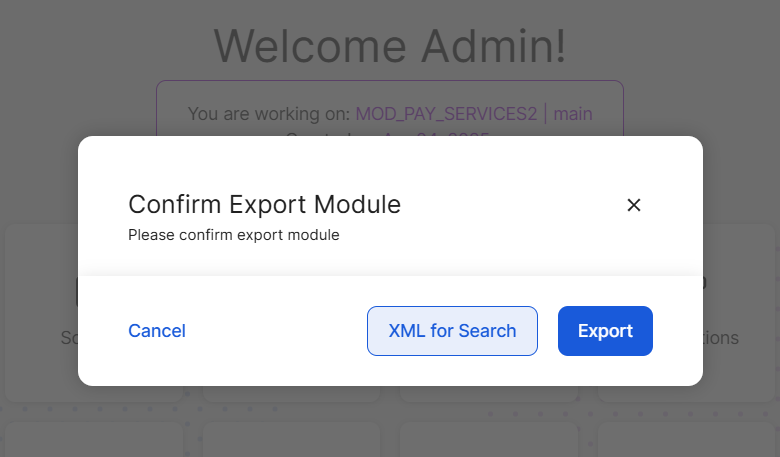
You can also export your module's branch to use it in another Studio environment. To do it, navigate to your module branch, click Menu , and then, click Export branch in the Management section.
A modal window appears, where you can choose to export the branch to your device (Export) or export the .xml file to search for elements and dependencies within your module in a human-readable file (XML for Search). The Export option downloads a .tar file.
Note
The .tar file includes an index file that details the branch's metadata (such as export date, app, branch, user that exported the app, commit info and Studio version) and a list of dependencies included within the export.
Import Apps and Modules
Studio allows you to import apps and modules, making it possible to easily take apps from one environment to another. To do this, follow the steps below:
Navigate to Studio's Dashboard and click Apps or Modules tab, depending on what you need to import.
Click Import.
Important
Importing a Module on the Apps tab and viceversa will result in an error in Studio.
In the modal that opens, click select a file, or drag and drop a .tar file from your device. Studio will process the file and detect whether any of the global entities being imported are already available in the environment.
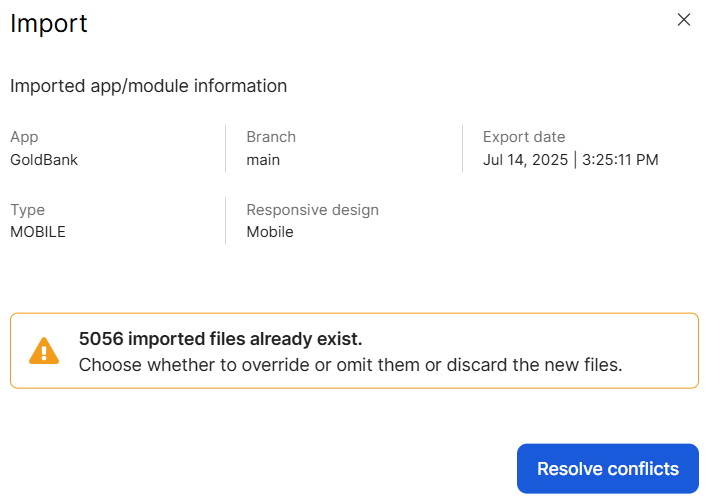
A new modal opens that displays the imported app or modules information, such as the branch, type of app, responsive design, and the date it was exported. If any of the dependencies within the imported file already exist in the target environment, a warning will indicate how many dependencies are generating this conflict. To visualize the entities and manually select which ones to import and which ones to discard, click Resolve conflicts.
Important
To verify if an entity already exists in the new environment, Studio only looks for an entity with the same name. It does not recognize if the content within that entity is different.
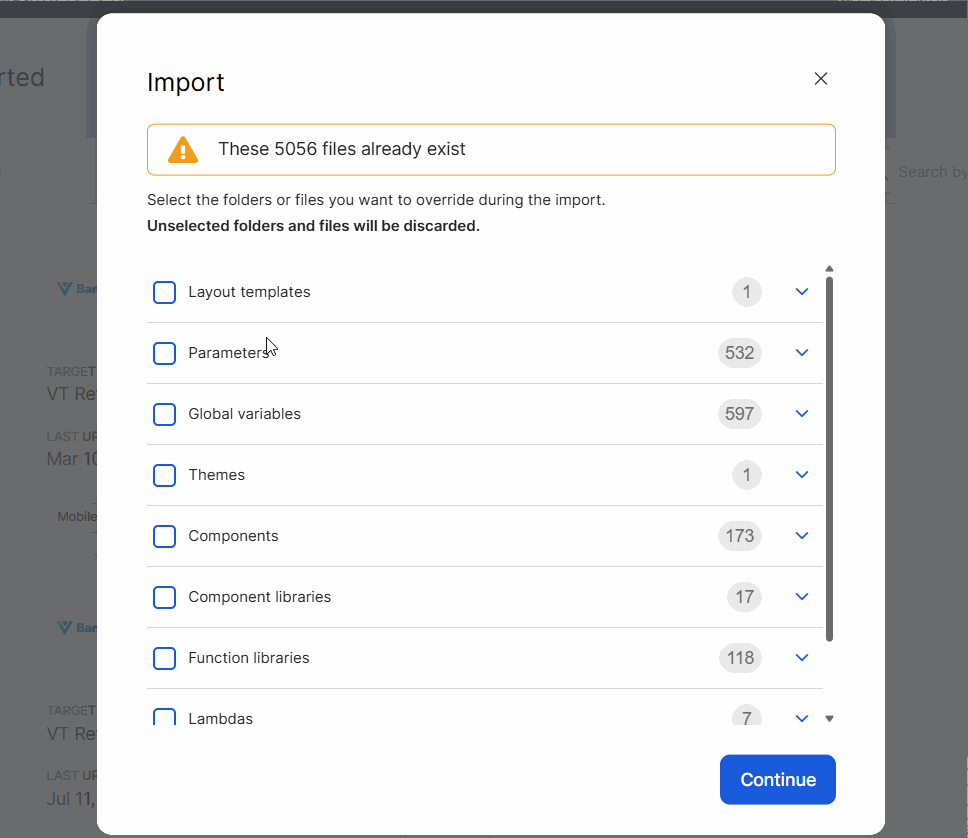
The Import modal window opens, which displays all the entities that are already available in the target environment, divided by category. You can select the entity folder so that every entity of that category is imported to the target environment and overwrites the already available elements. Additionally, you can open each folder and select entities individually, as shown below.
Caution
Selected entities will overwrite the entities that are already available in the target environment.
After selecting the entities to be imported, you need to name your app or module. Enter a name for the app or module, following the naming best practices. This name cannot be edited after confirming the import.
Click Import to finish the process.