Set User Properties
The tracking feature allows you to set and track specific user properties from your app's processes and then add them to a component in your app from the Visual Builder.
Important
You can only add up to 25 new user properties. Analytics does not log user properties that exceed that limit. Refer to Google's documentation on Collection and Configuration Limits to learn more.
To set new user properties to be tracked, go to My Apps (Overview > See my apps). Find your application in the list, hover over your app's card and click Processes in the menu that appears at the bottom. The Processes [List] page opens in the Lambda tab. Click + New Lambda on the top right corner of the page to open the Lambda Editor and follow these steps:
Complete the Name, Description and Tags fields on the right panel to identify the process.
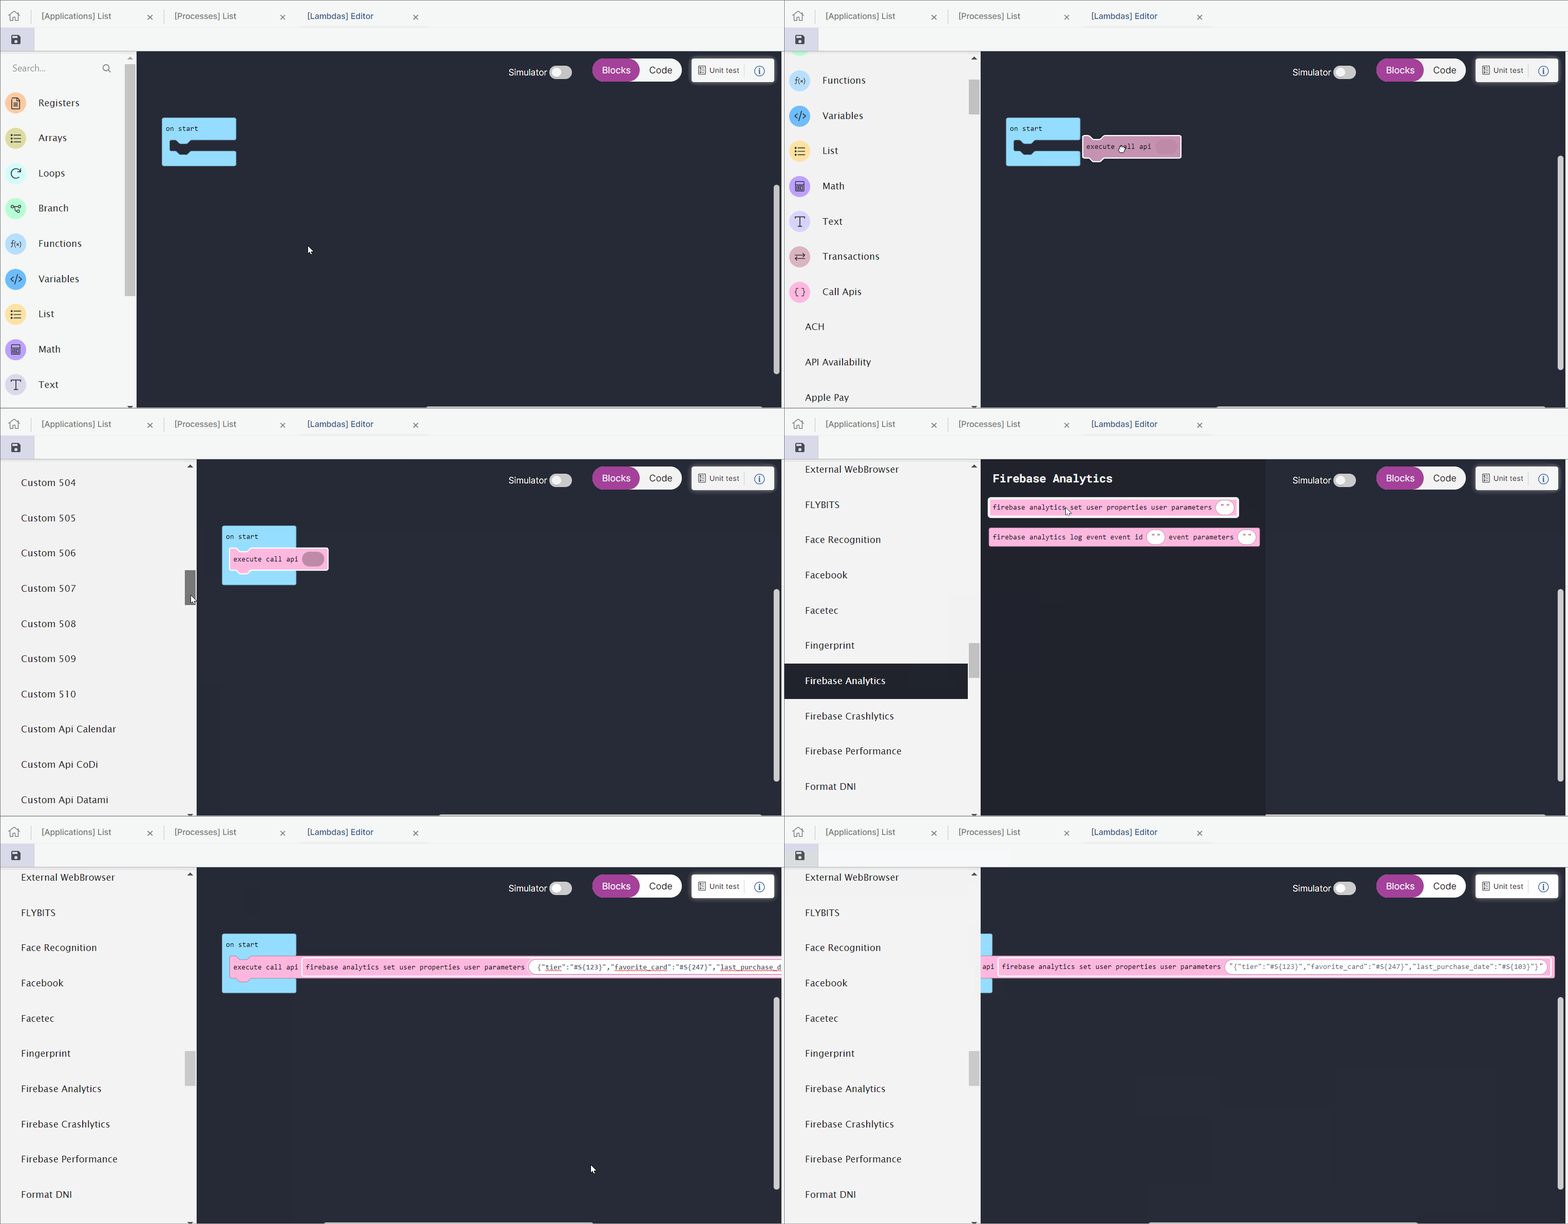
Find the Call APIs block category in the blocks menu on the left or use the search bar. Click to open the category and see the functions available. Drag the Execute Call API block into the canvas and connect it to the On Start block.
Find the Firebase Analytics block subcategory inside the Call APIs block category. Click to open the category and see the functions available. Drag the Firebase Analytics Set User Properties User Parameters block into the canvas and connect it to the Execute Call API block.
Complete the field at the end of the block with a json containing the user properties’ names and tokens you want to track.
Click Save in the actions bar to save the process.
Refer to the animated image below to see an example of how to perform the actions described in steps 2 to 5.

To complete the activation process of the user properties set on your app's processes, you need to create them as user-scoped Custom Dimensions in Analytics. Refer to Google's documentation on Custom Dimensions to learn more.
Once you have configured the user properties, you have to add them to a component in your app from the Visual Builder to be able to track them. Refer to the section below to learn more.
Add User Property Tracking to a Component
To access the Visual Builder, go to My Apps (Overview > See my apps), find your app's card in the list and click Screens. Find the screen you want to work with in the list and click Design or double click the screen's card. The Visual Builder opens in a new tab.
Find the component you want to add user property tracking to and click it. Go to the right panel's Actions tab, find the type of action you want to use to invoke the process and click the vertical three-dot icon to the right. A modal window opens. Select Lambdas from the first drop-down menu and, on the second drop-down menu, select the lambda process you had previously created. Click Accept to go back to the Visual Builder and click Save in the actions bar to save the changes.