Create or Edit a Rule
To create a new rule, go to the Rules page and click + Create Rule. The rules settings page opens in the Name and Description tab. Refer to the sections below to learn more.
Note
Once you save the settings configured, you will see a summary of the data set in each tab at the top of the page.
Name and Description
In the Name and Description tab, you can define the basic settings to identify the rule you are configuring. Refer to the annotated image below to learn more.
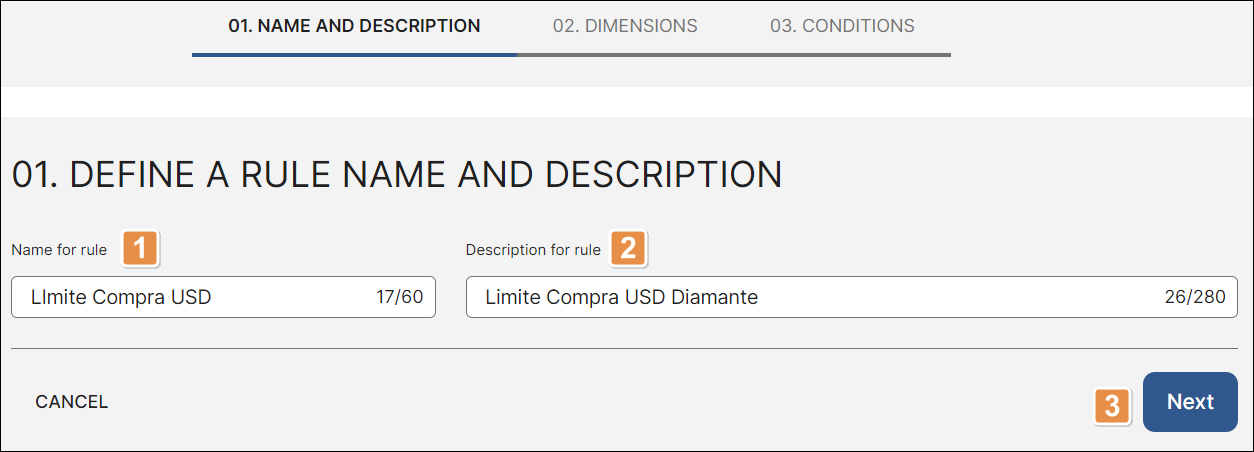
Name for rule. Enter a name to identify the rule. This field is mandatory.
Important
The rule name must be unique. You cannot have two rules with the same name.
Description of the rule. Enter a short text describing the rule. This field is mandatory.
Next. Click Next to go to the Dimensions tab.
To discard changes and go back to the home page, click Cancel.
Dimensions
In the Dimensions tab, you can define the scope of the business rule. Refer to the annotated image below to learn more.
Important
All fields in this tab are configured by default with the value Any until an option is selected in the drop-down menus. You can click the X icon to the right of any selected value to remove it and restore the default value Any.
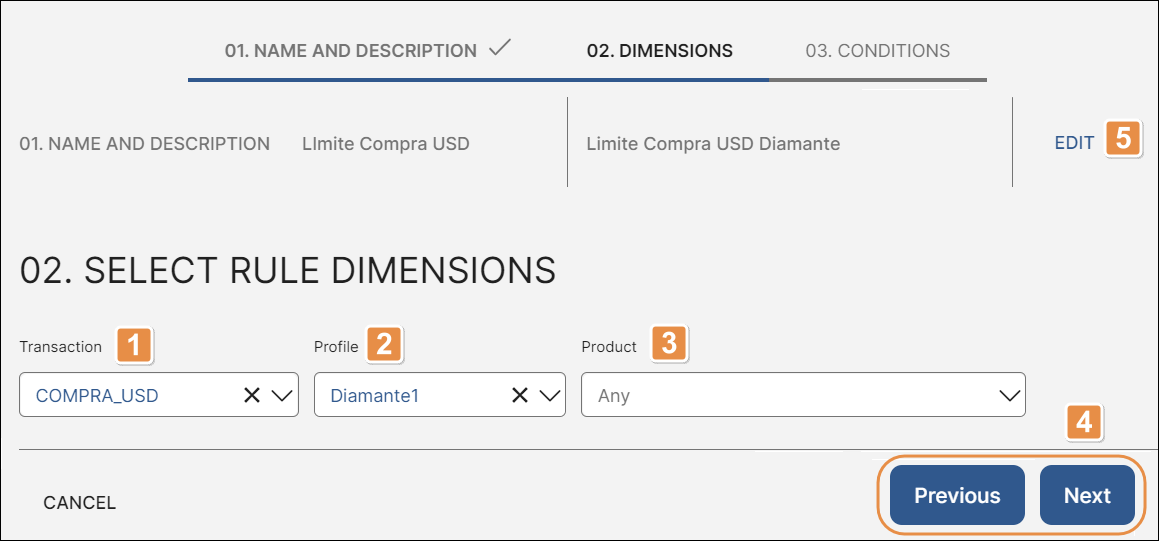
Transaction. Transaction to which the rule is applied. If you want the rule to apply to all transactions, leave the option Any selected. If you want to set a specific transaction, click the down arrow and select an option from the drop-down menu. You can also start typing the transaction name to narrow down the options in the menu. The list includes all the transactions created in BRM.
Profile. Profile to which the rule is applied. The rule will only be considered in the transaction evaluation if a user under this profile is executing the transaction.
If you want the rule to be applied to all profiles, leave the option Any selected. If you want to set a specific profile, click the down arrow and select an option from the drop-down menu. You can also start typing the profile's name to narrow down the options in the menu. The list includes all the profiles created in BRM.
Product. Product for which the evaluated transaction is executed. The rule will only be considered in the transaction evaluation if the transaction is being executed for the product specified.
If you want the rule to be applied to all products, leave the option Any selected. If you want to set a specific product, click the down arrow and select an option from the drop-down menu. You can also start typing the product name to narrow down the options available. The list includes all the products created in BRM.
Previous/Next. Click Previous to go back to the Name and Description tab. Click Next to go to the Conditions tab. The Next button is made available after you select a value from the drop-down menu in at least one field (Transaction, Profile or Product).
Edit. Click to edit the settings in the Name and Description tab.
Important
At least one field (Transaction, Profile or Product) must be configured with an option from the drop-down menus before you can continue to the Conditions tab.
Conditions
In the Conditions tab, you can define the parameters or conditions that the BRM system will consider when applying the rule to determine if a transaction should be rejected. Refer to the annotated image below to learn more.
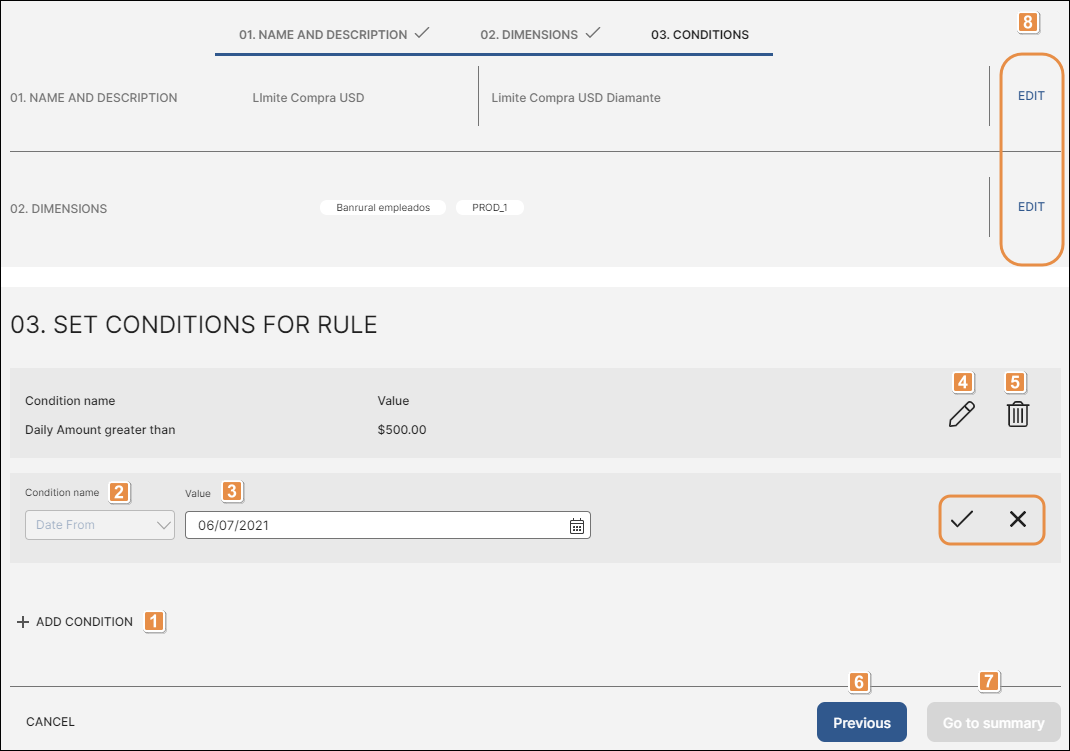
+ Add Condition. Click to add a new condition and configure its settings.
Condition name. Click the down arrow and select any of the options in the drop-down menu. Refer to the table below to learn more about the condition set by selecting each option.
Individual Amount greater than
Maximum transaction amount. If the transaction amount is higher than the number set in the Value field, it will be rejected. Enter an amount in the Value field.
Daily Amount greater than
Maximum total amount of the transactions carried out in one day. If the transaction amount causes the accumulated daily amount to exceed the value configured, the transaction will be rejected. Enter an amount in the Value field.
Individual Amount lower than
Minimum transaction amount. If the transaction amount is lower than the amount set in the Value field, it will be rejected. Enter an amount in the Value field.
Monthly Amount greater than
Maximum total amount of the transactions carried out in a month. If the transaction amount causes the accumulated monthly amount to exceed the value configured, the transaction will be rejected. Enter an amount in the Value field.
Date from
Date set so that any transactions carried out from the date specified in the Value field onwards are rejected. Click the Value field or click the calendar icon and select a date.
Value. Enter a value for the condition selected in the Condition name field. If you selected a condition involving an amount, enter a number with no currency information. If you selected the condition involving a date, select a date. Then, click the check icon to save changes or click the cancel icon to discard changes (see image above). The Go to Summary button is enabled.
Important
Once you save a new condition, you can't edit the condition type. However, you can make changes to the condition value.
Edit. Click to edit the settings of a condition already created.
Delete. Click to delete a condition.
Previous. Click to go to the Dimensions tab.
Go to summary. Click to open a panel containing a summary of all the settings configured and save the rule. Click the toggle switch to enable the rule so that it takes effect after you save it. Once you review the information set, click Save rule. To go back, click Cancel.
Tip
If you don't enable the rule in this step, you can enable it directly from the Rules page.
To edit the settings of an existing rule, find the desired rule in the Rules page by using the search bar or navigating the list. Then, click the vertical three-dot icon for the rule you want to modify and click Edit. The edit page contains the same fields that must be completed when creating a new rule.