Modules
Modules are configuration units that can be reused or instanced through their interfaces in main applications or other modules and have their own contexts, which allows them to use processes and registers without affecting any other parts of the app configuration. The concept of modularity refers to building apps by creating smaller parts (modules) so as to enable and facilitate collaborative building. You can link your module to the other modules available by enabling its dependencies in module settings.
To be available for use in the main app, modules must be linked as dependencies.
There are two different types of modules, referred to as interfaces: Component and Screen.
Component-type interfaces have a limited functionality and enable the creation of parts of a screen, like an input, a header or footer.
Screen-type interfaces have a more complete, extensive functionality and enable the creation of full screens or screen flows.
Both types of modules may also be made up of processes and registers.
After creating your module and enabling dependencies in module settings, you must create the module's interfaces. These are functionalities that will allow your instanced module to connect with the main app or with another module.
As opposed to apps, modules are sets of screens and processes that do not start through a view. You need to create interfaces in order to use such modules and the processes and screens within them. As a result, you will instance a module's content by invoking its interfaces from an app or another module.
To learn more about the instancing process, read the Instance a Module section below.
To see a list of the modules created in your Studio environment, create or import new modules, go to Global > Modules. The Modules [List] page opens. Refer to the annotated image below to learn more.
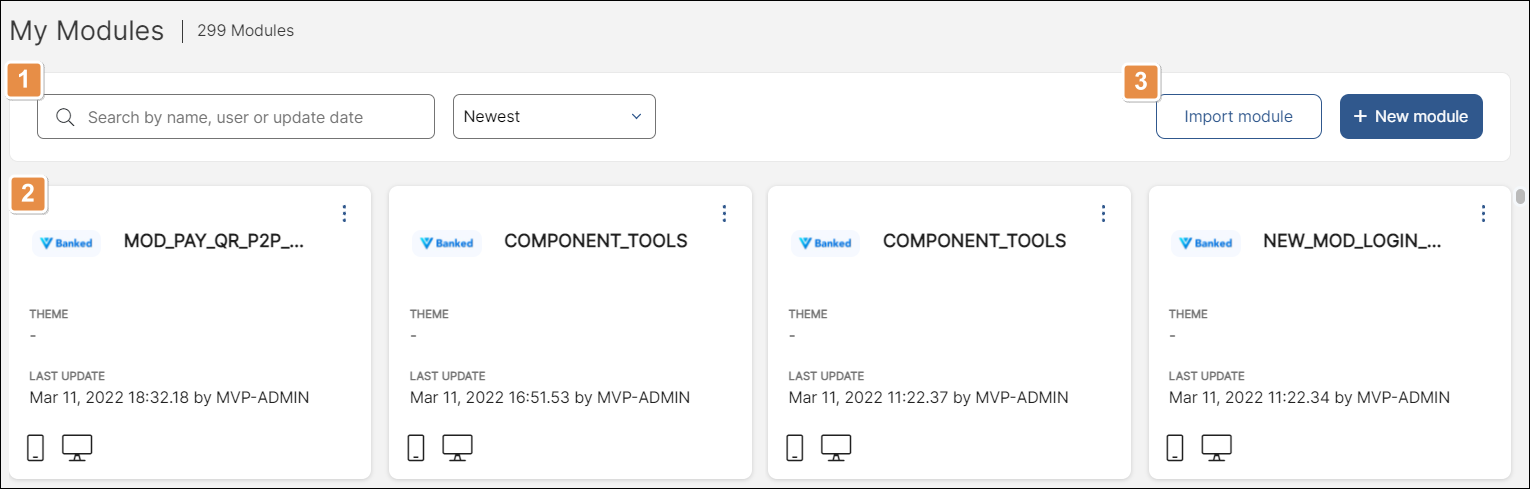
Search bar and sorting criteria. Search modules by name, theme, user or update. Click the drop-down menu to sort modules by creation date or alphabetically.
List of modules in card view. Read the Module Cards section below to learn more.
Tools. Each tool is explained in order of appearance.
Import Module
Click this button to import a module from your files.
+ New module
Click to create a module.
Module Cards
Modules appear in card view by default. Check the annotated image below to learn more about the card view and the module's information.
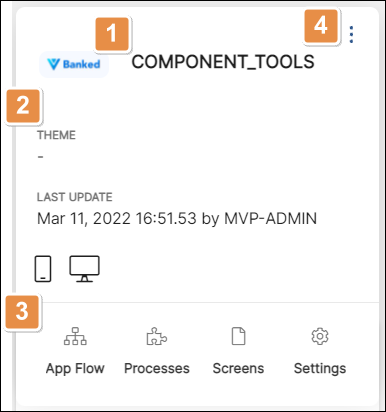
Module name. Shows the name and icon selected for the module.
Module information. This section shows the types of devices for which the module is configured, the date when the module was last updated and the module's theme.
Shortcuts. Click App Flow, Processes, Screens or Settings to edit the module's configuration. To learn more about these topics read App Flow, Processes, Screens and Module Settings.
More options. Click the vertical three-dot icon to expand a list of further options and sections related to the module.
Package extension
Click to package and download the selected module's configuration file.
Export module
Click to export the selected module and be able to export dependencies separately. A file in .xml format will be downloaded to your device. Either you or other users can then import the module using that file.
Copy module
Click here to duplicate the selected module. Add a new name and description to the copy and click Confirm copy.
Export
Click to export the module to your device, with or without dependencies. A file in .xml format will be downloaded to your device. Either you or other users can then import the module to other Studio environment. To read more about this process, read Export a Module.
Interfaces
Interfaces connect your module with a main application or another module. Click to see the interfaces created for your module or create new ones.
Quality assurance
Click to go to the Quality Assurance page to run unit tests for the selected module. Read Quality Assurance for more information about this topic.
Parameters
Click to see a list of site parameters configured for the module.
Views
Click here to see a list of site views associated to the module.
Modules
Click to access the [Modules] list page that lists the modules linked to that module. The page has the same functionalities as the page described in this article.
Dependencies
Click to see the module's dependencies in a diagram. To learn more about dependencies, read Module Settings.
Delete
Click to delete the module.
Instance a Module
You can instance either the screen-type interfaces or component-type interfaces of a module, which are respectively displayed as components or screens in the Visual Builder.
In the case of a module that contains component-type interfaces, such components are displayed in the Components tab within the Left Panel of the Visual Builder and can be dragged and dropped into any of the screens of the main app in the Visual Builder. Component-type interfaces behave as any other component created within Studio. To learn more, read Instancing a Component-type Interface.
In the case of a module that contains screen-type interfaces, such screens can be linked to any component in any of the screens in the main app through a wizard available in the Actions tab of the Right Panel for the component selected. To learn more, read Instancing a Screen-type Interface.