Resource Library
The resources library contains all the resources that were uploaded for use in your apps within folders. Resources can be images, icons, fonts, video files, audio files or widgets.
To access the resources library, click Resources > Resource Library. Refer to the annotated image below to learn more.
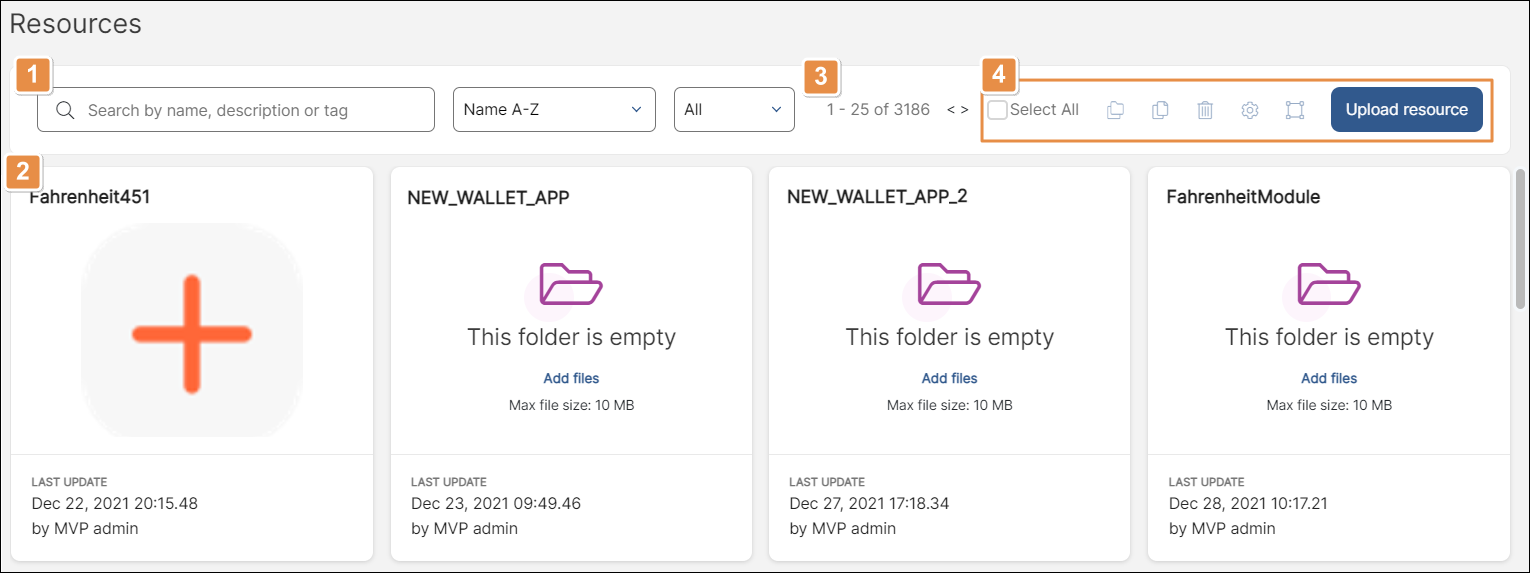
Search bar and filtering criteria. Search resources by name, type, file format and tags. Click the first drop-down menu to sort resources alphabetically, by creation date and by size. Click the second drop-down menu to filter the type of resource you want to display on the page. You can select to see only folders, only files, or a specific kind of file.
Resources folders. See a resources folder for each app created in Studio, with their name and user that made the last update.
Pagination. Use the arrows to navigate the library pages. Up to 25 resource folders appear per page.
Tools. Tools are described in order of appearance.
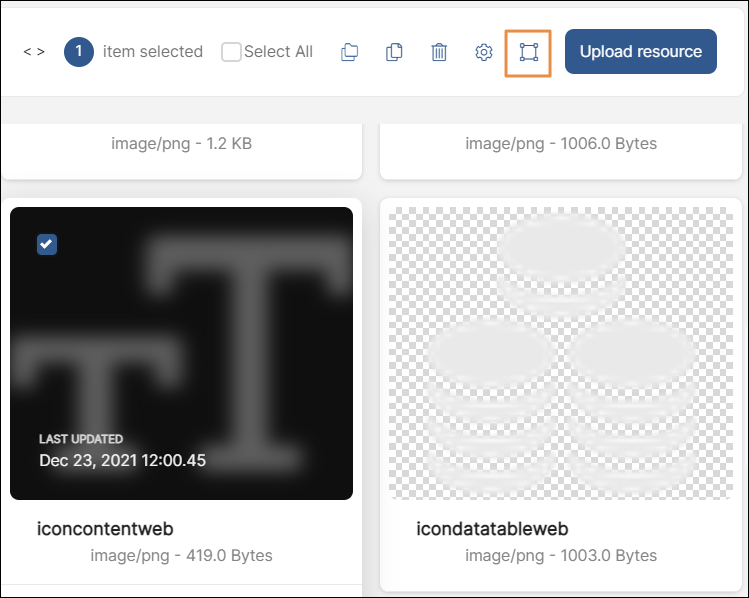
Select all
Click the checkbox to select all the resources on a page.
Move to other folder
Click here to move the selected resource(s) to another folder. Read Move Resources for more details.
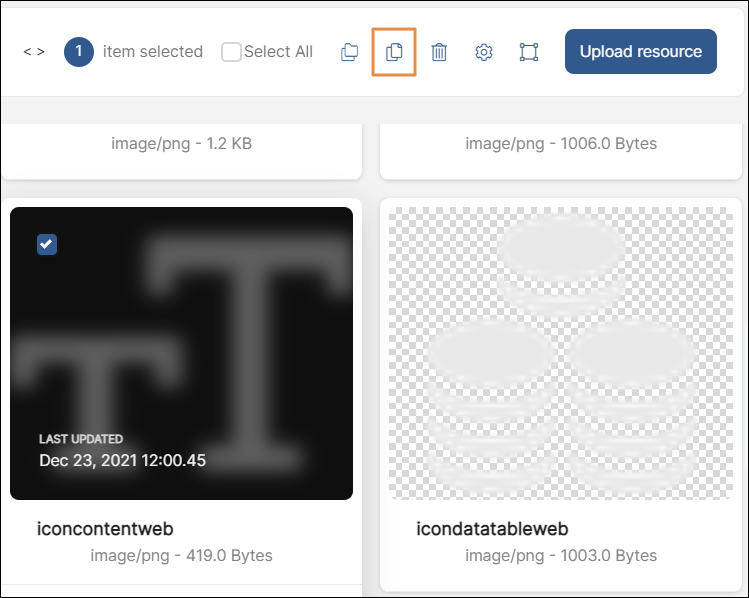
Copy to other folder
Click here to copy the selected resource(s) to another folder. Read Copy Resources for more details.
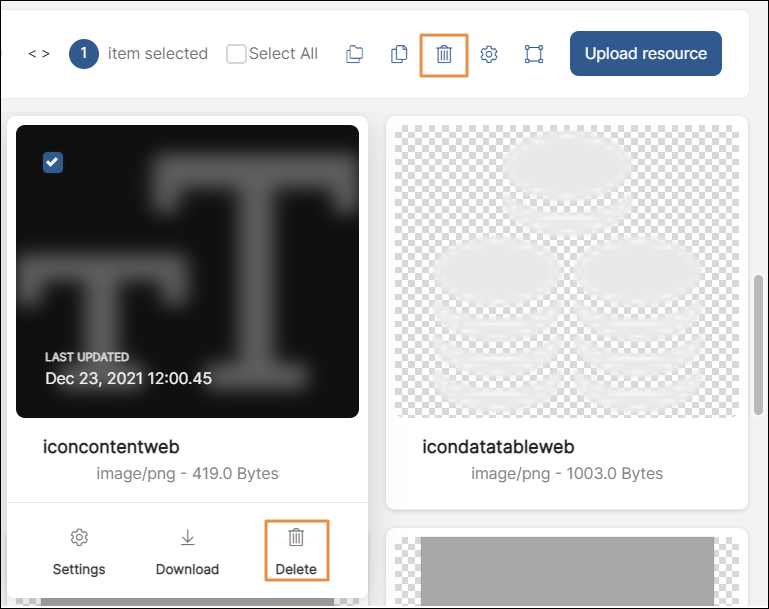
Delete
Click here to delete the selected resource(s). Read Delete Resources for more details.
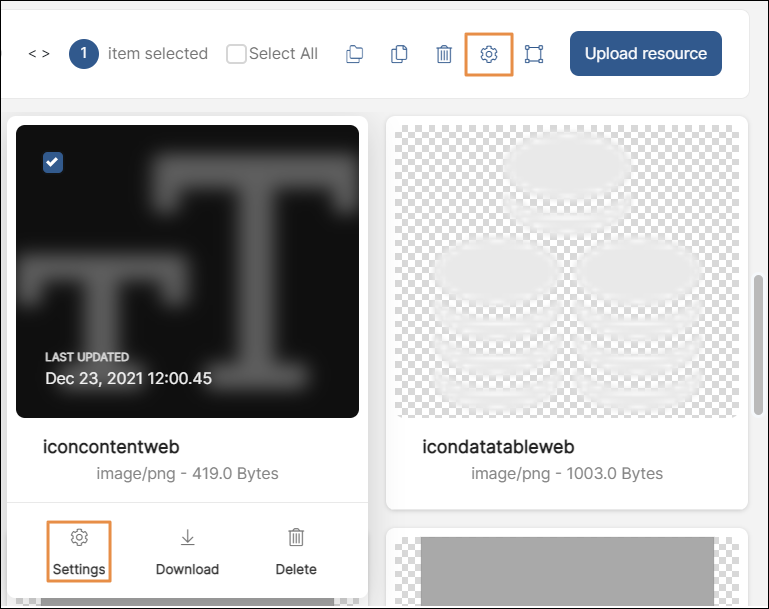
Settings
Click here to edit resources settings. Read Edit Resources Properties for more details.
Make available as icons
Click here to convert the selected image(s) to icon(s). Read Make Resources Available as Icons for more details.
Upload resource
Click to add a new resource.
Studio automatically creates a folder in the resources library for each of your apps. For each folder, you can see the folder’s name, last modified date, and a preview of some of the images inside. Empty folders show the message “Add files here”. Double-click any folder to open it.
Upload Resources
Caution
Before adding resources, consider whether you need to make them available for a single app or for all your apps. Resources uploaded from inside a folder will be available for that particular app, while resources uploaded from the root level (global folder) are shared between all your apps and are included in the configuration of all apps you generate.
To add resources, click Upload resource. You can upload resources individually or in bulk.
To add an individual resource, select File upload. In your file browser, select a single file to upload it.
To add resources in bulk, select Folder upload. In your file browser, select a folder to upload all the files inside it.
In the Settings popup that appears, edit the fields you need and click Save. Read Resources Settings to learn more about the Settings popup.
Move Resources
You can move resources from the root level to a folder, from one folder to another, or from a folder to the root level. To move resources, either individually or in bulk, click the checkbox (or click Select all) to select them and click Move to other folder.

In the popup that appears, click the Destination drop-down menu to see a list of all the folders available. The root level appears in the list as “Global”. Select the folder where you want to move the resources and click Ok.
Copy Resources
You can copy resources from the root level to a folder, from one folder to another, or from a folder to the root level. To copy resources, either individually or in bulk, click the checkbox (or click Select all) to select them and click Copy to other folder.
In the popup that appears, click the Destination drop-down menu to see a list of all the folders available. The root level appears in the list as “Global”. Select the folder where you want to copy the resources and click Ok.
Delete Resources
To delete resources, either individually or in bulk, click the checkbox (or click Select all) to select them and click the trashcan icon on the toolbar. You can also delete resources individually. Hover over the resource card and click Delete.
A confirmation popup appears. Click Confirm to delete the resource(s).
Edit Resources Settings
You can edit resources' settings individually or in bulk. Click the checkbox (or click Select all) to select the resources and click the cog icon on the toolbar. You can also edit a resource settings individually. Hover over the resource card, and click Settings.
The Settings popup appears. Read Resources Settings to learn more.
Make Resources Available as Icons
Use this action to convert .svg images into icons that will be available to be used in apps. These images are usually monochrome and used in buttons, lists, form components, etc. To make resources available as icons, either individually or in bulk, click the checkbox (or click Select all) to select them and then click Make available as icons.
A message appears to confirm the resource’s type was changed.