How to merge branches in Studio
Platform component | Veritran Studio |
Version | 3.0 / 3.1 |
Context
You are fixing a bug in the qr payment button of the GoldBank's app landing page and you need to take the changes made and tested in your hotfix branch to the release branch that will be delivered next. The aim of merging all changes into a release branch is to ensure that your changes do not generate conflicts with any other feature or fix implemented by your team, and avoid app crashes after its release.
Solution
You can merge your branch using the merge feature in Studio. To do so, access the Merge Requests page and follow these steps:
Create merge request
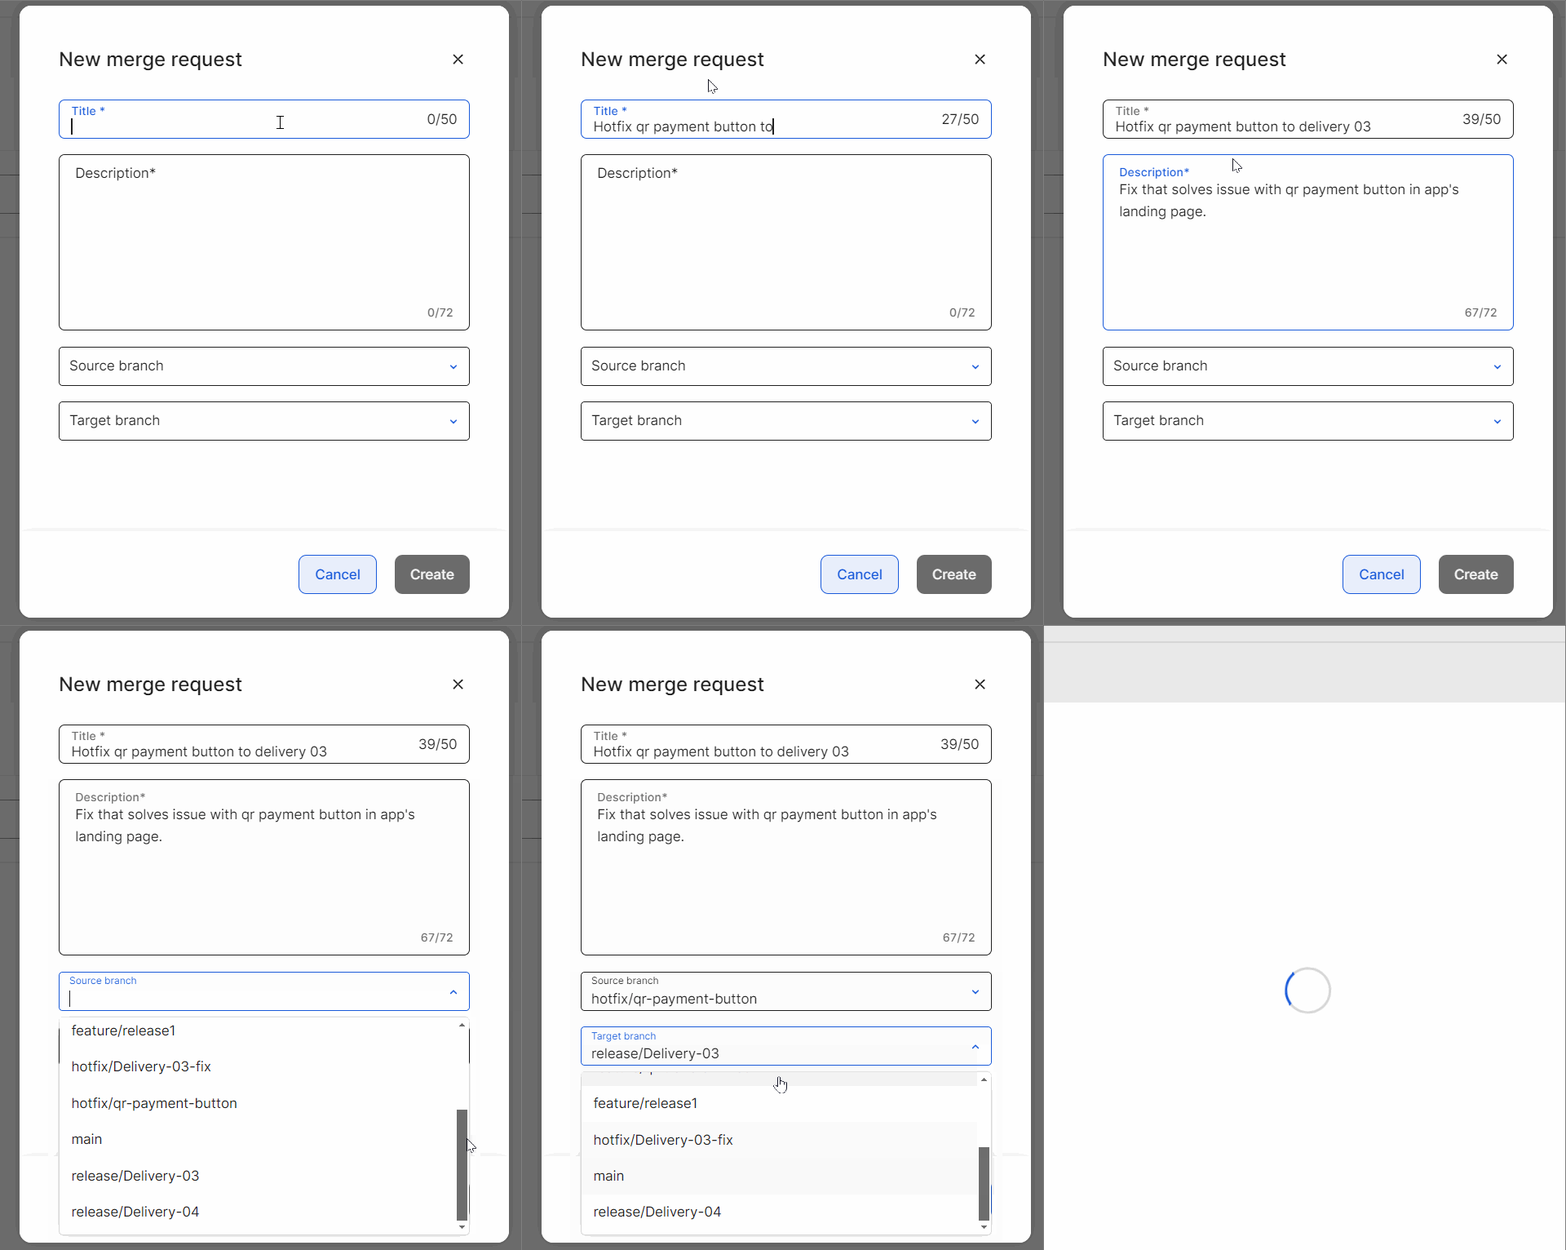
Click New merge request. The New merge request modal opens, where you complete all mandatory fields, as shown below:

In the Title field, enter an alphanumeric name (up to 50 characters) to identify the request. In this case: Hotfix qr payment button to delivery 03, as you are bringing the changes from the hotfix branch where the bug was fixed to the release branch that will be delivered to the client next.
In the Description field, enter a text (up to 72 characters) to explain the characteristics of the merge request or help your team understand why you created it. In this case: Fix that solves issue with qr payment button in app's landing page. Add the Jira ticket (project-number) to the description of the request to automatically associate the merge request to that ticket and have a better traceability of the changes introduced.
Click the Source branch drop-down menu to unfold the list of branches and select the branch in which the changes were made and that you need to take to the target branch. You can also type the name of the desired branch and the predictive search displays a list of coincidences while you type. In this case, the source branch is the branch where the bug was fixed: hotfix/qr-payment-button.
Click the Target branch drop-down menu to unfold the list of branches and select the branch to which you want to take the changes made in the source branch. You can also type the name of the desired branch and the predictive search displays a list of coincidences while you type. In this case, the target branch is the branch where all features and fixes implemented for the next delivery are being brought together: release/Delivery-03.
Click Create to finish the merge request creation process. You are then redirected to the Details page to review changes and solve conflicts (if any).
Resolve conflicts and execute merge
Once you create your merge request and if there are no conflicts between both branches, click Merge on the top right corner of the page to execute the merge.
If there are any conflicts between the selected branches, you will have to resolve those conflicts to be able to execute the merge. In this case, conflicts need to be resolved as the qr payment button in the landing page screen was edited differently in the target and the source branch.
To do so, click Resolve conflicts in the request's Details page and, in the page that opens, follow these steps:
Note
If you are not working on the target branch, a message will inform you that you are being redirected to the target branch, where conflicts are resolved.

Once in the target branch, click the double arrow of each element you want to take to the merge output column, as shown in the animated image above. In all three columns, changes are organized in folders for each type of entity (screens, assets, tests, lambda and legacy processes) or other element. In this case, the changes selected are those made to the landing page screen in the hotfix branch.
Click Resolve and Merge to execute the merge with the changes selected.
In both cases, once the execution finishes, you are redirected to the Details page and a success message appears on the top right corner of the page.