[en] Configure a Provider
[en] Below you can find an example on how to configure a provider in Notif to allow your app to receive push notifications through that provider. Keep in mind that, since each provider requires different information, the steps described in the following scenario may vary.
[en] Consider the following scenario. You need to configure Google's settings in Notif to allow your app to receive push notifications through Google's Firebase Cloud Messaging solution. To do so, you must first obtain your project's information from the Firebase console. Then, you need to encrypt part of the information extracted from the console to create a crypto profile and ensure its security. Finally, you need to edit Google's information in Notif's Notification Providers page and complete the settings required by Notif —status and description— and the information required by Google —URL, Crypto Profile, Private Key ID and Client Mail— previously obtained.
Importante
[en] The procedure to encrypt information and create the crypto profile is not included in this documentation. Contact the Product team to gain access to the complete user guide.
[en] Obtain your Project Information from the Firebase Console
[en] Access the Firebase console (https://console.firebase.google.com/) with your credentials.
[en] Go to Project Settings (cog icon on the top left corner of the page > Project Settings).
[en] Go to the Service Accounts tab.
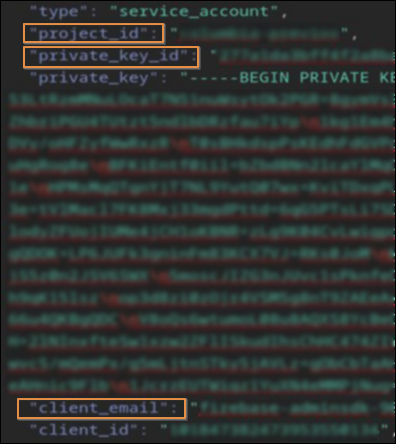
[en] Click Generate new private key to download the service account JSON file of your Firebase project. In this JSON file, you will find the project_id, the private_key_id and the client_email required to configure the provider in Notif.

[en] Once you have extracted this information, you must encrypt the private_key and generate a new keystore to then create the crypto profile required to securely configure the provider in the Notif console. To do so, contact the Product team to gain access to the complete user guide.
[en] With these steps completed, you can edit Google's information in the Notification Providers page to complete its configuration.
[en] Edit Google Provider in Notif
[en] Access Notif.
[en] Click Providers in the main menu to go to the Notification Providers page.
[en] Find Google in the providers list. Then, clickthe pencil icon next to the right to access the Notification Method Edit panel. The provider and the product fields are already set and cannot be modified.
[en] In the Status field, click the arrow and select a status for the provider from the drop-down menu. By default, the provider is set as active.
[en] In the Description field, enter a brief text that describes the provider and its method. For this example, enter Google push notifications.
[en] In the URL field, enter the following path: @@STATION=STP1GOOGLEPUSH01@@/v1/projects/project_id/messages:send, where the fragment in bold should be replaced with the project_id copied from the service account JSON file.
Nota
[en] The first part of the path obtains the domain defined in the Notif server ini node (LNP1GOOGLEPUSH01) for the provider. In the case of Google, fcm.googleapis.com.
[en] In the Crypto Profile field, enter the profile previously saved into the database. For example, P1_CRYPTO_PROFILE_FIREBASE, where the fragment in bold should indicate the product related to that crypto profile and be followed by the crypto profile name. The procedure to create the crypto profile is not included in this documentation.
Sugerencia
[en] Contact the Product team to gain access to the complete user guide.
[en] In the Private Key ID field, enter the private_key_id copied from the service account JSON file.
[en] In the Client Mail field, enter the client_mail copied from the service account JSON file. The client mail is the same as the Firebase service account.
[en] Click Save to finish the editing process and close the panel. Google is now available as a notification provider for your project.