Crear o editar una versión
Importante
[en] Only the Mobile Team can create or edit an SDK. If you don’t have the permissions, you won't have these options available. Contact the Mobile Builder team for assistance.
[en] Create an SDK
[en] To create an SDK in Mobile Builder, follow these steps:
[en] Best Practice
[en] Make sure that the information here provided coincides with that of the SDK documentation.

[en] Go to the SDKs page and click + Create.
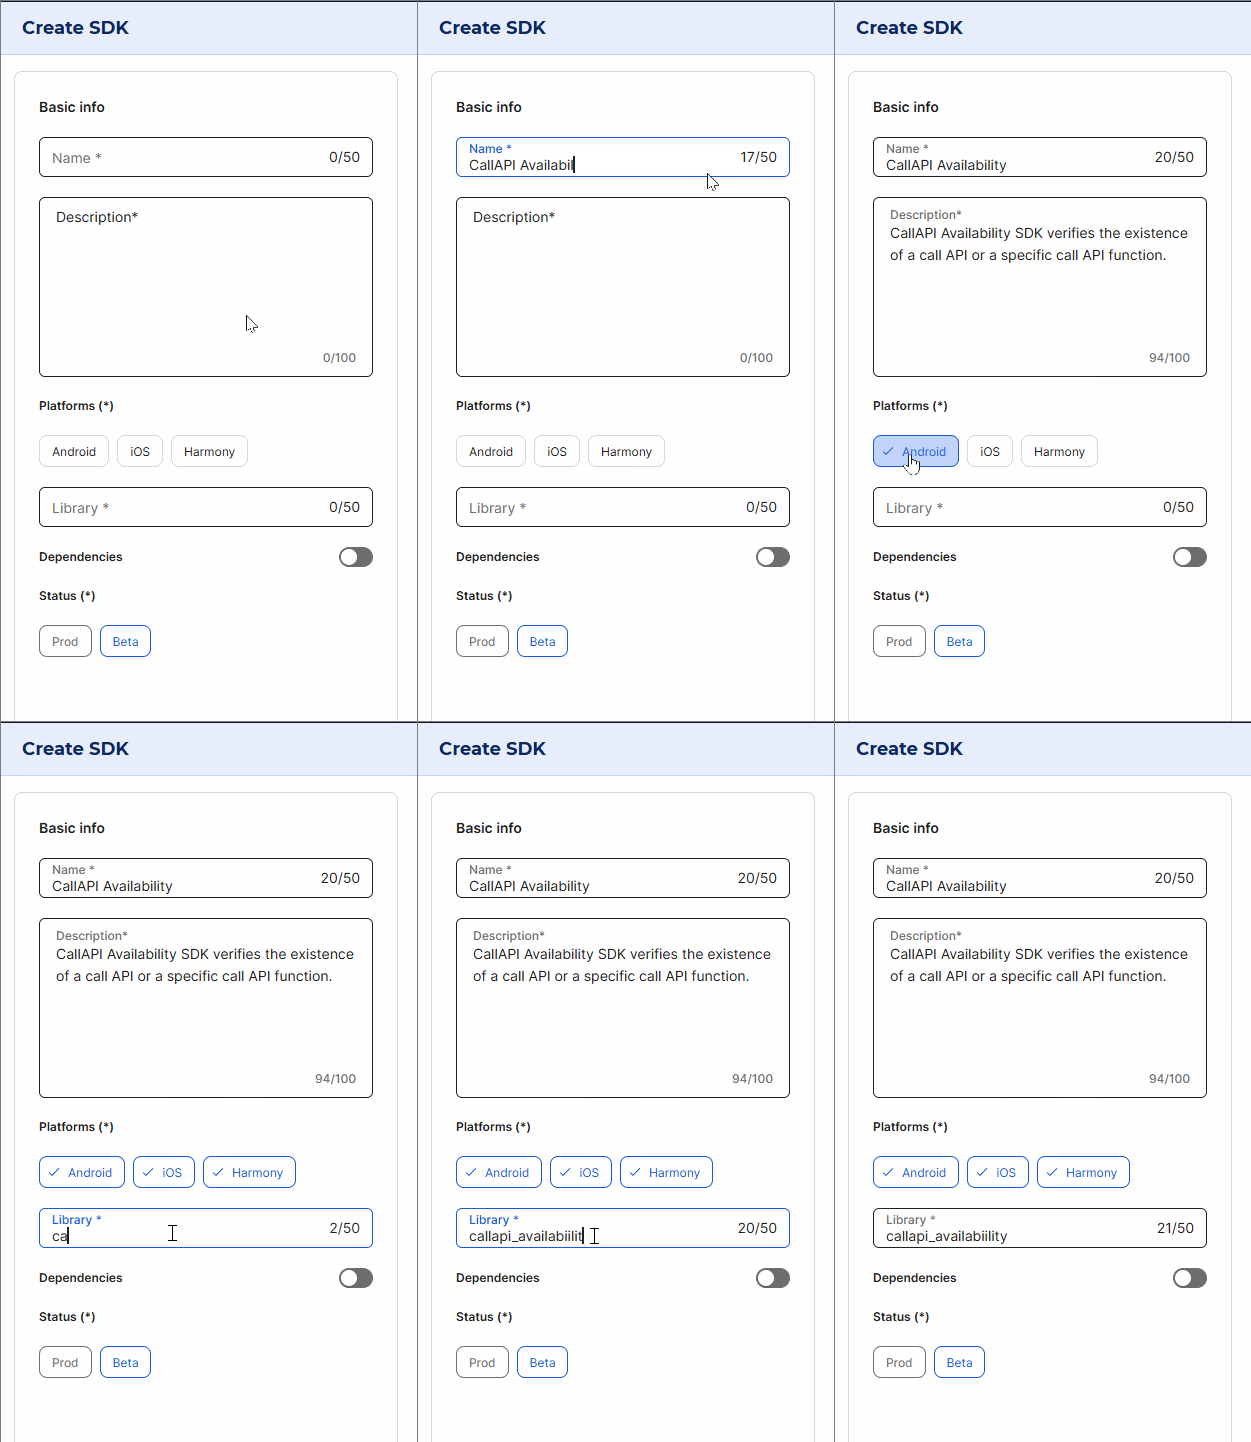
[en] In the Create SDK panel that opens, enter a unique name to identify the SDK. For this example, enter CallAPI Availability.
[en] Best Practice
[en] Do not use "lib" or "sdk" in the name as it is implied. If it is an SDK associated to a call API, indicate it in the name, as in the example above.
[en] In the Description field, enter meaningful information about the SDK's purpose (max. 100 characters). This description is displayed in the Add SDK panel when adding the SDK to an app. For this example, enter CallAPI Availability SDK verifies the existence of a call API or a specific call API function.
[en] Then, select the platform or platforms (iOS, Android or Harmony) for which you want to create the SDK. For this example, select all three platforms.
[en] Complete the Library field with the SDK library created in GIT. A validation is performed to check that the library exists in GIT repository. For this example, enter callapi_availability.
[en] If the SDK has dependencies with other integrations, switch the toggle on and select the dependencies for each Platform from the corresponding drop-down menu. For this example, there are no dependencies.
[en] Finally, choose a status for the SDK. The statuses available are: Beta, that indicates that the SDK is still under development by the Mobile team and that using it implies assuming the associated risks, and Prod, that indicates that the SDK development has been completed by the Mobile team. For this example, choose Beta.
Nota
[en] When adding a Beta SDK to an app, it displays an informative message for users to know that the SDK should only be used for testing purposes.
[en] Once you have configured the necessary fields, click Add to finish the creation process. You are redirected to the SDKs page, and a message appears confirming that the SDK was successfully created. By default, new SDKs appear as enabled.
[en] Edit an SDK
[en] To edit an existing SDK, find the desired SDK in the list and click the pencil icon to the right. The Edit SDK panel opens. The name and library fields cannot be edited. Once you have edited all the necessary fields, click Save to implement the changes. You are redirected to the SDKs page, and a message appears confirming that the SDK was successfully updated.
Nota
[en] Once an SDK development and testing finishes, its status must be modified from Beta to Prod from this panel.