Builds
A build is the generation of an app binary to test it in a mobile device or to publish it in stores.
To access the Builds page, go to the Applications page, find your app in the list, click the vertical three-dot icon to the right and then click View builds.
Navigate the Builds Page

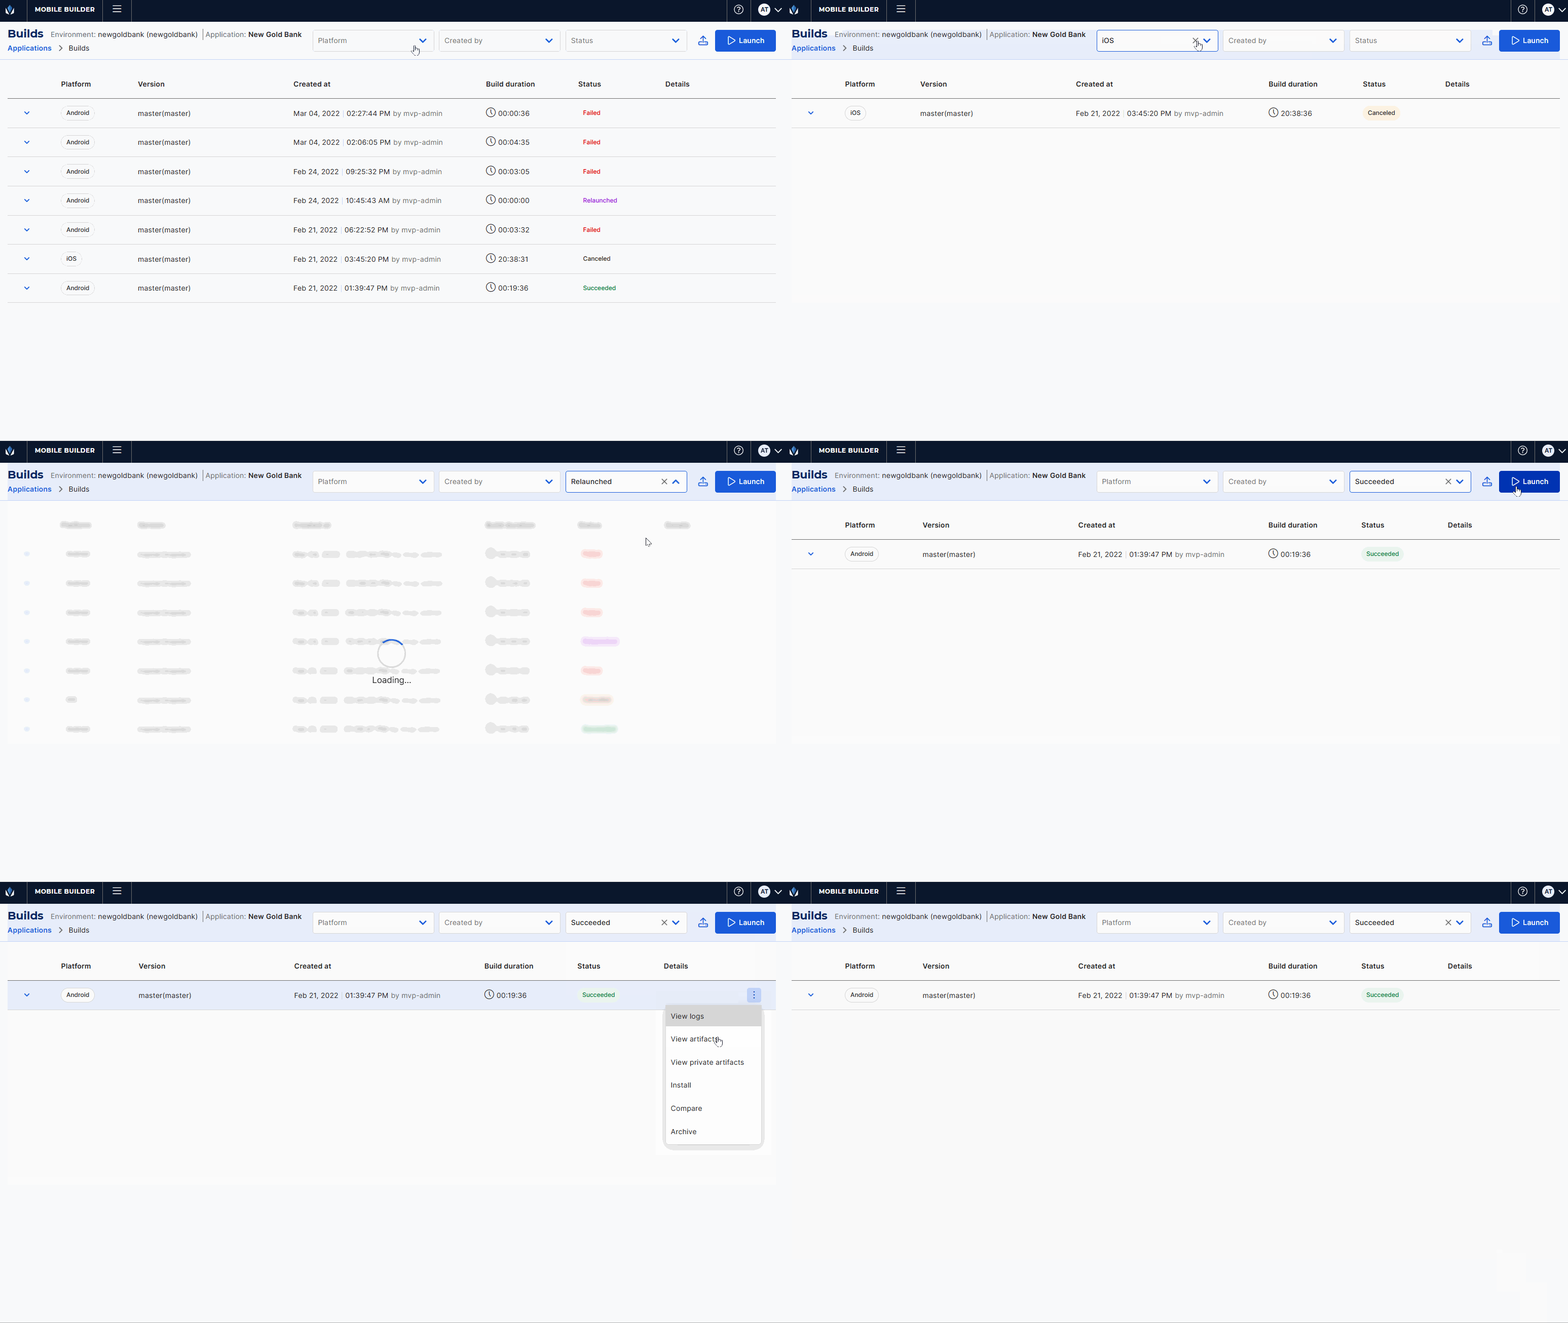
The Builds page opens, where you can see the selected environment and app, and all the builds launched for the app.
To find a build, you can go through the list or narrow it down using the Platform, Created by, and Status filters in the top bar. Each build shows the platform for which the binary was generated, the version, the date of creation and the user who created it, the duration of the generation (hover over to see when it started and when it finished), its current status and details.
Builds can have different statuses:
Succeeded (green chip): The build was successfully generated.
Failed (red chip): The build could not be generated as there was an error during the generation process. The error may be caused by an incorrect configuration, for example, an nonexistent Static Resources ID. If the build fails, review its logs to find the issue using the View logs option and click Relaunch to try again.
Scheduled (purple chip): The build is ready to be generated but the runner has reached its maximum number of concurrent builds. The build will be generated once the runner finishes with one of the generations in progress.
Running (blue chip): The build is being generated.
Cancelling (blue chip): The build is being cancelled.
Cancelled (yellow chip): The build was successfully cancelled and cannot be relaunched.
In the Details column, you can find tags that will appear if they apply to the respective build. Learn more about each tag below:
For Stores: indicates that the build was generated to be published in a store (App Store, Google Play Store or AppGalery).
XpressPlug: indicates that the binary was generated using XpressPlug.
Retain project: indicates that the binary was configured to log specific information on the project for which it was generated for debugging purposes.
You can also click the down arrow to the left of each build launched for that app and see an application snapshot, which contains specific details of the app when that build was generated. Details include the app's name, product and environment to which it is associated, its static resources ID, the application and product configurations, and the SDKs and tamper detectors set for it.
You can also hover over the platform chip to see the details on that platform's configuration for that binary generation. If the Mobile Security feature is enabled for a certain platform, a shield icon is displayed in that platform chip.
Once you find the build you want to work with, hover over the build, click the vertical three dot icon and select one of the options described in the table below.
View logs | Click to be redirected to a new page and review the logs of the binary generation process. |
View artifacts | Click to open the Public artifacts modal and review the list of public artifacts —these are the files generated during the build launch— with their sizes and the option to download any of them. To download an artifact, click the download icon, and a TXT file will be downloaded to your device. |
View private artifacts | Click to open the Private artifacts modal and review the list of private artifacts —these are the files generated during the build launch— with their sizes and the option to download any of them. To download an artifact, click the download icon, and a TXT file will be downloaded to your device. |
Relaunch | Click to relaunch a failed build. The build will be listed and the status will be Relaunched. NoteThis option only appears available for builds with a Failed status. |
Install | Click to test the app. A modal opens, and scan the QR code to test the app or click Download file to download the application binary file (.ipa for iOS or .apk for Android). You can also set a build as published in store, if the build had the For stores option enabled when generated. The options displayed depend on the status of the build. |
Compare | Click to compare two builds. Read Compare Builds to learn more. |
Archive | Click to archive a build. A confirmation modal opens, where you must select Confirm to archive the build and remove it from the list. |
Cancel | Click to cancel a build. This option appears available if you are the user who launched it or have a project leader profile. ImportantThis option only appears available for builds with Scheduled or Running statuses. |
Note
The View logs, View private artifacts and Relaunch actions are only available for builds with Failed or Succeeded statuses.
From this page, you can alsolaunch a new build or upload a build. Read the sections below to learn more.
The instructions below describe how to launch a new build for an app, this is, to generate a new app binary.
You can launch builds for an app - to generate a new app binary - using one of two options from the Applications page: find the app in the list, hover over it and click Launch build ( ), or click the More options icon (
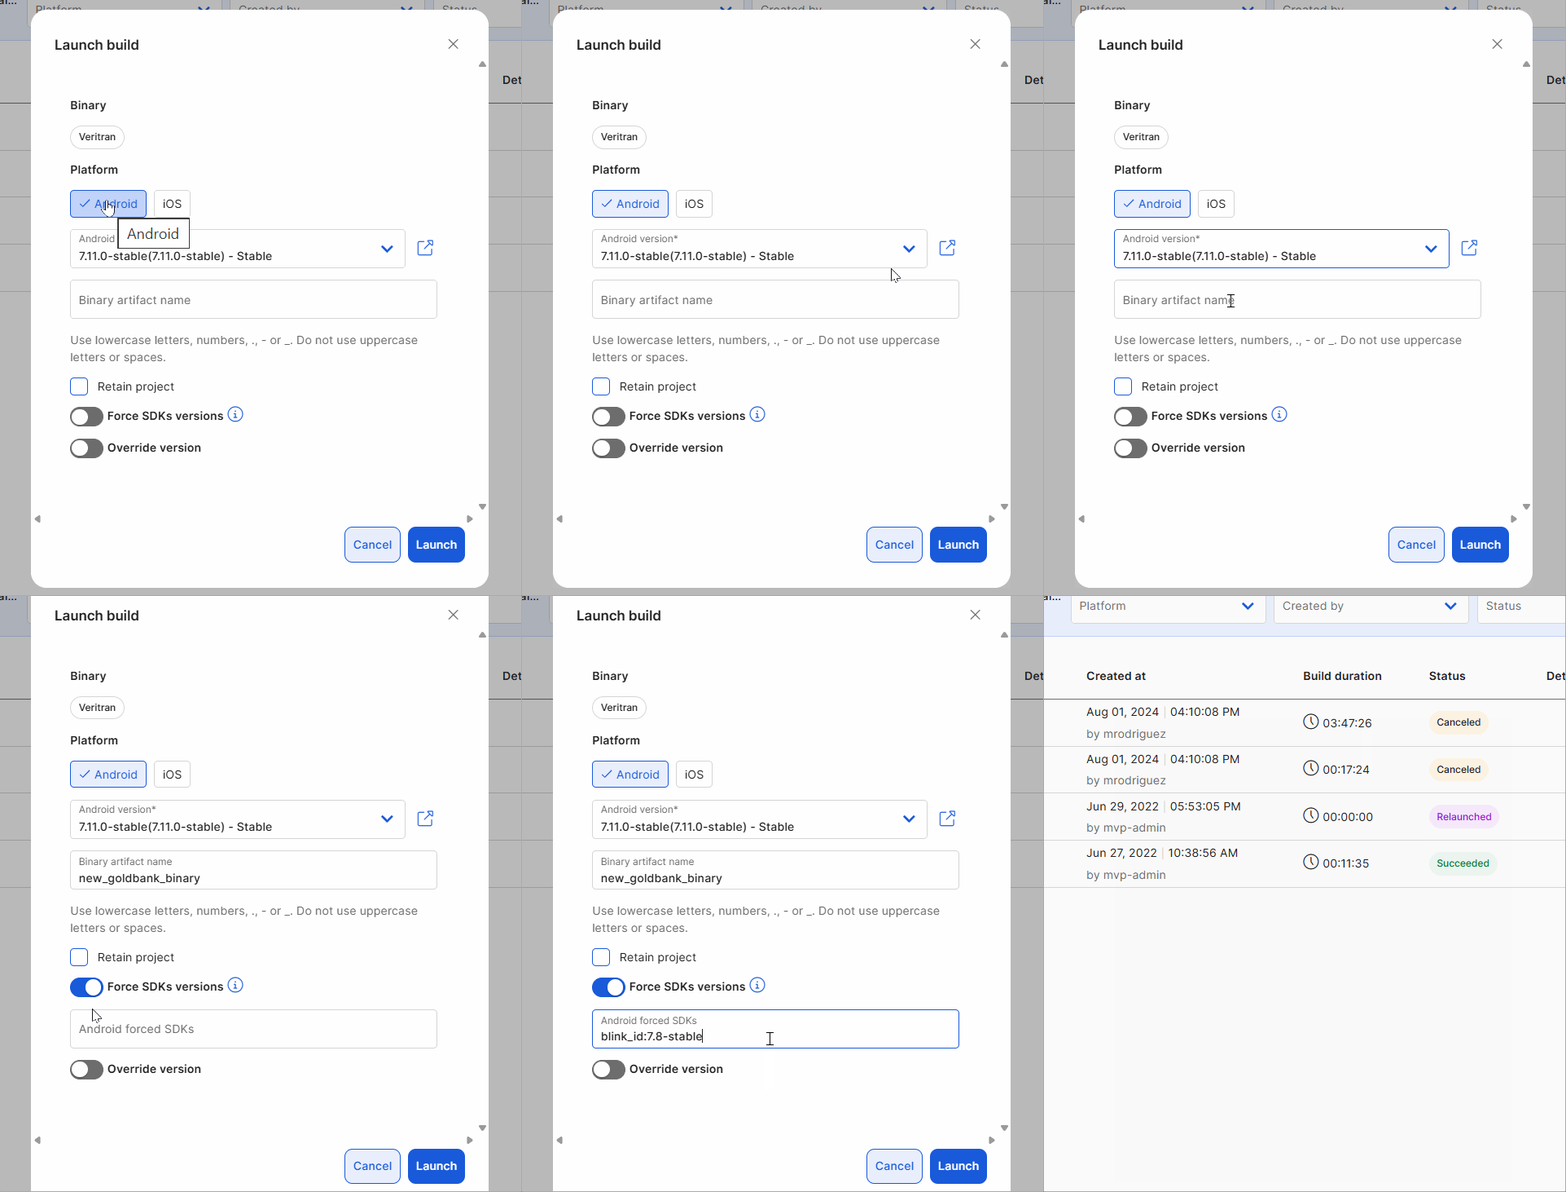
 ) and click View builds to open the Builds page and click Launch. In both cases, the Launch build modal opens. Follow the instructions below to configure the modal to generate a new app binary or binaries.
Important
Launching a build to generate an iOS binary integrated with XpressPlug requires further configurations than the ones described below. Refer to Generate an app binary integrated with XpressPlug to learn how to do so.

Choose one or more platforms where that build will be launched (iOS, Android or Harmony). You can generate binaries for more than one platform in the same launch.
Choose one or more platform versions from the drop-down menu. You can choose from a tag or a stable branch.
Warning
Productive binaries should only be created from tags and not from stable branches.
Click Open preview in a new tab (
 ) to compare the build version before generating it with another version. The Preview page opens, where you can compare the differences between the build you want to generate with another build. This page shows the same information shown when you use the the Compare Builds feature. Read Compare Builds to learn more.
In the Binary artifact name field, enter a name for the file that will be generated (.ipa for iOS and .aab or .apk for Android and Harmony). Use lowercase letters, numbers, ., - or _. Do not use uppercase letters or spaces. For this example, enter: goldbank-mobile-prod.
Click the Retain project checkbox to log specific information on the project for which it was generated for debugging purposes.
Note
This option is only available for project leaders.
If you want to force a specific branch version for an SDK, enable the Force SDKs versions toggle. Then, enter the library's name and the branch version desired for any of the platforms, following the structure library:version,library:version. Use snake_case for the library name, followed by a colon and the version name. Use commas to separate libraries names and do not use spaces.
Note
If you selected more than one platform, you must complete these fields for all platforms.
If you want to override the platform version, enable the Override version toggle. Then, enter the platform version number.
Click Launch to generate the binaries.
Warning
As from Studio 4.6, the Devtools SDK is no longer available for applications in production environments.
If you try to launch a build of an application in a production environment, a warning modal appears, indicating that this SDK must only be used in development and QA environments, and you must remove it from the SDKs section. Click Close and remove Devtools from the SDK section in the Application configuration and try to launch the build again.
Best practice
Applications in production environments should have all detectors activated. If you don't activate one or more of them, and try to launch a build for the application, a warning modal appears, indicating that not activating the missing detectors may increase the risk of cyberattacks. You can either click Close and activate the detectors or click Save and continue without activating them.
Mobile Builder also allows you to upload the binary files of those existing apps integrated with XpressPlug. You can upload builds using one of two options from the Applications page: find the app in the list, click the More options icon ( ) and click the Upload build (
 ), or click View builds to open the Builds page and click Upload XpressPlug build (
 ). In both cases, the Upload build modal opens. Follow the instructions below to configure the modal and upload the binary.
Important
This option is only available if the project was integrated with XpressPlug.
Choose the platform that corresponds to the binary file (Android, iOS or Harmony).
Choose a platform version from the drop-down menu. You may choose from a tag or a stable branch.
In the Binary artifact name field, enter a name for the file that will be generated when launched (.ipa for iOS and .apk for Android and Harmony). Use lowercase letters, numbers, ., - or _. Do not use uppercase letters or spaces.
Click Upload file to upload the binary file from your computer.
Click Save to finish the process. The uploaded build will show the XpressPlug tag in the details column to easily identify it.