Create and Delete Branches
To create a new branch, make sure to select the desired app and branch, and go to Branch Management > Create branch. On the top of the modal that opens, you can see the name of the branch from which you are generating the copy (parent branch); this is the branch you are standing on when you create the new one.
Note
To know which is the parent branch of the branch you are working on, access the Settings page and check the Source branch field in the Basic info section.
You then need to complete the following fields:
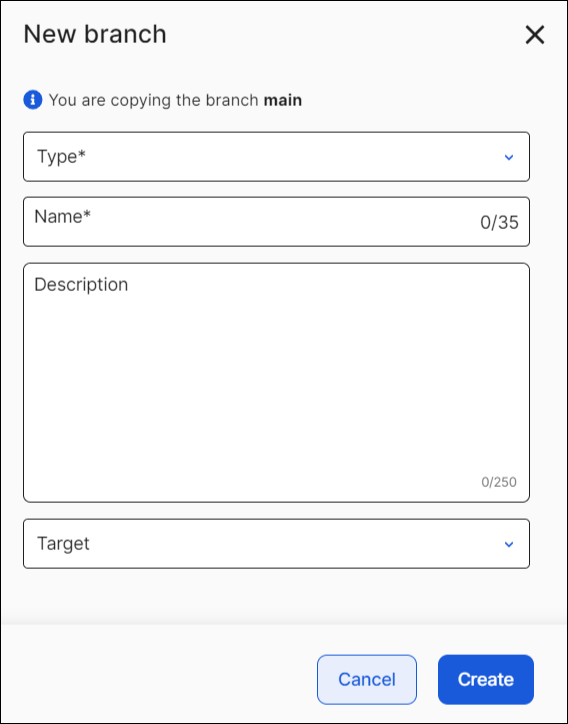
Type | Click the arrow and select the type of branch you need to create. Read Branch Types to learn more about each type of branch. |
Name | Enter a name for the branch. ImportantThe branch's name cannot be edited once created. Choose the name carefully. |
Description | Enter a description for the branch. This field is mandatory. |
Target | Click the arrow and select a publishing target for your app's branch. This field does not apply for module branches. |
To delete a branch, it needs to be unprotected on GitLab.
Go to GitLab and then click Settings > Repository > Protected Branches.
Click Unprotect on the corresponding branch.
Go to Studio and make sure to select the desired context, and go to Branch Management > Delete branch.
A modal opens to confirm the process.
Warning
This process deletes the branch you are navigating, which you previously selected from the branches drop-down menu. Additionally, if the Middleware Versioning feature is enabled in your environment, deleting a branch may delete all transactions associated to that branch in Middleware. This process cannot be reverted.
Make sure to delete branches from Studio and not from GitLab directly. If you delete a branch from GitLab, it disappears from Studio, but its data remains on the database.